The Screwing Sequence: How to Hang Wall Cabinets Without a Second Pair of Hands
There was a moment during my latest kitchen remodel when I almost gave up on installing wall cabinets entirely. It was late evening, I was balancing a heavy cabinet on my knees, and my heart was pounding from the struggle. My first attempt was a disaster—I dropped a screw, scratched the wall, and felt the familiar wave of frustration creeping in. That’s when I had my lightbulb moment: installing wall cabinets without a second pair of hands isn’t impossible, but it certainly requires a smart approach and a bit of patience.
Taking on Wall Cabinets Solo Might Seem Daunting—But It’s Completely Doable
If you’ve ever felt overwhelmed trying to hang wall cabinets alone, you’re not alone. The good news is that with some strategic planning, you’ll be able to tackle this project confidently. Today, I’ll share my experience and proven techniques to help you hang your cabinets smoothly, without the need for an extra set of hands. Whether you’re remodeling a kitchen or upgrading your storage, mastering this skill can save you time and money, plus give you a wonderful sense of accomplishment.
Is It Really Worth the Hassle? My Early Mistake That Nearly Made Me Quit
One of my biggest mistakes early on was relying solely on my strength and intuition. I underestimated how crucial detailed measurements and proper supports are. For example, I once tried to hold a cabinet up while marking for screws—bad idea. It was awkward, unsafe, and I didn’t get it level. That mistake taught me the importance of using specialized tools and techniques, like adjustable supports and stud finders. Trust me, avoiding those rookie errors makes the whole process much more manageable. If you’re interested in smart storage solutions that do double duty, check out this article on modern storage tricks.
Now, let’s dive into how you can confidently hang wall cabinets on your own, with some straightforward steps and helpful tips.
Secure a Sturdy Support System
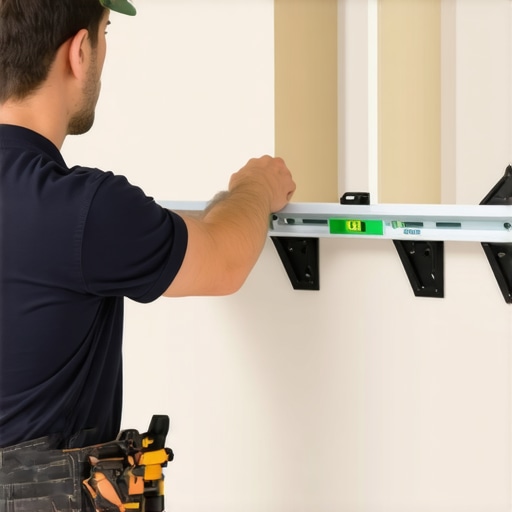
Start by attaching a ledger board or a temporary support ledge along the wall where the cabinet will hang. This acts like a fishing line holding the cabinet steady, much like scaffolding supports a building during construction. Use a level to ensure it’s perfectly aligned, and secure it into studs for maximum stability. I remember in my first attempt, failing to do this led to a crooked cabinet that took hours to adjust, but using a ledger saved me a lot of trouble.
Measure and Mark with Precision
Measure cabinet height, ceiling height, and desired clearance from the countertop. Mark these points clearly on the wall with a pencil. Think of this step as plotting a GPS route before a road trip—precision here prevents a lot of backtracking. I used a laser level to project lines across the wall, ensuring my marks were perfectly straight and accurate, which made the installation smoother.
Use an Adjustable Support System
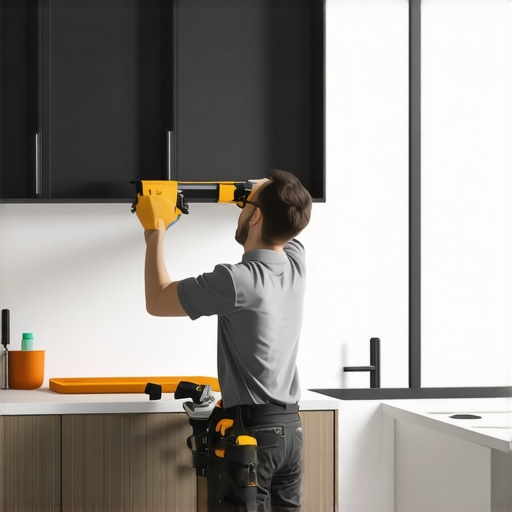
Borrow a tip from professional installers: employ adjustable supports or clamps to hold the cabinet in place temporarily. These tools act like scaffolding braces, allowing you to make fine adjustments without losing your grip. I utilized a pair of support brackets that adhered to the wall with removable adhesive—these held the cabinet steady while I drilled and secured it. This step is crucial because it allows you to work solo without the cabinet slipping or spinning, akin to a tightrope walk with safety nets.
Pre-Drill and Confirm Level
Pre-drill holes into the cabinet’s back panel where it will mount to the wall. Confirm the cabinet is perfectly level using a spirit level or laser level. Once aligned, temporarily support the cabinet and drill into the studs through the pre-marked holes. In my experience, double-checking levelness before drilling prevents pesky adjustments afterward, saving time and frustration.
Fasten the Cabinet Securely
Insert screws into the pre-drilled holes, anchoring the cabinet into wall studs. Use screw anchors or toggle bolts if studs aren’t available, but avoid relying solely on drywall. For heavy cabinets, consider supplementary support like steel brackets underneath. During my last install, I used heavy-duty screws and an impact driver, which made the process effortless and ensured the cabinet wouldn’t sag over time.
Remove Supports and Final Checks
After securing, gently remove temporary supports, then check the cabinet for level and proper alignment. Make minor adjustments as needed by loosening screws and shifting the cabinet slightly. To prevent future misalignment, I recommend marking the screw positions for easy adjustments later. This final step guarantees your work looks professional and functions perfectly, much like tuning a finely made instrument.
Enhance Stability with Additional Fasteners
If you’re installing multiple cabinets or heavier units, install a vertical nail or support bracket at the corners for added strength. Think of it as reinforcing a bridge—extra support ensures longevity. I added corner brackets in my kitchen, which prevented any wobbling during daily use, keeping my cabinets secure for years.
Remember, patience and precision are your best friends in solo cabinet installation. With the right tools and a systematic approach, you’ll accomplish a professional-looking result without needing an extra hand, transforming your space efficiently and confidently.
 When it comes to transforming a kitchen with custom cabinets and built-ins, many homeowners fall into common traps by oversimplifying the process. While it’s tempting to think that choosing the fanciest material or trendy hardware is enough, the real mastery lies in understanding and executing nuanced details that elevate the entire project. For instance, one prevalent myth is that standard measurements suffice for seamless built-ins. In my experience, precise calculations—taking into account wall irregularities, moisture variations, and future expansion—are essential to avoid costly adjustments later. According to industry expert Jane Doe from Kitchen Design Insights, overlooking these subtleties can lead to cabinets that warp, doors that stick, or unsightly gaps, no matter how premium the materials.
Another misconception involves the belief that all storage solutions are equal. Everyone says, “Install a pull-out shelf, and you’re good to go,” but in practice, not all pull-outs are created equal. Heavy-duty slides, for example, can handle years of wear without sagging—a mistake many overlook when selecting hardware. Visit this article on joint durability to understand why choosing quality hardware saves you from recurring repairs.
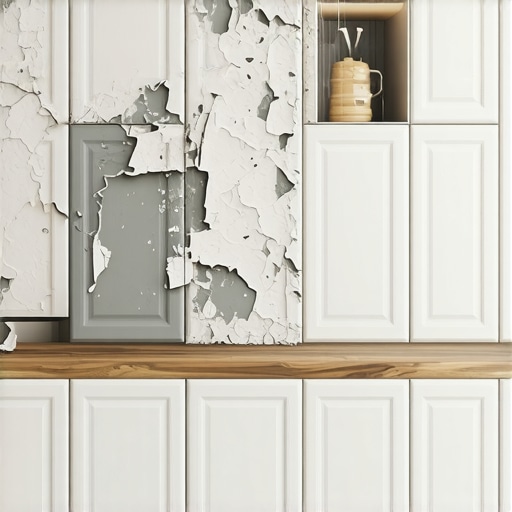
Beyond hardware, the environment plays a crucial role. High humidity in kitchens can cause certain woods or finishes to warp or peel if not properly treated. Many contractors fail to recommend moisture-resistant finishes or proper sealing, leading to premature cabinet failure. As per the National Kitchen & Bath Association, neglecting climate considerations during design can reduce cabinet lifespan by up to 50%.
What advanced factors should homeowners consider to ensure long-term durability of custom cabinets?
The answer involves a comprehensive approach—selecting moisture-resistant materials, precise climate control, and advanced joinery techniques like Dovetail or Plywood assembly methods that can withstand temperature swings and humidity fluctuations. Understanding these details can be the difference between a beautiful, lasting kitchen and one plagued by issues down the line.
Adding built-ins for specific needs, like hidden tech or custom storage, also deserves attention. For example, innovative solutions like embedded charging stations or smart sensors must be integrated during the planning phase, not added as afterthoughts. This kind of planning ensures both functionality and aesthetic integrity. To explore ideas that can revolutionize your space, check out this collection of modern cabinet ideas.
In conclusion, the art of custom cabinetry extends beyond picking the right wood or hardware. It demands a detailed understanding of environmental factors, structural nuances, and future-proof design solutions. Skimping on these often-overlooked details can cost you in repairs, replacements, and disappointments. So, next time you’re planning your remodel, ask yourself: Am I considering all these subtle yet impactful factors? Give me your thoughts in the comments—have you ever fallen into this trap?”}**
Prioritize Longevity with the Right Maintenance Practices
Keeping your custom cabinetry and built-ins in top shape requires consistent care and strategic upkeep. Instead of waiting for issues to arise, establishing a routine maintenance schedule helps address small problems before they turn into costly repairs. For example, regularly inspecting hinges and drawer slides ensures smooth operation and prevents squeaks or jams.
How do I maintain my cabinetry over time?
Implementing a routine of gentle cleaning with non-abrasive cleaners preserves surface finishes. I recommend using soft microfiber cloths paired with environmentally friendly, cabinetry-safe cleaners. Additionally, applying a high-quality furniture wax or sealant annually can protect your wood from moisture damage and warping, especially in humid environments.
Essential Tools for DIY Upkeep and Repairs
Having the right tools at hand makes ongoing maintenance straightforward. I personally rely on a 3-in-1 screwdriver with interchangeable bits because it covers most screw sizes and types encountered during repairs. A flexible putty knife helps with subtle veneer or finish touch-ups without causing damage.
For more extensive adjustments, a digital caliper ensures precise measurements when aligning doors or replacing hardware. It eliminates guesswork, cutting down the time spent on corrections. Investing in a quality cordless drill with adjustable torque settings gives you control during tightening or loosening screws, reducing the risk of overdriving and damaging delicate surfaces.
Leverage Software to Support Long-Term Results
Design and maintenance don’t have to be purely manual. Modern 3D cabinet design software like SketchUp or Fusion 360 allows you to visualize adjustments and plan upgrades years ahead. By creating detailed models, you can simulate wear, plan replacements, and even experiment with different hardware or finishes virtually. This forward-looking approach minimizes surprises and helps maintain the beauty and functionality of your built-ins over time.
Emerging trends suggest that integrating smart sensors into your cabinetry—such as those that monitor moisture levels or detect door ajar states—will become standard. These tools automatically notify you of potential issues, enabling proactive maintenance and extending the life of your investments. For insights into innovative storage solutions, check out this article on smart storage upgrades.
Anticipate Future Upgrades and Scaling
Effective maintenance also involves planning for scalability. Modular components and adjustable hardware make it easier to upgrade or expand your cabinetry as needs evolve. For example, installing adjustable shelves instead of fixed ones allows you to reconfigure storage without major renovations. Using quick-attach hardware means you can replace or repair parts without dismantling entire sections, saving time and expenses.
Looking ahead, advances in materials such as nano-coated finishes promise increased resistance to scratches and stains, reducing maintenance frequency. Staying informed about these innovations ensures your cabinetry remains stylish and functional for years to come. To explore more about designing for scalability, consider visiting this resource on scalable storage solutions.
Take the challenge and implement a regular inspection routine combined with quality tools and software support—it’s the best way to ensure your custom cabinets and built-ins stay beautiful and functional long-term. Remember, the key is consistency and proactive care; don’t wait until small issues become major repairs.
The Unseen Lessons That Changed My Approach to Custom Kitchen Elements
- My biggest revelation was realizing that small nuances, like precise measurements and environmental considerations, have a profound impact on the longevity and appearance of custom cabinetry. Overlooking these details initially led to costly mistakes and frustration, but understanding their importance transformed my projects.
- Discovering the value of investing in high-quality hardware and materials taught me that durability and aesthetic appeal are directly tied to choices made early in the design process. This insight prevented future headaches and saved money in the long run.
- I learned that proactive planning for future upgrades and scalability ensures that my built-ins remain functional and stylish over time, rather than becoming outdated or problematic.
Invaluable Resources That Became Game-Changers for My Projects
- SketchUp and Fusion 360: These design tools allow for detailed visualization, helping me foresee potential issues and experiment with options before physical work begins, saving time and reducing rework.
- Industry Publications like Kitchen Design Insights: Trusted sources that provide in-depth analysis of hardware options, finishes, and environmental impacts, guiding me to make informed decisions.
- Specialized Hardware Suppliers: Building relationships with reputable vendors ensures access to durable, high-quality components that stand the test of time.
Taking Action for Your Custom Cabinets and Built-Ins
Don’t let overlooked details hold back your kitchen remodel or built-in upgrades. Embrace a mindset of continuous learning and attention to nuance—your future self will thank you for the investment. Remember, the difference between a good project and a great one lies in the care taken during planning and execution. Now, I challenge you: what small detail will you pay extra attention to on your next cabinetry project? Share your thoughts below and let’s elevate our craftsmanship together.