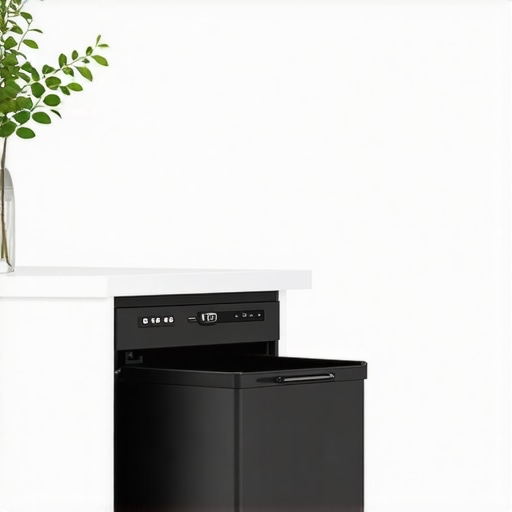
Stop Fighting Your Trash Can: The Side-Mount Pull-Out Advantage
Have you ever wrestled with a stubborn trash can that refuses to stay put, spilling garbage every time you open the cabinet? I used to spend more time cursing my kitchen’s inefficient layout than actually cooking. It’s a frustrating sabotage—bumping, slamming, and constant cleanup—that steals joy from an otherwise beautiful space. My lightbulb moment came after a clattering disaster involving a full trash bag and a freshly painted cabinet. I realized I was fighting a losing battle every single day.
The Real Problem Behind Kitchen Clutter
In my search for a solution, I discovered that the traditional under-sink trash bin setup is fundamentally flawed. It’s awkward, prone to tipping, and often makes the trash a messy, unreachable eyesore. What I needed was a smarter, more seamless approach to waste management that would eliminate the hassle and keep my kitchen looking polished.
Is Side-Mount Pull-Out Trash Really Worth the Hype?
Initially, I was skeptical. I’d seen a few fancy options online and wondered if they were just another overhyped trend. But let me tell you—early on, I made a mistake by assuming all pull-out systems are the same. I bought a cheap model that jammed frequently and didn’t support heavy loads, which only added to my frustration. Now I know that investing in a quality side-mount pull-out can drastically change how you handle trash—and make your kitchen safer and cleaner.
According to experts, well-designed waste management solutions can improve overall kitchen functionality significantly. The secret lies in quality hardware and smart placement, which prevents spills, reduces odors, and maximizes space. If you’re tired of battling your trash can daily, then this simple upgrade might just be your game-changer.
Today, I’ll walk you through how to stop fighting your trash can and start enjoying a clutter-free, efficient kitchen space. Ready to see the difference? Let’s dive into the benefits of side-mount pull-out systems and how they can transform your home.
Plan Your Space Strategically
Start by assessing your current kitchen layout, focusing on the cabinet area designated for trash and recyclables. Remove the existing trash can and measure the space, paying attention to width, depth, and height. Visualize how a side-mount pull-out system will fit, considering nearby cabinetry and countertop overhangs. Remember, a well-placed system can streamline your workflow and reduce clutter.
Choose Quality Hardware
Opt for heavy-duty slide mechanisms that support substantial loads and frequent use. I once purchased a cheap set, which jamed after a week, causing frustration. Instead, invest in robust options like those found at this resource. Look for features like soft-close hinges and corrosion-resistant materials to ensure longevity and smooth operation.
Build or Modify Cabinets for the System
Construct a custom cabinet box that accommodates the pull-out mechanism, ensuring it aligns precisely with your measurements. Use high-quality plywood or recycled ocean plastic certified to withstand moisture and weight—see these durable materials. When installing the slides, secure the mounting brackets to solid framing, avoiding drywall-only attachments to prevent wobbling.
Install Waterproof Liners and Seals
To contain odors and prevent leaks, use waterproof liners tailored to your cabinet dimensions. I once neglected this step, leading to a mess and lingering smells. Consider waterproof trays like here. Seal edges carefully to create a tight barrier against moisture and spills, extending the system’s lifespan and maintaining kitchen hygiene.
Test and Fine-Tune the System
Insert your trash bin into the constructed pull-out, then slide it in and out several times. Check for smooth operation, clearance, and stability. During installation, I once realized the door was misaligned, causing it to scrape. Adjust hinges using Phillips-head screwdrivers and refer to this guide for precise leveling. Make necessary tweaks until the system glides effortlessly.
Maintain and Upgrade Over Time
Regularly clean slide mechanisms with a silicone-based lubricant to prevent sticking and corrosion. If you notice signs of wear, consider replacing hardware before breakdowns occur. For aesthetic upgrades, explore modern cabinet ideas at this source. Consistent maintenance ensures your waste management system remains functional, clean, and a seamless part of your kitchen routine.Many homeowners jump into custom kitchen projects convinced they’re getting the perfect solution, but a closer look reveals common misconceptions that can derail your renovation. One prevalent myth is that investing in high-end, custom-built cabinets guarantees flawless functionality, even though design nuances like door alignment and hardware quality often get overlooked. Expert insights suggest that even the most beautiful cabinetry can underperform if not executed with attention to detail; a study by the National Kitchen and Bath Association highlights that hardware installation errors account for up to 25% of cabinetry issues. Furthermore, many assume that more storage equals better, but strategically combining open shelving with hidden compartments enhances usability without clutter. An advanced mistake is neglecting the importance of proper space planning for built-ins; poorly measured or improperly installed units can cause misalignment and accessibility issues, defeating their intended purpose. To avoid these pitfalls, consider consulting from seasoned professionals who prioritize both aesthetics and function. For instance, exploring innovative built-in solutions like those showcased in this collection can teach you how thoughtful integration improves overall space use. Remember, tailored storage isn’t just about filling every nook but optimizing for your lifestyle, which requires understanding nuanced design principles beyond surface appearances. Do you often fall for the allure of luxury finishes without examining the underlying mechanics? Share your experiences below! The key to a truly successful remodel is understanding that the devil is in the details, from hardware durability—like material quality—to precise measurements and hardware choices. Small oversights can lead to costly corrections later, so investing in expert guidance upfront is your best move. Learning to distinguish myths from fact in the realm of custom cabinetry can significantly elevate your project’s outcome, ensuring that both form and function stand the test of time.Maintaining the longevity and functionality of your custom cabinets and built-ins hinges on using the right tools and following proven methods. I personally rely on a few specific equipments and software to ensure everything runs smoothly over time. For hardware installation, I use a digital angle finder like the Bosch Digital Angle Finder, which guarantees precise alignment of cabinet doors and drawers—crucial for preventing misalignment issues that can cause future repairs. Additionally, a cordless power drill with adjustable torque settings helps me avoid over-tightening screws, preserving soft-close hinges like those featured in this resource, and prevents hardware damage.
To streamline project planning and dimension accuracy, I employ CAD software such as SketchUp Pro. This makes it easier to visualize storage solutions in tight spaces, similar to the innovative ideas in this article. These tools help me make precise cuts and avoid costly mistakes during builds or remodels.
For ongoing maintenance, silicone-based lubricants are a must—I’ve found that applying them to slide mechanisms every six months keeps pull-out systems like the best models operating smoothly. Regularly inspecting and tightening hardware with a basic screwdriver set prevents the wobbling or sagging that often plagues less-maintained cabinetry.
Looking ahead, I predict that intelligent hardware equipped with sensors and automation will become standard. From soft-close hinges that signal when misaligned to app-controlled lighting in hidden storage, the future of kitchen upgrades will be smarter and more intuitive.
**How do I maintain my built-ins and storage solutions over time?** The key is consistent, proactive care. Incorporate routine checks—like testing soft-close mechanisms and inspecting waterproof liners—to catch issues early. Consider adding a few high-quality tools to your workshop, such as a digital angle finder and CAD software, to fine-tune your projects efficiently. And don’t forget—regular cleaning with gentle lubricants can prevent wear and tear on moving parts.
To really elevate your kitchen storage game, I recommend trying out some of the advanced tips discussed here. For example, upgrading to waterproof liners and sealing edges can dramatically extend system lifespan, ensuring your investments pay off long-term. Ready to get started? Explore tools and tips at this insightful guide and make your custom storage solutions last for years to come.
Throughout this journey, I’ve learned that the real magic lies in attention to detail and willingness to experiment with new ideas. Investing in quality hardware changed my daily routine, turning a once frustrating chore into a seamless part of my kitchen experience. The importance of strategic space planning became evident when I realized that well-designed built-ins can turn underutilized corners into functional showpieces. Most importantly, embracing a mindset of continuous maintenance ensures that these improvements stand the test of time, saving me both money and headaches in the long run.
Lessons That Changed My Perspective
- Not all hardware is created equal: Choosing durable, high-quality slides and hinges made a significant difference in longevity and ease of use. I wish I had known earlier that investing in premium components pays off.
- Measurement precision is paramount: Small errors in measuring can lead to misaligned doors or drawers, so I now employ digital tools like a Bosch digital angle finder. This simple step saved me numerous headaches during installation.
- Maintenance keeps things running smoothly: Regularly lubricating slides and inspecting seals prevents issues before they become costly repairs, highlighting the value of ongoing care.
- Customization enhances usability: Tailoring storage solutions to my specific needs, rather than generic off-the-shelf options, maximized every inch of space and improved workflow.
- Patience during installation yields better results: Taking the time to adjust hinges and level cabinets meticulously resulted in a polished, professional look that I’m proud of.
Tools and Resources That Make the Difference
- Build your toolkit with intention: A cordless drill with adjustable torque and a digital angle finder like Bosch’s help me achieve precise, durable results. I trust these because they provide consistent accuracy, reducing guesswork.
- Leverage expert guides and software: Using CAD programs such as SketchUp Pro allowed me to visualize spaces before physical work, preventing costly mistakes and ensuring perfect fits. Resources like these recycled ocean plastic cabinets exemplify sustainable choices I now incorporate.
- Stay proactive with maintenance products: Silicone lubricants and waterproof liners are my staples for ongoing upkeep, and I recommend them for anyone committed to longevity.
Embrace Your Kitchen Evolution
Knowing that each upgrade, no matter how small, adds to a more functional, beautiful space is empowering. The future of custom kitchens is bright, filled with innovative hardware and smart design ideas that make daily life easier. Whether you’re planning a full remodel or just refining your current setup, remember that your kitchen’s potential is bounded only by your vision and willingness to experiment.
What steps will you take today to enhance your kitchen’s storage and style? Share your plans or questions below—I’d love to hear about your journey toward a more efficient and charming kitchen!