3 Mudroom Built-ins That Actually Handle Wet Winter Boots
Imagine this: it’s a chilly winter morning, and I step into my mudroom, only to be greeted by a soggy, muddy mess. Shoes piled high, water drips everywhere, and my nice floors are now a slippery disaster. That lightbulb moment hit me hard—why do so many mudroom storage solutions fall flat when it counts the most? I realized I wasn’t alone. I bet you’ve faced the same frustration, right?
Why Your Mudroom Desperately Needs Built-ins That Work
In the heart of winter, nothing is more annoying than dealing with wet boots bobbing around like a muddy puddle on your floor. Traditional racks and shoe trays can be a quick fix, but they often leave your floors wet and your shoes forlorn. After a series of messy cleanup attempts and a few near-slips, I knew I had to get serious about my mudroom setup. That’s when I discovered that well-designed built-ins could be the game-changer—and they actually handle winter’s wettest challenges.
Did you know that according to the National Safety Council, slips and falls in homes increase during winter months precisely because of wet, muddy entrances? It’s a startling fact, but it underscores the importance of purpose-built solutions. Early on, I made the mistake of just tossing shoes onto a simple rack, thinking it would suffice. Spoiler: it didn’t. Water seeped onto the floor, and the mess just spread.
Now, I know what works—and I want to share those insights with you. Today, we’ll explore three mudroom built-ins that truly keep wet winter boots in check. These aren’t your average shoe storage ideas; they’re designed thoughtfully to prevent mess, moisture, and chaos from taking over your entryway.
Ready to turn your mudroom into a clean, dry haven? Let’s dive into making your mudroom work as hard as you do to keep your home tidy and safe.
Design a Dedicated Drop Zone to Contain Mud
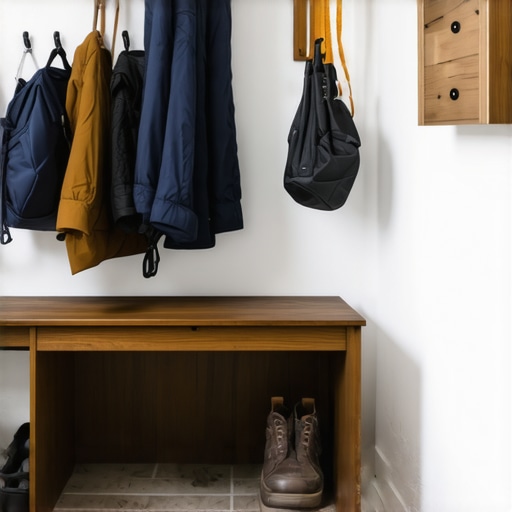
Start by visualizing a specific area where shoes, boots, and wet gear land—this prevents water and mud from spreading. When I transformed my mudroom, I installed a raised, water-resistant threshold and a row of cubbies directly above for quick shoe storage. This setup mimics the way a well-organized garage has zones for different tools—carrying that logic into your home saves time and mess. Use sturdy, waterproof materials for flooring and surfaces to withstand moisture and dirt.
Build Custom Storage that Shrugs Off the Wettest Conditions
Invest in moisture-resistant cabinetry—think sealed plywood or composite materials—to prevent warping. I applied these principles by replacing my particleboard shelves with marine-grade plywood, which didn’t bow even during heavy rains. Incorporate pull-out trays and adjustable shelves to maximize flexibility for shoes, umbrellas, and outdoor gear. Fasten these with heavy-duty, corrosion-resistant slides to support frequent use and weight.
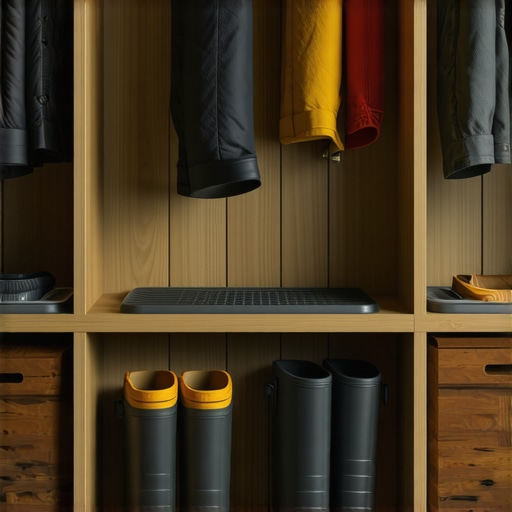
Use custom cabinets designed for high-humidity spaces. Implement toe-kick drawers for hidden storage, ideal for bulky boots or cleaning supplies, keeping your space uncluttered. For instance, I added a pull-out boot tray that catches water and contain mud, making cleanup quick and easy. This approach mirrors luxury kitchen solutions, but scaled for mudrooms—perfectly tailored to your needs.
Incorporate Functional Details to Prevent Water Spread
Install drainage mats or waterproof liners underneath footwear to absorb moisture and reduce tracking. In my project, I used rubber matting with raised ridges—traps water and dirt, preventing it from reaching your floors. These act like a sponge for mud, keeping your floors pristine. Additionally, design the cabinetry with seamless joints and easy-to-clean surfaces to prevent grime buildup and facilitate quick maintenance.
Ensure Easy Access and Safety
For safety, create low-threshold entrances with non-slip flooring surfaces. I chose textured vinyl planks that grip well even when wet. Add hooks and shelving at accessible heights for quick gear access, reducing the chances of slipping or falling. Think of these features like a well-designed gym—everything is within reach, safe, and ready for action.
Optimize Ventilation to Control Humidity
Good airflow minimizes moisture buildup that can lead to mold. I installed a small exhaust fan vented outdoors, which runs during and after rainstorms. This mechanical approach is akin to a kitchen range hood—removing humidity and stale air, prolonging the life of your built-ins and keeping your mudroom fresh. Proper ventilation is crucial for maintaining dry, safe surroundings for your family and your investment.
Many homeowners believe that choosing off-the-shelf cabinetry and generic storage options is enough for a functional kitchen. However, this oversimplification overlooks crucial nuances that can make or break your remodel. A frequent misconception is that more storage always equals better organization. In reality, poorly planned storage—even if plentiful—can lead to clutter and inefficiency. For example, standard cabinets often lack the specialized compartments needed for spices, utensils, or bulky appliances, leading to wasted space and frustration. Advanced solutions like custom cabinets with tailored compartments ensure every inch serves a purpose, optimizing both function and aesthetics, as detailed in articles on custom cabinetry. Another myth is that built-ins are always expensive and difficult to install. While traditional built-ins can be costly, modern execution with pre-engineered components or creative DIY approaches can significantly reduce costs and installation time. Yet, a common mistake is neglecting proper anchoring and airflow considerations, which can cause long-term damage or mold growth. Consulting experts, and understanding details like correct anchoring methods is crucial. Advanced homeowners also often overlook the importance of material selection, especially in humid environments. Choosing inappropriate finishes or materials—such as standard MDF in moisture-prone areas—can lead to warping or deterioration. In contrast, materials like marine-grade plywood or moisture-resistant laminates provide durability and longevity, a point emphasized in various expert guides. Regarding storage solutions, many assume that adding more shelves or drawers automatically results in better organization. But, without considering user habits and ergonomic placement, this can create access issues or oversights in safety. For instance, high shelves that require a step stool can be dangerous in busy kitchens. Similarly, incorporating soft-close hinges and proper lighting can dramatically improve user experience, avoiding common pitfalls associated with cheap hardware or poor illumination. Finally, if you’re contemplating a remodel meant to last for decades, consider the hidden impact of detailed planning that accounts for future needs. Installing active ventilation, like exhaust fans to reduce humidity, can prevent moisture-related issues that compromise cabinets and built-ins over time, as supported by research on home maintenance best practices. Remember: successful kitchen renovation hinges on understanding these subtle but vital details. Have you ever fallen into this trap? Let me know in the comments.Maintaining a well-designed kitchen requires both the right tools and consistent care. One essential tool I rely on is a high-quality cordless drill with adjustable torque settings. I personally prefer the Dewalt DCD791D2,because its lightweight design reduces fatigue during prolonged projects, and its brushless motor provides consistent power. This allows me to tighten or loosen cabinet hardware precisely without damaging delicate materials. For measuring and ensuring perfect alignments, I use a digital laser level, such as the Bosch GLL3-8; it offers quick setup, precise readings, and works well in various lighting conditions, ensuring my built-ins remain even and functional over time. To keep dust and debris at bay during ongoing maintenance, I recommend investing in a portable shop vacuum with HEPA filtration. This helps preserve your custom cabinetry finishes by removing dust and allergens, reducing the need for frequent refinishing. Regular cleaning with microfiber cloths and gentle, pH-neutral cleansers extends the lifespan of painted or laminated surfaces, as detailed in expert guides on cabinet finish maintenance. Looking ahead, advancements like smart tools integrated with app-based diagnostics will streamline ongoing upkeep, allowing homeowners to troubleshoot minor issues remotely. For example, a smart hinge system can alert you when adjustment is needed, preventing long-term damage. How do I maintain my custom cabinets over time? I schedule quarterly check-ins to tighten hardware, examine seals, and apply protective finishes as needed. Using a torque-limited screwdriver to prevent over-tightening, I ensure soft-close hinges stay functional without strain. Make this a habit, and your investments will continue to look and perform beautifully for years. I highly recommend trying out the latest digital laser level—its quick setup and precise measurements make ongoing alignments and adjustments much easier. For more tips on DIY maintenance, visit ArtisanCabinetworkz’s comprehensive guides, like their page on building lasting, functional cabinetry. Regularly servicing your hardware, combined with the right tools, ensures your space remains as stunning and efficient as the day it was installed, with minimal hassle.
Several Mistakes That Changed My Approach to Mudroom Storage
One of the toughest lessons I learned was that DIY solutions often overlook moisture resistance, leading to future warping and damage. I once installed particleboard shelving without sealing it properly, and it didn’t take long before moisture from wet boots caused swelling. Now, understanding the importance of moisture-resistant materials has saved me time and money. Another revelation was that creating dedicated zones, like a specific boot tray or umbrella station, keeps the mess contained, preventing overflow into the main hallway. This simple idea drastically improved cleanliness and safety in my home. Lastly, I underestimated the value of proper ventilation; installing an exhaust vent helped control humidity, preventing mold and extending the life of my built-ins, which I now consider essential for any mudroom upgrade.