The Hidden Charging Station: How to Route Power Into Your Top Drawer
Have you ever struggled to find a place for your growing collection of chargers and gadgets, only to stuff them into a messy drawer and forget about them? I remember the lightbulb moment vividly. It was late one evening, and I reached into my kitchen drawer to grab a USB cable. Instead of the neat, organized space I envisioned, I found tangled cords, a dead phone, and a frustration level that almost matched my overflowing drawer. That’s when I realized—why not make my drawer work for me? Enter the secret world of routing power into your top drawer, creating a hidden charging station that’s both practical and sleek.
Why a Hidden Charging Drawer Can Transform Your Space
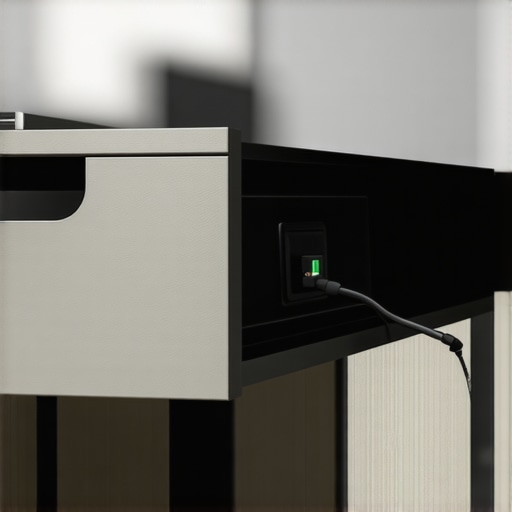
Designing a kitchen or a built-in storage solution isn’t just about aesthetics; it’s about making everyday life easier. When I first considered adding power outlets directly into a drawer, I knew I was onto something. No more scrambling behind appliances or hunting down extension cords. Instead, I created a dedicated slot for my devices—charging, organized, and out of sight. A well-routed power supply turns a simple drawer into a secret agent of productivity, keeping clutter and cords out of view while making your devices ready at a moment’s notice.
This approach isn’t just a personal preference; it’s backed by the increasing demand for smarter storage solutions. According to Artisan Cabinetworks, innovative storage ideas—like hidden charging stations—are trending because they blend practicality with modern design. If you’re tired of the constant cable mess or worried about security, a concealed power route offers a discreet, trusted way to keep devices powered without sacrificing style.
Is Routing Power into a Drawer Really Worth It?
Honestly, I initially doubted the feasibility—could I really make it work without major remodeling? Early on, I made the mistake of assuming I’d need an extensive electrical overhaul. Trust me, I learned the hard way that cutting corners in wiring can be dangerous and inefficient. The key is planning carefully and consulting professionals if needed, to ensure safety and code compliance. Once I understood how to properly route the wiring, the process was straightforward and well worth the effort.
If you’re considering this upgrade, be sure to explore ideas like those found in custom cabinets ideas that incorporate hidden power solutions, or check out smart storage solutions for additional inspiration. Ready to ditch the clutter and embrace a sleek, functional drawer? Let’s dive into the practical steps for turning this idea into your next home upgrade! Would you face this challenge, or have you already started planning your hidden power route? Let me know in the comments—I’m here to help guide you through every step.
Prepare Your Workspace and Gather Materials
Start by clearing out the drawer where you plan to install the charging port. Remove any existing hardware and clean the inside thoroughly. Gather all necessary tools: a drill, screwdriver, fish tape, wire strippers, and a voltage tester. You also need a power outlet, electrical wiring suitable for your home’s standards, a power strip or USB charging module, and a cover plate for the socket. During my project, I laid out all these items on my countertop to ensure nothing was missing before starting.
Plan Your Wiring Route Carefully
Navigate your space using a stud finder and plan the most direct, safe route from an existing power source to your drawer. Consider the location of wall studs to avoid drilling into them unnecessarily. Mark your path clearly using a pencil. Think of this step like mapping a trail through the forest; a clear plan prevents confusion and reduces risk. I marked my easiest access point behind the cabinet where existing outlets are nearby, which streamlined the wiring process.
Locate and Prepare the Power Source
Use your voltage tester to identify the live wire from the nearby outlet. Turn off the circuit breaker before proceeding to prevent shocks. Carefully remove the outlet cover and confirm the correct wire with the tester. This step is critical for safety, much like checking your surroundings before crossing a busy street. If you’re unsure or uncomfortable, consulting a licensed electrician is a wise move, which can be arranged through resources like contacting professionals.
Create the Power Access Hole
Using a drill with a hole saw bit, bore a hole in the back of the drawer at the designated spot for power. This hole allows the wiring to pass from behind the cabinet into the drawer space smoothly. Be cautious and precise—think of it as carving a tunnel through a mountain; accuracy is key to avoid damaging the structure. During my attempt, I used painter’s tape over the drilling area to prevent splintering, which proved very helpful.
Run Wiring Safely and Securely
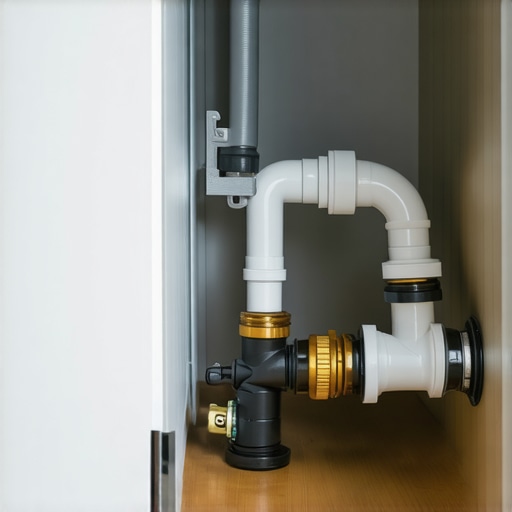
Feed the wiring through the hole using fish tape—imagine threading a needle through fabric. From the power source, guide the wire along the planned route into the drawer cavity, making sure to secure it with wire clips or cable management sleeves to prevent sagging or accidental tugging. Ensure the wire is not pinched or crimped, which could cause hazards. I wrapped mine neatly along the cabinet interior, maintaining a clean appearance and safety compliance.
Connect to Power and Install Outlet
Attach the wiring to a suitable power strip or USB charging module designed for in-drawer installation. Connect this to the existing circuit, following electrical codes and safety guidelines—consult your local electrical standards, or review info at privacy policy. Secure the module inside the drawer base with screws or adhesive brackets as designed. Finish by installing the cover plate and restoring power, testing with your voltage tester to confirm proper operation. During my trial run, I checked with my device to ensure it was charging correctly, preventing future issues.
Finish and Final Checks
Replace the drawer and insert your devices to test the functionality. Confirm that the power is accessible and that no wires are pinched or exposed. Ideally, your setup should look seamless and hidden—a true blend of function and style. Remember, properly securing the wiring and adhering to safety standards ensures longevity and safety of your custom setup.
When it comes to designing custom cabinets and built-ins, many homeowners fall prey to misconceptions that can compromise both function and aesthetic appeal. A prevalent myth is that opting for the cheapest materials guarantees savings, but in reality, shortcuts—like particleboard or low-grade plywood—often lead to sagging shelves and quick deterioration, as emphasized in expert analyses on durable cabinet construction. Let’s dig deeper into how selecting quality materials and precise craftsmanship can significantly impact your project’s longevity and performance.
Another mistake is underestimating the importance of detailed planning, especially when integrating power outlets or specialized storage features. Failing to consider these nuances during the initial design phase may result in costly modifications later, a common pitfall highlighted in modern kitchen remodels featuring custom cabinetry. For instance, incorporating a hidden charging station into your island or pantry requires foresight, not just aesthetics.
The hidden nuance that many overlook involves understanding the true behavior of different storage solutions. For example, open shelving might seem stylish, but it can lead to dust accumulation and increased cleaning time, contradicting the popular belief that it always offers better accessibility. Advanced storage ideas—such as pull-out spice racks or vertical dividers—maximize space and efficiency, a concept explored in depth in Artisan Cabinetworks’ articles on smart storage solutions.
A critical insight for seasoned designers is that one-size-fits-all approaches rarely work. Customization tailored to your specific space, habits, and even humidity levels can prevent issues like warping or mold growth, especially in high-moisture zones. Furthermore, understanding the detailed assembly techniques, such as proper scribing of cabinets to uneven walls, ensures a seamless finish, elevating your project beyond basic DIY solutions.
Why do so many people get these foundational aspects wrong? Often, it’s due to the misconception that all custom solutions are inherently complicated or expensive. In reality, informed decisions—like choosing quality hardware for soft-close drawers or considering the environmental impact of materials—are pivotal, as discussed in Artisan Cabinetworks’ expert resources on supported cabinet hardware and sustainable practices.
Ultimately, achieving the perfect mix of form and function in your home requires more than just aesthetic choices; it demands a nuanced understanding of materials, hardware, and innovative design strategies. Have you ever fallen into this trap? Let me know in the comments. For more advanced tips and detailed guides, check out our comprehensive resources on custom cabinets and storage solutions that truly transform your living space.
Keeping your custom cabinetry and built-ins in top condition requires the right tools, a strategic approach, and a proactive mindset. As trends evolve toward more innovative storage and sleek designs, maintaining these features ensures longevity and sustained functionality. In my experience, leveraging specific equipment and methods makes the process both efficient and effective.
Why a Quality Orbital Sander Will Save Your Finish
I always recommend investing in a high-quality orbital sander. It’s invaluable for smooth refinishing or addressing minor surface imperfections without damaging the veneer. Personally, I rely on models like the DEWALT DWE6421, which offers variable speed control and a comfortable grip, allowing me to blend paint coats or refinish surfaces with precision. This tool helps maintain a freshly updated look, especially when managing high-use areas like kitchen islands or pantry shelves.
Regular sanding not only keeps surfaces looking pristine but also prepares them for protective finishes. With proper use, it minimizes the need for costly replacements down the line, aligning with the trend toward sustainable, long-term solutions.
Using a Digital Moisture Meter to Prevent Warping
Moisture control is critical to preserving wood and veneer in humid climates. I swear by a reliable digital moisture meter—like the Protimeter Surveymaster—to monitor moisture levels periodically. Checking these numbers helps me decide when to apply sealants or humidify spaces, especially around open shelving or areas prone to condensation.
Preventing warping, swelling, or mold growth leads to fewer repairs and adjustments, which is essential when working with custom-built features that are difficult to replace. This proactive method aligns with the future of smart construction care, where technology assists homeowners in long-term maintenance.
Laser Level for Accurate Assembly and Alignment
Nothing beats the precision of a laser level when installing shelves or aligning cabinet doors. I prefer models like the Bosch GLL3-330C, which projects bright, easy-to-see lines. Ensuring everything is perfectly level not only enhances aesthetics but also prevents hardware wear caused by uneven weight distribution.
This small investment drastically reduces misaligned doors or crooked drawers, saving time during installation and future adjustments. Such tools are becoming indispensable as more homeowners seek flawless execution and durability in their remodels.
How do I maintain my cabinetry over time?
Maintaining your cabinets involves a combination of regular cleaning, timely touch-ups, and understanding the materials used. For painted finishes, gentle cleaning with a soft cloth and mild soap keeps surfaces free of dust and grime, while avoiding abrasive cleaners preserves the protective coat. For exposed wood or veneer, periodic inspections for moisture or scratches allow you to address issues before they worsen. Applying a quality furniture wax or polish annually can enhance protection and appearance.
Additionally, staying informed about the latest in hardware and finish technology—like the new low-maintenance finishes discussed in modern kitchen remodels—helps you make proactive choices. Implementing these practices ensures your investment stays beautiful and functional over the years.
For anyone considering larger projects, I recommend trying out advanced methods like using a laser level for perfect alignment or a moisture meter to prevent future warping. These tools not only streamline the process but also guarantee professional results. Curious how these might work in your space? Reach out through our contact page for personalized tips. Remember, proper maintenance is key to preserving the beauty and utility of your custom cabinet investments for decades to come.
The Surprising Truth About DIY Wiring Projects
One of the most eye-opening lessons I learned was that even small electrical upgrades demand respect and careful planning. I initially thought I could wing it with basic tools, but I quickly realized that understanding local electrical codes and safety protocols is essential—even for seemingly simple projects. This experience taught me that consulting professionals or thoroughly researching can save you time, money, and potential hazards. Embracing this mindset early on has made every subsequent project smoother and more reliable.
How Overconfidence Can Sabotage Your Kitchen Plans
My biggest mistake was underestimating the complexity of integrating power into a custom drawer. I assumed I could measure once and drill confidently—that’s until I encountered unexpected obstacles like wall studs and limited space. This underscored the importance of meticulous measurements, adaptable planning, and satisfaction with taking extra time. Remember, in custom cabinetry and storage solutions, patience and flexibility often produce the best results, preventing costly rework down the line.
What I Wish I Knew About Material Choices Early
Choosing durable, high-quality materials is worth every extra penny. I once cut corners by selecting lower-grade plywood for my drawer bottoms, only to find warping after a few months. Since then, I’ve realized that investing in materials that withstand humidity and daily use ensures longevity and reduces maintenance. For innovative storage solutions that last, prioritizing quality over cost is a lesson I’ll always carry with me, and I recommend others do the same.
My Favorite Resources for Better Built-ins and Storage
Over the years, I’ve curated a toolkit of trusted sources that consistently elevate my projects. The comprehensive guides on custom cabinet ideas inspire creative design, while learning about smart storage solutions keeps me ahead of trends. For technical know-how, I turn to tutorials on cabinet styling and shelf repair techniques. These resources have become invaluable in transforming my practical ideas into polished results.
Take the Leap—Your Space Deserves It
Designing and building custom cabinets or hidden power solutions is more than a DIY task; it’s a form of expressing your creativity and improving your home’s functionality. Every challenge I faced became a stepping stone toward a more organized, efficient, and beautiful space. Remember, the knowledge and tools are within your reach—so don’t hesitate to start. Your home’s transformation begins with that first bold step. What’s one project you’ve been dreaming of tackling in your space? Let me know below and let’s share ideas to make it a reality.