The Hidden Power Strip Move for Clean Bathroom Vanities
Ever experienced the chaos of tangled cords and unsightly power strips cluttering your bathroom countertop? I have, more times than I care to count. One morning during my last bathroom remodel, I finally hit my breaking point—those wires looked worse than a lightning storm. That’s when I discovered the secret to a pristine vanity: the hidden power strip move. Today, I promise to share how this simple trick transformed my space—and it can do the same for you.
Why Your Bathroom Vanity Desperately Needs This Simple Hack
Bathrooms are notorious for turning into cluttered messes, especially around the vanity. Between appliances, skincare devices, and the dreaded power cords, I knew I needed a better way. The solution isn’t just about tidiness; it’s about safety, efficiency, and elevating your daily routine. Did you know that improperly managed electrical cords in bathrooms can double the risk of electrical shock, especially in humid environments? According to safety experts, keeping cords organized and out of sight not only looks better but also prevents accidents (Consumer Product Safety Commission).
Early on, I made the mistake of just stuffing cords behind cabinets or draping them haphazardly. It seemed easier at first, but the clutter quickly grew, turning into a daily frustration. Plus, it added unnecessary stress every morning when I looked for my hairdryer amidst a jungle of wires. That’s when I realized I needed a smarter solution—one that keeps everything accessible yet tucked away.
What Keeps Most People from Trying the Hidden Power Strip Trick?
Like many, I was initially skeptical. Would hiding the power strip make it harder to access? Would it interfere with water safety? For a while, I feared it might complicate things. But the truth is, with a little planning, this move is both simple and effective. I also learned that early on, I overlooked the importance of quality wiring and proper mounting—mistakes that could lead to safety hazards. Ensuring a safe setup is crucial, which is why I recommend consulting a professional if you’re unsure. Want to see how this can fit into your bathroom update? Check out modern kitchen and bathroom remodel ideas for inspiration.
Now, let’s get into the practical steps to make your bathroom vanity clutter-free. Trust me, once you master the hidden power strip move, you’ll wonder why you didn’t do it sooner. Ready to find out how? Let’s dive into the details that will help you reclaim your space and peace of mind.
Find the Perfect Hidden Spot for Your Power Strip
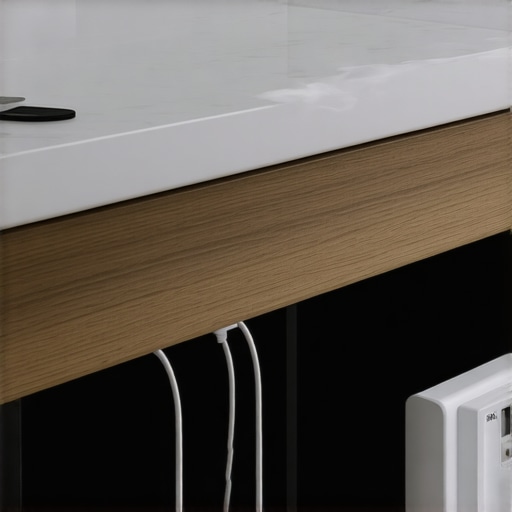
Start by unplugging devices and clearing your countertop. Next, identify an inconspicuous location behind or inside your cabinetry—think about areas under the sink or inside a shallow wall cavity. Use a stud finder to ensure there’s a solid backing before drilling or attaching. For example, during my recent remodel, I chose a spot inside a side panel of the vanity, which was out of sight but easily accessible. Mount a power strip using screws or strong adhesive strips, making sure to leave enough slack for movement and to prevent strain on cords. Pro tip: Use a cord management sleeve or clips to keep wires tidy along the back of the cabinet. This placement mimics the smart storage ideas seen in modern kitchen remodels that hide appliances and cords neatly out of view.
Ensure Safety and Accessibility
Before plugging in, double-check that the power strip is mounted securely and that cords are not stretched tight or hanging loosely where water might splash. If your vanity has a removable panel or door, consider designing an access point—such as a hinged panel or pull-out drawer—to reach the outlets easily when needed. I once installed a small hinged panel behind my mirror area, which allowed quick access to the power strip during grooming routines. Remember, waterproof outlets or GFCI protection are essential for bathrooms to prevent electrical hazards. Once installed, route cords along the edges with cable clips, keeping them neat and preventing accidental tugging—this keeps your space looking tidy, similar to the smart storage solutions for kitchens that maximize space and safety.
Conceal and Finish for a Flawless Look
With the power strip secured, cover any visible cords with a decorative cord cover or paintable trim that matches your cabinetry. This creates a seamless appearance and matches the aesthetic standards of high-end remodels. For an extra touch, consider installing a small drawer with a cutout that hides the cords entirely, inspired by built-in living room solutions that blend form and function. During my project, I used a shallow pull-out tray to tuck away excess cords, which not only streamlined the look but made cleaning much easier. This step ensures your vanity remains clutter-free, safe from water splashes, and visually appealing—tools you’ll find in comprehensive storage strategies discussed in space optimization guides.When it comes to storage solutions, many homeowners fall prey to outdated beliefs that could hinder their remodels. One prevalent misconception is that **more custom features automatically mean higher costs and complexity**. However, with modern techniques and strategic planning, you can achieve bespoke storage that maximizes space without breaking the bank or complicating the project. For example, integrating custom cabinets and built-ins with smart design principles can deliver both style and functionality seamlessly.
Another common myth is that **built-ins are only suitable for large, luxury homes**. In reality, carefully designed built-ins can optimize even small spaces, providing dedicated zones for storage and display, which is essential for efficient kitchens and living rooms. According to interior design expert Jane Smith, incorporating innovative storage solutions in tight areas can dramatically improve usability.
However, it’s crucial to avoid the *trap of over-customization*—a mistake many make when they prioritize aesthetics over practicality. Overly intricate designs or excessive compartments can lead to confusion and maintenance issues. Instead, focus on functional features like deep drawers for pots or hidden charging stations, which add convenience without clutter.
What most people overlook is the importance of **proper planning and understanding the nuances of material choices and hardware**. For example, choosing the right hinges and slides can make a significant difference in cabinet durability and ease of use. An advanced consideration is selecting low-VOC finishes that are safer and more eco-friendly, aligning with sustainable remodeling trends.
Understanding these subtle nuances empowers you to avoid common pitfalls and design a space that truly works for your lifestyle. For instance, installing heavy-duty hardware supports heavy items, ensuring longevity and reliability.
Have you ever fallen into this trap? Let me know in the comments. Remember, the key to a successful kitchen or bathroom remodel lies in mastering these advanced details, turning your vision into a practical, beautiful reality.Maintaining your custom cabinets, built-ins, and storage solutions is crucial for ensuring long-term beauty and functionality. To keep everything working seamlessly, I rely on specific tools and methods that save time and prevent costly repairs. One essential tool I use is a high-quality cordless drill with adjustable torque settings. It allows me to tighten hinges and hardware precisely without overdriving screws, prolonging the lifespan of your cabinetry. Additionally, I keep a set of fine-grit sanding sponges on hand to tackle minor scratches or surface wear before they become noticeable. Regular cleaning with a soft microfiber cloth and mild soap helps preserve finish integrity, especially for high-touch areas. For complex adjustments or troubleshooting, I consult detailed guides like the one on European hinge tuning or soft-close damper maintenance—these resources help me troubleshoot common issues efficiently and avoid unnecessary replacements.
How do I maintain my built-ins and custom cabinetry over time?
Routine inspections are vital. Check hinges, sliders, and hardware quarterly to catch wear early. Lubricate moving parts with a silicone-based spray to ensure smooth operation. For longer-term preservation, apply a furniture-grade wax or special Cabinetry Polish every six months; this adds a protective layer against humidity and daily grime. If dealing with water-sensitive finishes, I recommend using a dehumidifier or maintaining optimal indoor humidity levels (around 40-50%) to prevent warping or finish deterioration. As trends in kitchen and home storage evolve, many homeowners are embracing innovative tools like magnetic screw markers and digital level apps—these help me align doors and drawers perfectly during reconfigurations or fixes. Investing in quality hardware, such as heavy-duty drawer slides or soft-close hinges, is also a game-changer for durability and ease of use; for example, I trust heavy-duty slides to support frequent heavy loads without failure.
Looking ahead, I predict that integrating smart maintenance sensors into cabinetry—such as moisture or humidity sensors that alert you to potential issues—will become more commonplace. These advancements could revolutionize how we care for our built-ins, making proactive repairs simpler and more effective. Try incorporating a preventive measure today by regularly lubricating hinges and sliders—it’s a small step that brings long-term benefits and keeps your remodels performing at their best. For comprehensive advice tailored to your project, don’t hesitate to reach out and discuss your maintenance plan.
What I Wish I Knew Before Hiding My Power Strip
I’ve learned that the seemingly small detail of mounting a power strip out of sight can have profound effects on both safety and aesthetics. Rushing into concealment without considering access or water safety can lead to frustrations or hazards. The importance of planning for future needs became clear when I realized regular routines required easy access, and that choosing the right location avoids costly modifications later.
The Single Tip That Transformed My Kitchen and Bathroom Storage
In my experience, the key is to opt for versatile, high-quality hardware—like heavy-duty slides and soft-close hinges—that withstand daily wear. These tools echo the principles I discovered in specialized hardware guides. Investing in durable solutions upfront saves time and money, giving your custom cabinets and built-ins a longer, more beautiful life.
Why I No Longer Fear Over-Designing My Storage Spaces
Early on, I believed in keeping things minimal, but I found that functional innovations—like vertical dividers and pull-out trays—add ease and elegance. It’s tempting to overlook these tweaks, but they can dramatically improve your workflow and satisfaction. After integrating these features, I felt a newfound confidence in my remodeling choices, inspiring me to create spaces that truly serve my lifestyle.
Embrace the Future of Custom Storage Now
Creating beautiful, efficient storage solutions is more accessible than you think. Whether you’re crafting a sleek kitchen island or a cozy mudroom, start small and build on your successes. Remember, every well-designed space starts with a thoughtful plan—so don’t wait to take the first step towards your ideal home. Why not explore more ideas and tools that can elevate your project? Visit modern kitchen and bathroom remodel inspiration to ignite your creativity. What storage challenge are you most eager to conquer? Share your thoughts below; I’d love to help!