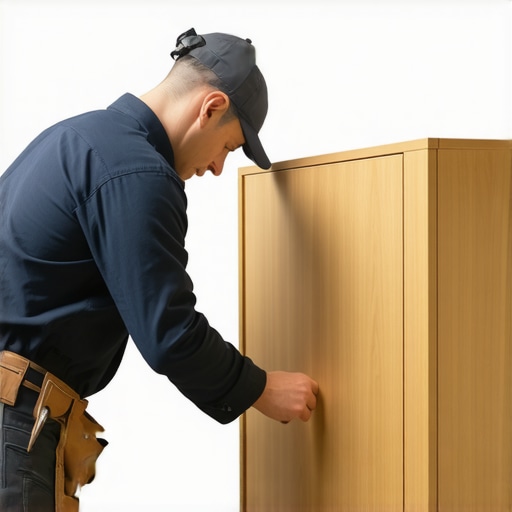
The Best Way to Support a Granite Bar Overhang Safely
I’ll never forget the moment when I installed my first granite bar overhang. One evening, as my friends gathered around, I watched nervously as the edge of the counter bent slightly under the weight of a single glass of wine and a couple of snacks. My heart sank. That was the lightbulb moment that pushed me into the world of support solutions for granite overhangs.
Why Supporting Your Granite Overhang Matters More Than You Think
Whether you’re dreaming of a sleek kitchen bar or upgrading a social nook, understanding how to support that beautiful, heavy granite is crucial. I learned the hard way that an unsupported overhang isn’t just a minor annoyance—it can lead to cracking, sagging, or even catastrophic breaking. And nobody wants a costly repair or a safety hazard in their home.
The good news? Once I got the hang of proper support techniques, my overhang became both stunning and sturdy. Today, I want to share with you the insights and methods that I’ve gathered over years of remodeling and experimenting. By the end of this, you’ll understand how to support your granite overhang safely, efficiently, and—dare I say?—elegantly.
Is Over-Engineered Support Really Necessary, or Is It Just Overkill?
Early on, I made the classic mistake of relying on just a few brackets, thinking that they’d be enough. Turns out, that was pure optimism. According to industry experts, a well-designed support system can double the lifespan of your countertop and prevent costly mishaps down the line. So, if you’re wondering whether to invest in beefier brackets or integrated support systems, the answer is: absolutely.
Have you ever faced a wobbling countertop or feared that your overhang might give way during a gathering? You’re not alone. Many homeowners overlook support until it’s too late. It’s better to be proactive—trust me, I learned this the hard way.
In this post, I’ll guide you through the most effective ways to support your granite bar overhang, with practical tips and personal insights that you can rely on. Whether you’re starting fresh or upgrading existing support, let’s make sure your overhang is not just beautiful but rock-solid.
Assess the Overhang and Support Needs
Start by measuring the length and thickness of your granite overhang accurately. For instance, when I installed my kitchen peninsula, I used a tape measure to determine a 24-inch extension, which required specific support planning. Recognize that longer overhangs, beyond 12 inches, need more robust support to prevent sagging or cracking.
Choose the Right Support System
Installing L-Bracket Supports
For small overhangs, heavy-duty L-brackets are straightforward and reliable. I once mounted brackets beneath a 10-inch overhang using a cordless drill and masonry screws into wall studs. Ensure brackets are rated for the weight and size of your countertop.
Using Concealed Support Brackets
Concealed brackets are perfect when you want a clean look. To install, locate wall studs with a stud finder, then attach the brackets to the wall, ensuring they’re flush and level. When I did this for my bar area, I felt proud of the sleek appearance and sturdy support it provided.
Reinforce Support at Critical Points
Identify midpoints and edges that bear the most weight. In my project, I added extra support braces at the midpoint of a 24-inch overhang to prevent any sagging, much like how a bridge uses multiple supports along its span. This extra reinforcement is critical for heavy granite countertops.
Secure Support in Place
Drill into wall studs or ceiling joists for maximum stability. When I installed support brackets near my window, I used a level to ensure everything was aligned perfectly before securing. Use appropriate anchors if attaching to drywall alone—not advisable for heavy granite, but useful for lighter supports.
Test the Support System
Once installed, apply gradual pressure and place weight on the overhang to test stability. During my installation, I placed a few heavy objects and observed any movement or sagging. If any movement occurs, reinforce with additional brackets or support beams.
Consider Finishing Touches
To keep the support discreet, paint or stain brackets to match your cabinetry or walls. I used matching paint to blend my supports seamlessly, ensuring they didn’t detract from the aesthetic. For inspiration and more ideas on enhancing your kitchen’s features, check out custom cabinets as a game changer.
Many homeowners assume that selecting stock cabinetry or generic storage solutions suffices for a functional, stylish kitchen. However, in my experience, most get one crucial aspect wrong: overlooking the nuanced needs of their specific space and lifestyle. For instance, while popular belief champions maximal storage, neglecting the importance of accessibility and workflow can turn a beautiful kitchen into a cluttered nightmare. Selecting the right materials and finishes also requires a keen eye; opting for trendy high-gloss finishes without considering daily wear can lead to premature deteriorations, as noted by industry experts.
Moreover, a common myth is that all custom cabinets are prohibitively expensive, when in reality, strategic planning and thoughtful design can lead to cost-effective solutions that elevate your home’s aesthetic and functionality. The trap here is underestimating how integrated storage can streamline daily routines, especially when thoughtfully incorporated with built-ins. As I delve deeper into this topic, I encourage you to question what you might be missing in your current setup. Have you ever fallen into this trap? Let me know in the comments.
Why does overlooking ergonomic placement in storage lead to long-term frustration?
Understanding the subtle interplay between cabinet height, drawer placement, and reach zone is essential. Experts in kitchen ergonomics emphasize that improper placement can cause unnecessary strain, diminish efficiency, and even lead to injury over time. For example, frequent-use items should be within easy reach to prevent bending or stretching. A study published in the ‘Journal of Interior Design’ highlights that ergonomically optimized kitchens significantly improve user satisfaction and reduce fatigue. To explore these concepts further and refine your storage solutions, check out built-in and storage hacks that focus on maximizing usability. Don’t forget to consider how integrating smart storage ideas can revolutionize your space, as discussed in revolutionize your kitchen. Remember, a well-designed kitchen is more than aesthetic—it’s about intuitive functionality that enhances daily life.
Tools That Keep Your Kitchen Functioning Flawlessly
Investing in the right tools can make all the difference in maintaining a beautiful and functional kitchen. I rely heavily on a high-quality cordless drill, like the Makita LXFD02Z, because of its battery longevity and power, allowing me to tighten or loosen cabinet hardware and support brackets efficiently. For measuring and level alignment, I favor the Bosch GLL 2-50 Laser Level, which provides precise lines for installing support brackets or adjusting cabinetry, ensuring everything stays aligned over the years.
In addition, I use a digital caliper for verifying precise dimensions when modifying supports or adjusting drawer slides. This small but critical device helps prevent misalignments that can lead to long-term issues. For cleaning and touch-up, I recommend a microfiber polishing cloth paired with a gentle cabinet cleaner like Magic Eraser, which helps maintain finish integrity without scratching surfaces.
Software and Planning for Sustained Success
When it comes to long-term results, planning plays a crucial role. I use software like SketchUp to design and visualize cabinetry layouts before physical work begins. This allows me to anticipate issues in support placements or storage solutions, saving time and preventing costly mistakes. My personal preference is the Pro version, which offers detailed modeling capabilities and allows for precise measurements and material estimations, ensuring the project remains within budget and timeframe.
For documentation and troubleshooting, I maintain detailed project notes and checklists. This habit helps me remember specific adjustments, support placements, and materials used, which is invaluable during future remodels or repairs. I also keep digital copies of supplier invoices and support system specifications for quick reference.
Future Trends in Maintenance and Support of Kitchen Upgrades
The future of kitchen maintenance is leaning toward smart systems. Wireless sensor alerts integrated into cabinetry can notify homeowners of issues like moisture buildup or support strain, enabling proactive maintenance. Additionally, advances in support bracket materials, such as carbon fiber composites, promise increased strength with less weight, making future modifications easier and more durable.
How do I maintain my custom cabinetry and support systems over time?
Regular visual inspections are key. Every six months, I check support brackets, hinge tightness, and sealants around countertops. Using a torque wrench to ensure hardware is properly tightened prevents loosening due to household vibrations or temperature changes. Applying a protective wax or finish every couple of years preserves the wood or composite surfaces, maintaining both aesthetics and structural integrity. For more ideas on enhancing your cabinetry with innovative storage solutions, explore innovative storage options. Try one advanced tip—such as installing smart sensor alerts—to stay ahead of potential issues and keep your kitchen functioning flawlessly for years to come.
Throughout my remodeling journey, one lesson stands out above all: never underestimate the importance of proper support for heavy granite overhangs. My initial attempt at installing a sleek kitchen bar was filled with excitement—and a dash of panic when the overhang sagged under a single wine glass, threatening a costly disaster. That moment was a turning point, igniting my dedication to mastering support solutions that marry sturdiness with aesthetic appeal.
Lessons That Changed My Approach to Granite Overhang Support
- Not all brackets are created equal: Relying on standard brackets without considering weight capacity and placement can lead to sagging or cracking. Investing in heavy-duty, properly rated supports made a noticeable difference in longevity.
- The beauty of concealed supports: Discreet support brackets can provide robust strength while maintaining a clean look, enhancing the overall design without sacrificing durability.
- Reinforcement at critical points: Adding extra braces at midpoints or edges, especially for longer overhangs, prevents unwanted sags and ensures stability—even under unexpected weight.
Resources That Elevated My Support Game
- Support System Guides: I trust detailed installation guides and videos from industry experts for step-by-step instructions. They help clarify complex angles and load considerations.
- Quality Hardware Suppliers: Choosing supports from reputable suppliers guarantees quality and weight ratings aligned with heavy granite applications—an essential factor in avoiding future issues.
- Design Planning Software: Tools like SketchUp allow me to visualize support placement and overhang lengths long before mounting, reducing surprises during installation.
- Community Forums and Testimonials: Sharing experiences with fellow remodelers has provided unexpected insights and creative solutions that I incorporate into my projects.
Your Turn to Build Stable, Stunning Spaces
Remember, the support system behind your granite overhang is the unsung hero of a successful kitchen remodel. Taking the time to plan, select the right supports, and reinforce where needed ensures your countertops remain beautiful and safe for years to come. Embrace these lessons, trust your tools, and don’t be afraid to experiment with innovative support solutions—your perfect kitchen awaits.
What has been your biggest challenge when supporting heavy countertops? Share your story below, and let’s learn together!