The Drawer-in-Drawer Method for Organizing Overflowing Utensil Trays
Ever opened your kitchen drawer and felt like you were about to dive into a chaotic abyss? That pile of utensils, mismatched spoons, and lonely forks can turn even the most serene mornings into a frantic search party. I’ve been there—frustrated, digging through layers of clutter, wondering if there’s a better way. One lightbulb moment changed everything for me: discovering the Drawer-in-Drawer method.
Bring Order to Kitchen Chaos with Smart Storage Solutions
It’s not just about tidiness; it’s about reclaiming your time and sanity. The overflowing utensil tray was a constant obstacle, making quick meals a battle zone. After countless attempts at organizing, I realized the core issue was not the lack of space but how I was utilizing it.
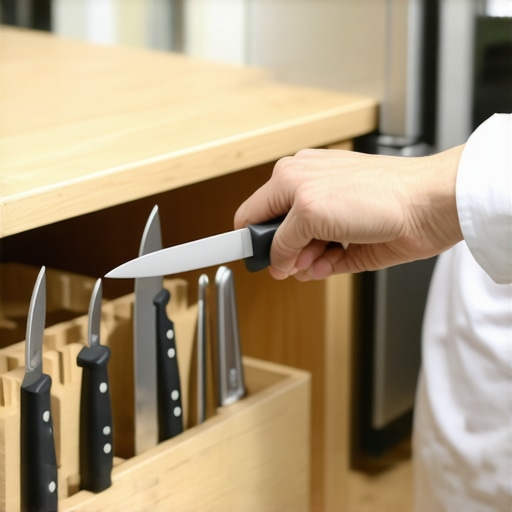
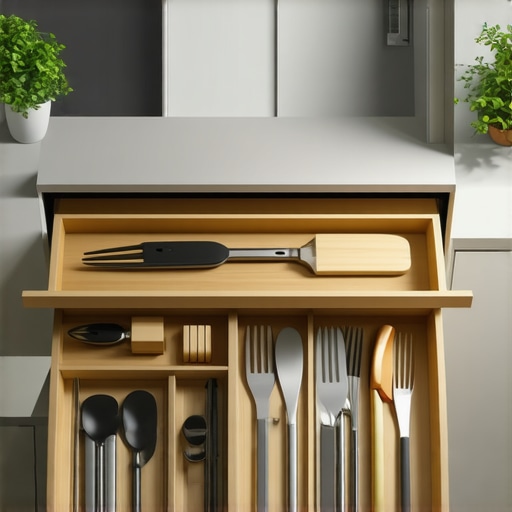
The Drawer-in-Drawer technique creates compartments within your existing drawers, transforming a cluttered mess into a sleek, accessible system. Imagine opening your drawer to find everything in its place—knives, spoons, specialty utensils—each snug in its own little home. This isn’t just my secret; it’s a game-changer for any kitchen facing similar messes.
But I’ll admit, my early efforts were not perfect. I made the mistake of thinking a generic organizer would do the trick—big mistake. It led to wasted space and frustration. That’s why I want to guide you through the process, ensuring you avoid my pitfalls. Additionally, if you’re considering broader kitchen upgrades, check out [creating seamless kitchen remasters with built-in storage solutions](https://artisancabinetworkz.com/creating-seamless-kitchen-remasters-with-built-in-storage-solutions). It complements this approach perfectly.
Have you ever faced the chaos of an overflowing utensil drawer, wishing for a simple yet effective solution? You’re not alone. Stick around, because I’ll show you how the Drawer-in-Drawer method can transform your messy drawers into organizational sanctuaries—and make cooking a joy again.
Start by Clearing Out and Assessing Your Drawer Space
Remove all utensils, tools, and unwanted clutter to see what you’re working with. I once had a jumbled drawer full of mismatched spoons and forgotten gadgets. As I emptied it, I realized I could identify the types of utensils and their storage needs, which is crucial for designing an effective system. This initial step sets the foundation for an organized, functional drawer.
Measure and Plan Your Compartments Precisely
Use a tape measure to record the exact dimensions of your drawer. Imagine trying to fit a custom-made puzzle piece—precision matters. Based on your measurements, sketch a layout dividing the space into sections for knives, spoons, and specialty utensils. When I planned my own drawer, I used cardboard to experiment with compartment sizes, which saved me from purchasing mismatched organizers later.
Select High-Quality Inserts That Fit Your Space
Choose materials like customizable bamboo or acrylic that withstand moisture and are easy to clean. I learned the hard way that cheap plastic organizers warp over time, leading to reorganization. For my drawer, I ordered a custom insert with adjustable dividers to accommodate different utensil sizes. This ensured everything stayed in place and was easily accessible.
Install the Compartments Carefully and Securely
Slide the inserts into your drawer, making sure they fit snugly without moving. Proper installation avoids shifting during opening and closing. When I first tested my setup, I realized some inserts rattled due to loose fitting. I fixed this by adding non-slip pads underneath, which kept everything stable, reducing frustration during quick access.
Customize and Tweak for Optimal Use
Adjust the dividers and layout as needed for your daily routines. Think about how you grab utensils—do you need larger compartments for serving spoons or a separate section for scissors? My experience showed that continuous tweaks improve usability. Over time, I added a small section for measuring spoons, making meal prep more efficient.
Maintain Your System Regularly to Keep It Sharp
Periodically clean and reorganize to prevent clutter buildup. I set a monthly reminder to tidy my utensil drawer, which keeps the system functional. Additionally, if you notice some compartments are too tight or too loose, revisit the dividers and make adjustments. This proactive approach ensures your drawer remains an organized sanctuary, not a chaotic mess.
Linking Broader Solutions for Maximum Impact
While the Drawer-in-Drawer technique works wonders, consider integrating it with broader built-in storage solutions or customizing your cabinetry for even better organization. For instance, inserting custom shallow drawers into your cabinetry can turn your entire kitchen into an organized haven, streamlining more than just your utensils.Many homeowners assume that simply purchasing high-end built-in or custom cabinets will magically transform their kitchen. However, even seasoned renovators often overlook the nuanced realities that determine long-term success. One common misconception is that all built-in solutions are inherently better, faster, or more affordable. In reality, the key to truly effective storage is understanding the subtle craftsmanship details and avoiding pitfalls that can turn a dream kitchen into an ongoing frustration. For instance, choosing plywood over MDF or particleboard isn’t just about cost—it’s about moisture resistance and durability over time, especially in humid environments. Experts agree that the quality of materials and joinery techniques profoundly impact how well your cabinets perform over decades, not just years. But many skip this step, assuming “all custom is good enough.” This oversight can lead to warping, squeaking, or delamination, which are not always immediately apparent during installation. That’s why deep knowledge of cabinet construction is crucial; it allows you to differentiate between a well-made piece and a poorly executed one.
Have you ever fallen into this trap? Let me know in the comments.
Another nuance often ignored involves improper planning of storage access. For example, corner cabinets are frequently misused, with lazy Susans or blind corners that still leave parts hard to reach. The true expert approach involves integrating innovative solutions like diagonal pull-outs or custom-designed shelving that maximize accessible space. Linking this idea to broader design strategies, check out [creating seamless kitchen remasters with built-in storage solutions](https://artisancabinetworkz.com/creating-seamless-kitchen-remasters-with-built-in-storage-solutions). It emphasizes that a bespoke approach doesn’t just look good—it functions perfectly, saving time and reducing clutter.
People also tend to underestimate the importance of precise measurements and the tolerances in cabinetry. A mere quarter-inch miscalculation can cause doors to misalign or drawers to stick, diminishing the aesthetic and functional appeal. This is why expert cabinet makers spend extra time on detailed measurements and mock-ups before final fabrication. Fail to do this, and you’ll likely face ongoing adjustments or even reordering, which can double or triple your project costs. It’s a common myth that “pre-made perfect fits” exist; in truth, precision craftsmanship takes effort but pays dividends in the end.
Now, you might wonder about the impact of integrating technology into these systems. Modern kitchens increasingly feature built-ins with integrated charging stations, hidden compartments, or smart lighting. Knowing how to incorporate these seamlessly requires a sophisticated understanding of both electrical planning and cabinetry design. Explore [revolutionize your kitchen with built-ins and creative storage](https://artisancabinetworkz.com/revolutionize-your-kitchen-remodel-using-built-ins-and-creative-storage) to see how expert craftsmanship elevates both form and function.
Finally, a critical mistake many overlook is neglecting future accessibility. Custom solutions should not only look fantastic but also age well. Choosing hardware that resists finger smudges, designing for easy cleaning, and planning for accessible heights can make or break your long-term satisfaction. Remember, the goal isn’t just a beautiful kitchen but one that adapts with your changing needs.
In essence, the secret lies in appreciating that effective kitchen storage and cabinetry are about more than just aesthetic appeal. It’s about smart engineering, meticulous planning, and quality craftsmanship integrated through expert knowledge. Dive deeper into these strategies by visiting our main guides linked throughout this article, and ensure your next project stands the test of time. Don’t forget to share your experiences or doubts—sometimes, small overlooked details become big problems later. Keep curious, and happy remodeling!
Keeping It Working: Essential Tools and Maintenance Tips
Maintaining your custom cabinets and storage solutions requires more than just installation; it’s about consistent care and using the right tools. Personally, I swear by a high-quality cordless drill with multiple bit sizes; it’s invaluable for tightening screws, adjusting hinges, or making quick modifications without fuss. Additionally, a precision level ensures your cabinets stay perfectly aligned over time, preventing creaks and misalignments that can occur with settling or minor shifts. To combat moisture and prevent warping, I recommend a good dehumidifier in your kitchen, especially if your space experiences humidity fluctuations—this prolongs the life of your wood finishes and hardware.
For routine cleaning, soft microfiber cloths combined with a gentle, pH-balanced cleaner are my go-to. They help preserve your cabinet finishes and keep hardware looking pristine without scratching surfaces. A dedicated soft-bristled brush is also handy for detailed areas like crown molding or drawer slides, ensuring dust and grime don’t accumulate where it counts.
When it comes to software or digital tools, managing renovation plans and maintenance schedules is simplified with project management apps like Trello or Notion. I use these to track cleaning routines, hardware replacements, and upgrade ideas. Staying organized digitally keeps your long-term improvement plan on point, reducing the temptation to neglect routine upkeep.
Prediction suggests that smart, sensor-based maintenance systems might become mainstream—automatic humidity sensors, LED alerts for hardware wear, or even app-controlled lubrications could become standard, giving homeowners proactive alerts before issues develop. Adapting early to these innovations can save time and costs in the future.
How do I keep my cabinetry and storage solutions reliable over time?
Regular inspections are key. Check hinges, slides, and hardware at least biannually, applying lubricant like silicone spray on moving parts to enhance smooth operation. Pay attention to any signs of moisture or wood swelling and address them promptly. Applying a fresh coat of furniture wax or a penetrating oil annually helps sustain finishes and creates a protective barrier against spills or humidity. For setup, a stone anchor or anti-tip hardware can prevent sudden accidents, especially in homes with children or busy environments.
In reaching for long-term results, selecting durable tools and staying diligent with maintenance ensures your investment stays beautiful and functional for years to come. Remember, a small annual or semiannual checkup—like tightening screws or cleaning hardware—can significantly extend your cabinetry’s lifespan. To explore more about maintaining high-end custom setups, visit these expert tips on integrated storage maintenance.
Don’t forget to incorporate advanced strategies into your routine—one tip I often recommend is adjusting your hinges periodically to prevent misalignment. A precise, minimal tweak can keep doors closing smoothly and prevent premature wear. Try it yourself and see the difference it makes in preserving your custom cabinetry’s beautiful, seamless look.
Throughout my journey in transforming kitchens, I’ve uncovered some hard-earned truths that no quick-fix article can truly teach. These insider lessons have not only elevated my craft but also saved countless hours of frustration and costly mistakes. If you’re considering a kitchen overhaul with custom cabinetry and smart storage, brace yourself for revelations that could change your entire approach.
The Hardest Lesson I Learned About Built-Ins and Storage
Never underestimate the value of meticulous measurements. I once ordered a stunning set of built-in shelves only to realize they didn’t fit because I skipped a critical step in measuring the alcove’s depth and height. Proper planning and double-checking measurements can mean the difference between seamless integration and costly rework. The true beauty of a custom solution is in the details—it’s about anticipating how you’ll use the space, not just how it looks.
Myths That Held Me Back in Kitchen Remodeling
One myth I believed early on was that high-end materials automatically guarantee longevity and performance. The truth is, even the most beautiful cabinets can fail prematurely if they’re not built with proper joinery and moisture-resistant finishes. Investing in quality craftsmanship and understanding the nuances of materials, from water-based lacquers to plywood substructures, can mean the difference between a kitchen that lasts decades and one that needs frequent repairs.
The Secret to Achieving a Seamless Look
Blending built-ins with existing architecture requires more than just matching paint swatches. It demands a keen eye for alignments, reveals, and hardware coordination. A small misalignment can ruin an otherwise perfect design. I discovered that taking the time to scribe and shim cabinets ensures that every joint sits flush, creating a truly integrated appearance. For comprehensive tips on creating harmonious kitchens, check out the article on seamless kitchen remanagement.
The Power of Forward Thinking in Storage Design
Planning for long-term use isn’t just about today’s aesthetic; it’s about future accessibility and adaptability. I learned to design with aging in mind—lowering shelves, choosing hardware that’s easy to operate, and incorporating accessible storage like pull-outs and tilt-outs. Implementing these thoughtful features now can save money and effort down the line, transforming your kitchen from a pretty space into a lifelong functional centerpiece.
Jumpstart Your Transformation with Proven Strategies
Starting your project with a clear understanding of core principles—precise measurements, quality materials, harmonious design, and future-proofing—sets you up for success. Don’t forget to explore comprehensive guides and trusted sources like smart storage innovations or the ultimate guide to custom cabinets to empower your decisions. Remember, every successful kitchen remodel begins with deliberate planning and a willingness to learn from seasoned professionals.