Why Under-Cabinet Puck Lights Beat LED Strips for Task Focus
I vividly remember fumbling around my kitchen after sunset, trying to find the right utensil or spice, only to be met with shadows that seemed to hide everything. It was frustrating—like cooking in a cave. Then, I realized it wasn’t just about better lighting; it was about adding *functionality* and *ambiance* that truly works for daily life. That revelation led me to explore lighting solutions that actually deliver, especially in the crucial task zones beneath my cabinets.
Have you ever faced this kind of lighting dilemma in your kitchen? If so, you’re not alone. And here’s the good news: the right lighting setup can make a world of difference. Today, I’ll share with you why under-cabinet puck lights outshine those long, sprawling LED strips for task-focused areas and how they can transform your space into both a functional and inviting environment.
Why Puck Lights Are Your Kitchen’s Best Friend
Is the Hype About Under-Cabinet Lights Real?
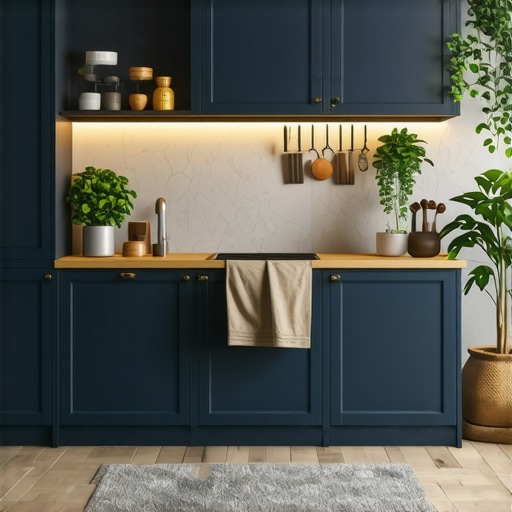
When I first considered updating my kitchen lighting, I was skeptical about whether small, disc-shaped puck lights could really make a difference. I had always thought that those thin LED strips were the go-to. But an early mistake I made was opting for a cheap, overly bright strip that created glare and harsh shadows, making the space uncomfortable to work in. After installing puck lights, I noticed a more even, warm glow that truly illuminated my countertops without the annoying glare.
According to lighting expert Artisan Cabinetworkz, choosing the right under-cabinet lighting is essential for both task efficiency and aesthetic appeal. They highlight a crucial point: puck lights provide focused illumination exactly where you need it most, unlike strips that often wash out your entire space or create uneven lighting patterns.
One sneaky mistake I made early on was installing LED strip lights with too high a color temperature, which made my kitchen feel sterile rather than cozy. Learning to select warmer LED puck lights changed the game, making my kitchen feel inviting yet highly functional. Now, I rarely have to squint or move lamps around to get the right light while cooking or prepping.
In the next section, I’ll walk you through the practical benefits of puck lights and how they stack up against other options like LED strips, guiding you toward a solution that’s both simple and highly effective. If you’re tired of struggling with poor lighting and want a clear upgrade path, stick around. Your kitchen’s new glow is closer than you think.
,
Design Your Storage Layout With Precision
Start by mapping out your kitchen’s workflow—identify prime prep zones and cleaning stations. Use painter’s tape to outline suggested cabinet placements, adjusting for door clearance and appliance access. I did this in my recent remodel when I discovered my initial plan blocked vital pathways; sketching thoroughly prevented costly mistakes.
Choose Materials That Last and Match Your Style
Select high-quality plywood or MDF with moisture-resistant finishes for durability, especially in humid climates. I learned this the hard way when particle board shelving delaminated within a year. For a unified look, opt for veneer or paint-grade finishes matching your existing cabinetry. Review custom cabinet ideas for style inspiration.
Build or Install Custom Cabinets Carefully
Consider framing your built-in units with a precise box construction—measure twice, cut once. Use jigs to ensure hinges and drawer slides align perfectly. I once mismeasured a deep cabinet; slivering a filler strip afterward saved the visual balance. For optimal aesthetics and function, learn about seamless built-ins.
Incorporate Smart Hardware and Accessories
Use soft-close hinges and slides to enhance functionality. Invest in pull-out trays for bulky items like spices or baking sheets. I installed a baking sheet divider that transforms clutter into order—saving me minutes daily. Check storage hacks for more ideas.
Seal and Finish Properly to Protect Your Investment
Apply water-based finishes or acrylic sealers to prevent damage from spills and humidity. Sand lightly between coats for a smooth surface. I experienced peeling cabinets because of rushed finishing—since then, I adopted meticulous sealing routines inspired by expert guides. For advanced finishing techniques, explore finishing insights.
Analyze and Adjust Post-Installation
Once installed, test every drawer and door for smooth operation. Adjust hinges for even gaps and verify handlers do not interfere with opening. Notice any wobbling? Use shims or levelers to stabilize. I once ignored a wobbly drawer; it caused wear and noise—fixing it instantly improved usability. For troubleshooting tips, refer to alignment techniques.
Many homeowners assume that choosing the right storage or built-in cabinetry is straightforward, but this oversimplification can lead to costly mistakes and frustration. A common myth is that all storage solutions are universally effective—that a trendy approach guarantees optimal organization. However, the reality is far more nuanced. For example, what works perfectly in one home might create chaos in another due to differences in wall structure, lifestyle, or spatial constraints. It’s crucial to understand the subtle factors like wall material compatibility and door swing clearance that influence long-term usability.
Overlooking these nuances can result in what I call the ‘Oops Effect,’ where an ostensibly smart choice ends up impairing functionality. One frequent trap is installing built-ins without considering future modifications. For instance, fixed shelving and non-adjustable drawers might seem ideal initially, but they can severely limit flexibility down the line. According to expert insights from Artisan Cabinetworkz, adaptable storage is key to a resilient design.
Thinking about advanced applications, have you ever wondered why some custom cabinets seem perfectly integrated yet become outdated faster? The secret often lies in the overlooked details such as veneer matching, hardware ergonomics, or electrical integration. For example, a well-designed hidden charging station can enhance daily convenience, but neglecting to incorporate power grommets during planning leads to cluttered surfaces and frustration. Recognizing these intricacies is what separates amateur installations from professional craftsmanship.
An advanced question I often encounter from seasoned remodelers is: “How do I ensure my storage remains flexible for future needs without sacrificing aesthetics?” The solution involves blending modular components with clean, seamless design—like using integrated built-ins that can be reconfigured over time.
Be wary of the trap where homeowners focus solely on style over substance. For example, installing a visually stunning but rigid pantry may look great initially but become obsolete when storage needs evolve. Therefore, prioritizing adjustable shelves, pull-outs, and smart partitioning is vital. Doing so not only prolongs the life of your investment but also enhances daily productivity.
In the end, understanding these lesser-known nuances ensures your investment in storage and cabinetry pays off decades down the road. For more insights into tailored solutions, check out innovative storage ideas that adapt to your lifestyle. Remember, a well-thought-out design is about foresight and flexibility, not just aesthetics. Have you ever fallen into this trap? Let me know in the comments.
Keeping It Working: Essential Tools and Techniques for Long-Term Storage Success
Once you’ve invested in custom cabinets and innovative storage solutions, the real work begins—maintaining them to ensure they perform flawlessly for years. The right tools and practices can make the difference between a kitchen that ages gracefully and one that quickly falls into disrepair.
One invaluable tool I personally rely on is a high-quality cordless drill with precision torque settings. It allows me to adjust hinges and drawer slides without over-tightening, which can cause misalignment or damage over time. Additionally, a soft-bristled brush and a microfiber cloth are essential for routine cleaning, preventing dust and debris from settling into mechanisms and reducing wear.
For periodic maintenance, I recommend using a silicone-based lubricant on drawer slides and hinge mechanisms—just a small drop applied with an applicator pin keeps them operating smoothly. This approach is backed by experts at Artisan Cabinetworkz, emphasizing regular lubricant application to extend the lifespan of soft-close hardware.
When it comes to cabinetry finishes, choosing water-based sealers provides a protective barrier against humidity and spills, especially in kitchens and laundry rooms. Regular inspection for signs of wear or peeling allows for early touch-up, preventing costly repairs later. A fine detail, but crucial: monitoring the alignment of doors and drawers ensures they continue to operate smoothly, saving you time and frustration in the long run.
Looking ahead, the trend toward smart home integration in cabinetry will grow, with sensors monitoring moisture and usage patterns. As these technologies become more affordable, tools like moisture meters and digital levelers may become standard in maintaining cabinetry health, ensuring your storage solutions remain both beautiful and functional.
How do I maintain built-in storage systems over time? Regular cleaning, lubrication, and inspection are your best allies. For example, applying a silicone lubricant to slider tracks every six months prevents stickiness and jamming. Additionally, checking screw tightness prevents hardware from loosening prematurely. For more comprehensive tips, check out this guide on maintaining built-ins.
One advanced technique I encourage you to try: use a digital level to check camera or hinge alignment periodically. Misaligned hardware can strain the cabinet structure, leading to cracks or warping over time. Ensuring everything stays in perfect balance prolongs the life of your investment and keeps your kitchen looking pristine.
Remember, maintenance isn’t a one-and-done task but an ongoing process. Embrace these tools and habits today, and your cabinetry will reward you with years of reliable service. Ready to take your maintenance routine to the next level? Start by incorporating a silicone-based lubricant into your quarterly care—it’s a simple step that delivers impressive results.
What I Didn’t Realize About Personalizing Storage—Until I Tried
One of my biggest lightbulb moments was understanding that storage solutions should be a reflection of my unique habits, not just trendy designs. I once tried copying a popular shelving style without considering whether it fit my family’s lifestyle—resulting in clutter and frustration. The lesson? Customization and knowing your own workflow trump aesthetic trends every time.
Another surprise was how overlooked minor details, like the placement of power outlets or the ease of reaching upper shelves, can make or break your kitchen’s functionality. Spending time on the small stuff upfront saved me countless headaches later, proving that meticulous planning pays off.
Finally, I learned that flexibility matters. Fixed designs can become limiting; I wish I’d incorporated adjustable features from the start. Embracing modularity can adapt your space for future needs without costly renovations.
Tools and Resources That Keep My Kitchen Working Smarter
Trusted guides like Creating Seamless Kitchen Remasters have been invaluable for understanding how to integrate built-ins smoothly. My toolkit wouldn’t be complete without a high-quality cordless drill, a decent level, and a set of soft-close hardware lubricants—these keep everything operating quietly and smoothly over time. For inspiration, custom cabinet ideas continually inspire my latest projects, mixing form and function effectively.
Additionally, I follow industry blogs and forums where pros share insider tips, like ensuring proper ventilation and choosing materials resilient to humidity. This ongoing learning has made my remodeling journey enjoyable and results more durable.
Your Next Step: Transform Your Storage Dreams Into Reality
Embarking on a kitchen remodel with tailored storage and built-ins is more than a project—it’s a chance to craft a space that truly fits your life. Don’t shy away from experimenting with innovative ideas; your ideal kitchen is within reach. Dive into resources, learn from those who came before, and take action today—your future self will thank you.
What’s the first storage solution you’re excited to try in your own kitchen? Share your plans below—I love hearing about your projects!