4 Media Built-Ins That Hide Home Theater Cable Chaos Fast
One evening, I found myself crouching behind my sofa, desperately trying to untangle a jumbled mess of cables that had taken over my living room. I thought I was organized—born out of a desire to keep things neat. But no matter how many cable clips or zip ties I used, the chaos just kept growing. That lightbulb moment hit me: I needed a smarter, cleaner solution to hide those unwieldy wires fast.
Say Goodbye to Cable Clutter in Your Home Theater
Believe me, I’ve been there, juggling remote controls while tripping over cords snaking across the floor. It’s frustrating, unsightly, and just plain stressful. If you’re tired of the cable spaghetti that turns your beautiful entertainment space into a trip hazard or an eyesore, I can help. Today, I’ll share four ingenious built-in media solutions designed to hide your home theater cable chaos quickly and effectively. These ideas aren’t just my opinion—they’re proven strategies that transformed my living space and can do the same for you.
Is Built-In Hardware Really Worth the Hype?
Early on, I made a rookie mistake: I thought hiding cables was just about hiding them with furniture or carpets. Spoiler alert: that approach is temporary and often worse. Proper built-ins are designed not just for aesthetics but for functional convenience. According to experts, integrating media storage into your home’s architecture is one of the best ways to keep everything tidy and accessible at the same time. If you’re skeptical whether these solutions are worth the effort, consider this: well-designed built-ins can add value to your home and save you hours of frustration. Plus, they keep your space safer and more enjoyable. Curious how I finally got my cords under control? Keep reading, and soon, you’ll be hiding your messy cables faster than you ever thought possible. If you’re ready to see how these built-in solutions work, check out some of the innovative ideas I’ve gathered from trusted sources like this expert guide.
Start by Planning Your Space
My first step was to sketch out the room layout, marking where the cables run and identifying dead zones in my furniture. Think of this like designing a custom kitchen cabinet: you need precise measurements before ordering. I measured distances from outlets to devices and noted areas where built-ins would sit naturally, avoiding cluttered corners. This initial planning phase ensures that when you move to execution, everything fits perfectly without guesswork. Getting this right is crucial; a poorly planned layout will mean more work and less sleekness later.
Choose the Right Built-In Structure
Next, I inspected my existing cabinetry to determine what could be modified or replaced with built-ins. I aimed for a design that integrated seamlessly into the wall, like a custom cabinet, to hide cables behind a false back. A good analogy is embedding a fridge into cabinetry—saving space and creating a clean look. I focused on selecting materials that matched my room’s style—whether wood, MDF, or laminate. Visiting a local supplier or consulting a professional can give you options that blend functionality with style.
Build or Retrofit Hidden Compartments
I decided to retrofit a false back into my media cabinet. This involved removing the existing back panel, then attaching a thinner panel with a cutout for cables to pass through. I also created dedicated channels within the cabinet for running wires behind shelves, similar to creating compartments in a kitchen for different utensils. Using cable clips and raceways helped guide wires neatly. This method keeps wires hidden from view and prevents them from dangling or tangling, transforming chaos into order.
Install Custom Cable Management Accessories
To finish, I installed cable grommets and clips at strategic points, such as on the back panel or inside drawers. Think of these like built-in organizers in a custom kitchen—keeping everything tidy. I used grommets with rubber seals to prevent damage and provide a clean entry point. For longer runs, I employed flat Ethernet or HDMI cables that could be hidden under surfaces, reducing visual clutter. Labeling the cables also simplified troubleshooting later, a trick borrowed from expert storage solutions to streamline maintenance.
Handle the Finishing Touches
Finally, I painted or finished the interior panels to match the room’s aesthetic, similar to upgrading cabinets with a new coat of paint or veneer. This step ensures that even internal sections look intentional and cohesive. I also added a flip-down panel or lift door for easy access when I need to retrieve or re-route cables, maintaining sleekness without sacrificing accessibility. The entire project took a weekend, but the results—clean, hidden cables and an organized media space—made a significant difference.
Many homeowners believe that choosing standard cabinetry or simple storage hacks is enough to make their kitchens and living spaces functional and stylish. However, these assumptions often lead to overlooked nuances that can drastically impact the effectiveness and longevity of your solutions. For instance, a prevalent myth is that all materials are equal—many assume that MDF is just as durable as solid wood, but in high-humidity environments, this misconception can cause serious issues like warping and swelling, as highlighted in expert studies on material performance.
A common oversight is neglecting the importance of proper weight distribution in custom cabinets. Even beautifully designed built-ins can fail prematurely if weight-bearing supports aren’t engineered correctly, risking sagging or joint failure over time. Don’t fall into the trap of relying solely on aesthetic appeal; understanding the structural nuances is key to creating lasting solutions.
When it comes to kitchen remodels, many overlook the significance of cabinet ventilation and moisture control, especially behind appliances. Without adequate airflow, cabinetry can degrade quickly, fostering mold and rot. For professional guidance, many designers recommend integrating venting solutions early in the planning stage, as discussed in the latest industry reports.
Beyond these, a sophisticated question arises: How can strategic integration of hidden compartments and adjustable shelving elevate your storage system’s versatility? Implementing dynamic solutions not only enhances accessibility but also maximizes space efficiency. For detailed strategies, exploring resources on custom cabinet ideas that incorporate such features can be incredibly beneficial.
Remember, shortcuts in design or neglecting nuanced aspects often lead to costly fixes later. Take the time to plan meticulously, considering structural integrity, material performance, and future-proofing your storage setups. If you’re interested in elevating your space with expert-approved techniques, check out articles on custom cabinets that transform your home or discover innovative storage hacks for a sleek, functional kitchen.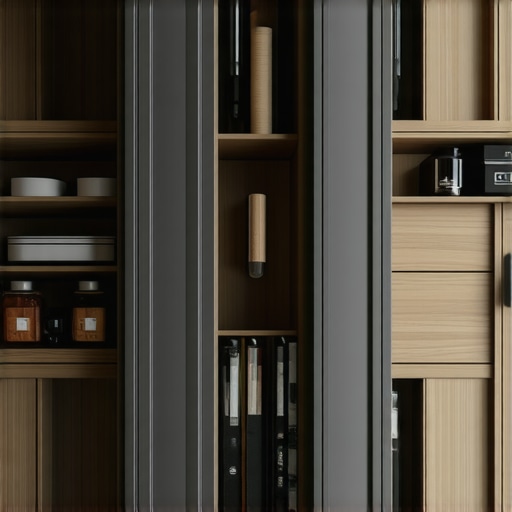
Have you ever fallen into this trap? Let me know in the comments.
Maintaining your custom kitchen cabinets and built-in storage is crucial to ensuring their longevity and continued aesthetic appeal. Investing in the right tools and adopting effective maintenance routines can save you time and money in the long run. One of my go-to tools is a high-quality orbital sander, which I use annually to smooth out minor scratches and prepare surfaces for cleaning or refinishing. Paired with a fine grit sandpaper, this tool helps keep veneer and painted surfaces looking fresh without stripping the finish. Additionally, a set of microfiber cloths and gentle cleaning solutions are indispensable for daily upkeep, preventing dust and grime buildup that can degrade materials over time.
For more stubborn stains or grease, I rely on a mix of mild dish soap and white vinegar—safe for most finishes and effective at cutting through kitchen grime. I also recommend investing in a small cordless vacuum or handheld blower to quickly remove debris from hard-to-reach corners or inside drawers, which is vital for preventing dust accumulation that can interfere with moving parts like drawer slides or hinges.
Trial and error with software can streamline your project management, too. I personally favor task management tools like Trello or Asana for scheduling regular maintenance checkups. Setting reminders for inspections—such as quarterly checks on cabinet hardware or annual assessments of built-in shelving—help catch issues early before they become costly repairs. Predicting future needs is equally important; for example, if you plan to scale your storage solutions over the next few years, understanding the load capacity of your current hardware (referencing expert studies on hardware thresholds) ensures your investments remain solid and reliable as your needs grow.
Looking ahead, I believe the trend in kitchen maintenance will lean heavily toward smart, sensor-equipped fixtures that alert homeowners to issues like leaks, excessive moisture, or structural stress. Incorporating such technology into your ongoing care routine could revolutionize how we manage our spaces and extend the life of built-ins and cabinets significantly.
How do I keep my storage systems in prime condition over time?
Regular inspections are your first line of defense. Check hinges, slides, and seals for wear and tear, applying lubricant like beeswax or silicone spray when necessary. Keep surfaces clean with gentle cleaners tailored to your materials, avoiding harsh chemicals that can erode finishes. For wooden elements, occasional conditioning with mineral oil or specialized wood polish prevents drying and cracking. For larger projects, consider consulting professionals periodically—experts in cabinetry or carpentry can perform detailed assessments and recommend upgrades or repairs, ensuring your custom solutions stay functional and stylish for decades.
To maximize your maintenance routine, try implementing a simple monthly check schedule. This proactive approach catches small problems early—like loose screws or minor surface scratches—before they escalate. For inspiration and detailed tips, explore resources like this expert guide on selecting durable hardware and finishes that stand the test of time. By staying vigilant and using the right tools, you can keep your personalized kitchen and storage solutions working flawlessly for years to come. Don’t hesitate to try out an advanced tip, such as applying a high-grade protective finish to vulnerable surfaces—you might be surprised at how much it prolongs their beauty and functionality.
Lessons That Changed My Approach to built-ins and Storage
- Embracing flexibility in designs was crucial; rigid plans often led to costly adjustments. Listening to actual usage patterns and allowing room for growth made my storage solutions more functional and enjoyable.
- Choosing durable, moisture-resistant materials from the start prevented many headaches down the line, especially in humid environments like kitchens and bathrooms. Investing in quality pays off over time.
- Involving professionals early—whether for structural insights or bespoke features—saves time and ensures the final outcome exceeds expectations. Their expertise bridges the gap between vision and reality.
- Small details, like proper cable routing behind built-ins or ventilation considerations, can significantly extend the lifespan and aesthetics of your storage. Paying attention to these nuances is worth every minute.
- Adopting a mindset of continuous improvement—regular maintenance and upgrades—keeps your built-ins looking pristine and functioning smoothly for years to come.
My Go-To Resources for Creative Storage and Built-In Brilliance
- artisan’s comprehensive guide to custom cabinets: It’s my primary reference for understanding material choices, construction techniques, and design trends, helping me craft personalized spaces that stand out.
- top industry blogs and forums: Sites like this expert guide keep me updated on innovative solutions and allow me to troubleshoot creative challenges with a community of enthusiasts.
- professional cabinetry catalogs: They offer detailed specs and finishing options, inspiring me with new ideas while ensuring my projects meet high durability standards.
- video tutorials and workshops: Visual learning accelerates my skillset, from installing hidden compartments to disguising wires behind panels. Hands-on demos provide confidence and clarity.
Seize the Moment and Transform Your Space
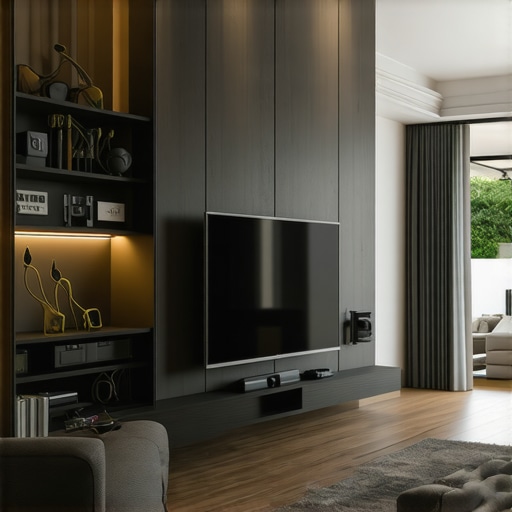
Mastering built-in storage solutions isn’t just about aesthetics—it’s about reclaiming your space, elevating functionality, and enjoying the process of creation. Every project I’ve undertaken has given me a deeper appreciation for the artistry and engineering behind custom cabinets and clever storage hacks. Remember, the most rewarding part of this journey is seeing your vision come to life in a way that perfectly fits your lifestyle. Whether it’s a sleek media wall or a hidden pantry, these personalized touches truly make a house feel like home. Don’t wait for perfect conditions—start planning today, and watch your space evolve into a sanctuary that combines form and function seamlessly.
How are you planning to apply these built-in storage ideas to your home? Share your thoughts or ask questions below—I’d love to hear about your projects!