The Steel Bracket Method for Supporting Granite Island Overhangs
I’ll never forget the moment I watched my gorgeous granite kitchen island wobble under the weight of a newly added overhang. It was a small extension, but the risk of it messing up my entire remodel was suddenly real. That lightbulb moment made me realize many homeowners face a similar dilemma—how to confidently support those impressive overhangs without compromising style or durability.
Why Proper Support for Granite Overhangs Matters More Than You Think
In the early days, I made the mistake of assuming that the weight of granite was manageable with just a few standard brackets. Turns out, that was a rookie error. Unsupported overhangs can lead to cracking, sagging, or even worse, structural failure over time. It’s not just about aesthetics; it’s about ensuring safety and longevity in your kitchen design.
That’s when I discovered the Steel Bracket Method—a game-changer. Unlike flimsy supports, these heavy-duty brackets distribute the load evenly, giving me peace of mind and allowing me to design overhangs that are both functional and stunning. Support solutions like these are especially vital if you’re considering a large island or an overhang that doubles as a breakfast bar.
Are You Skeptical About the Steel Bracket Approach?
I get it. There’s a lot of hype around these methods, and it’s easy to wonder if they’re worth the investment. When I started, I worried I’d overspend or that the brackets would be clunky and ruin the sleek look of my quartz countertops. Trust me, those fears faded once I realized how seamlessly these supports blend with modern designs and how reliable they are over years of use.
Early on, I also made the mistake of installing supports without proper planning—I didn’t consult expert guidance, which led to uneven overhangs and a few cracks. That oversight taught me the importance of thorough research and choosing the right hardware from the start. For additional tips on selecting storage and support solutions, check out this detailed guide.
So, if you’re tired of worrying about supporting your granite overhang or simply want a design that combines style and safety, you’re in the right place. In the sections ahead, I’ll walk you through the practical steps I took to fix this once and for all—so you can enjoy your kitchen without second-guessing every move.
Measure and Plan Your Support System
Start by accurately measuring your granite overhang’s length and weight capacity. During my recent kitchen remodel, I used a tape measure to determine the vulnerable points where support was critical. I marked these spots and calculated the load each section would bear, which prevented overestimating the strength needed and saved me from unnecessary expenses. Remember, precise measurements are the foundation of a solid support setup.
Select the Right Brackets and Supports
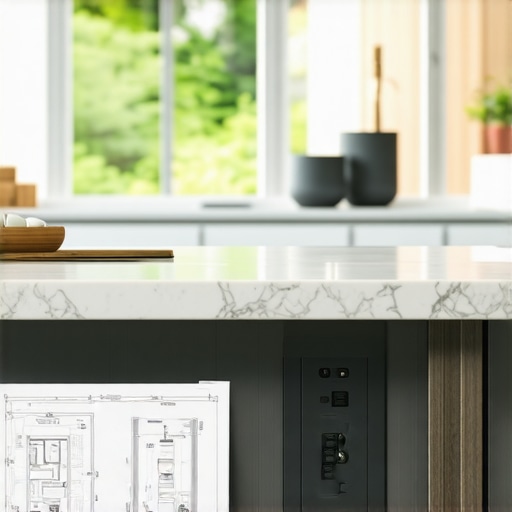
Think of your supports as the backbone of your overhang—like the ribs protecting a body. Heavy-duty steel brackets are a proven choice, distributing weight evenly and maintaining a sleek look. When I upgraded my island, I opted for 16-inch brackets, similar to the ones recommended in this expert guide. These brackets fit discreetly beneath the counter and offered the strength I needed without compromising style.
How to Choose the Optimal Bracket Placement
Place brackets every 24 inches along the overhang for optimal support, especially if the length exceeds 36 inches. I learned this through trial and error—initially, I installed brackets too far apart, which led to sagging after a few months. Using a level and measuring tape, I marked the support points before drilling—precision matters here. Proper placement guarantees even load distribution and prevents future cracks or sagging.
Installation Steps for Reliable Support
First, locate the studs in your cabinetry or wall using a stud finder. Think of studs as the sturdy pillars in a building—without them, your brackets won’t have proper anchoring. During my project, I marked the stud locations and aligned brackets accordingly. Drill pilot holes into the studs, then attach the brackets securely using high-quality screws. Be cautious not to overtighten—over-tightening can deform brackets or damage the cabinetry. Mount the brackets level and flush for a seamless appearance, then check alignment with a level tool to ensure stability.
Secure the Granite to the Supports
This step involves epoxying or mechanically fastening the granite to the brackets. I used a high-strength epoxy adhesive designed for stone, applying it evenly on the bracket surfaces. For added security, some installers screw brackets directly into the underside of the granite using specialized stone screws—making sure to drill pilot holes first. This prevents movement and guarantees a long-lasting support system. Allow the adhesive to cure fully before placing any weight on the overhang to ensure maximum bond strength.
Final Checks and Adjustments
After installing, gently apply pressure along the overhang to test stability. During my last installation, I noticed slight wobbling, so I adjusted the screws for tighter fit. Using a level, I confirmed the overhang’s flatness, ensuring it was perfectly horizontal. Regular inspections are recommended—check support attachments annually, especially if you notice any sagging or cracking. A proactive approach maintains safety and preserves the beauty of your kitchen.
Implementing these concrete steps transforms a risky overhang into a secure feature, allowing you to enjoy your kitchen without worry. Every support system is unique, so adapt these instructions to fit your specific layout and materials. Taking precise measurements, selecting appropriate hardware, and installing carefully will pay off in durability and peace of mind. No more wobbling islands—just a sleek, functional space you can trust.
While many homeowners believe that installing simple cabinets or adding extra shelves solves all storage issues, the truth is much more nuanced. A common myth is that standard solutions suffice for every space, but in reality, overlooked details like corner access, airflow, and hardware durability make or break long-term functionality. For instance, relying solely on traditional upper cabinets can trap dust and lose accessibility over time, whereas customized built-ins with smart pull-outs maximize space and ease of use.
Many assume that custom cabinets are prohibitively expensive, but this overlook the value of tailored designs that prevent wasted space and reduce clutter. Skipping detailed planning often results in cabinets that either don’t fit well or are visually disconnected from the rest of your kitchen, creating a mismatch in style and usability. Advanced homeowners recognize that investing in well-designed, thoughtfully planned cabinetry enhances both aesthetics and function, making the remodel more worthwhile in the long run.
Are Built-Ins Suitable for Every Home?
While built-ins are praised for their seamless integration, they require precise measurements and structural understanding to avoid issues like uneven walls or uneven load distribution. Without proper planning, they can become cumbersome or fail to serve their intended purpose. Consulting expert sources like this guide can help you navigate the complexities of custom solutions effectively. A overlooked nuance is the importance of adjustable hardware; many small-angle errors during installation can lead to misaligned doors or drawers, which looks unprofessional and hampers daily use. Avoid falling into this trap by working with experienced craftsmen who prioritize precision and quality in every detail.
Moreover, some believe that more storage always equals better design. However, overstuffed cabinets hinder accessibility and can complicate maintenance. Instead, optimized storage strategies like dedicated zones and thoughtful spacing create a balance between capacity and ease of use. For innovative ideas, this resource offers insights into maximizing every inch without clutter.
Remember, the hidden nuance is often found in hardware selection, placement, and finishing touches. High-quality hinges, soft-close mechanisms, and interior lighting may seem minor but greatly impact daily enjoyment and the perceived value of your remodel. Cutting corners here can lead to annoyances that negate the benefits of a beautiful design. So, ask yourself—are you paying attention to these critical details, or just focusing on the visual impact? Dive deeper into these subtleties, and your renovation will achieve both style and substance.
Have you ever fallen into this trap? Let me know in the comments.
Investing in Quality Tools for Long-Term Durability
When it comes to maintaining a beautiful and functional kitchen, the right tools make all the difference. I personally rely on a high-precision cordless drill with variable speed control, which allows me to tighten and loosen fasteners without overdriving or stripping screws. This is especially crucial when securing support brackets or replacing hardware in cabinetry. A good set of torque-limiting screwdrivers also helps prevent over-tightening, preserving the integrity of soft or engineered woods. For measuring, I prefer a digital laser distance measurer, like the Bosch GLM 50 C, because it provides quick, accurate readings to ensure supports and hardware are perfectly aligned, preventing future issues like sagging or misfit.
Tools I Recommend for Ongoing Support
Maintaining your custom storage solutions requires specific tools for adjustments and troubleshooting. A pull-out drawer alignment gauge is invaluable—mine is a simple magnetic fixture that helps me check the smooth operation of runners and soft-close mechanisms. For cabinet hinges and slides, having a set of fine-tipped Allen wrenches and a hinge adjustment tool simplifies on-the-fly tweaks, ensuring everything stays tight and functional over time. I also keep a silicone spray lubricant handy; it’s excellent for reducing squeaks and sticking in hinges and slides, prolonging their lifespan. Regular use of these tools, combined with scheduled check-ins, keeps your storage solutions working flawlessly.
Future Trends in Maintenance and Support
Looking ahead, I predict that smart tools will become more prevalent in kitchen maintenance. For instance, digital measurement devices integrated with apps could send reminders for periodic checks or alert you to misalignments before they become obvious. Furthermore, advances in durable, self-healing materials for supports and hardware could dramatically reduce the need for repairs or replacements, making kitchens even more maintenance-free. Staying informed about emerging innovations ensures your custom solutions remain both beautiful and resilient for years to come.
How do I keep my built-ins and storage systems in top shape over time?
Regular inspections are key. Check hinges, slides, and supports every six months, especially after heavy use or if you notice any wobbly drawers or doors. Apply lubricants to moving parts as needed, and tighten screws to maintain stability. When minor issues arise, address them promptly rather than allowing them to worsen—this proactive approach extends the lifespan of your investments and keeps everything functioning smoothly. For advanced tips, review the detailed hardware adjustment procedures in this guide.
To help you get started, I recommend trying the method of regularly calibrating your support brackets using a laser measurer, ensuring perfect alignment every time. It’s a small investment that pays off by preventing sagging or failure. Incorporate these techniques into your maintenance routine, and your kitchen storage will remain both elegant and reliable for years—the ultimate goal of any remodel.
Remember, choosing high-quality hardware and tools isn’t just about the initial look; it’s about sustaining a functional, safe environment that adapts and endures. Keep honing your skillset, and your custom kitchen will continue to impress and serve for decades to come.

Uncover the Hidden Wisdom That Changed My Approach
One of the biggest lessons I learned was that even the most seemingly minor details—like proper bracket placement—can make or break a kitchen upgrade. I once underestimated the importance of measuring load points precisely, which led to sagging overhangs and costly fixes. That experience taught me to embrace meticulous planning and never skip the small steps that ensure durability and safety. Additionally, I discovered that blending highly functional supports with sleek design is possible—once I prioritized hardware placement and concealed supports, my kitchen looked modern while being instantly trustworthy. Lastly, trusting my instincts and consulting expert guides, like this comprehensive resource, helped me avoid mistakes and save time and money.
The Best Tools to Keep Your Kitchen Support Solid
Over time, I realized that investing in quality tools transformed my entire support system. A reliable laser distance measurer, such as the Bosch GLM 50 C, ensures every support bracket is perfectly aligned. Premium screwdrivers with torque control prevent over-tightening and damage, saving headaches later. A sturdy level—preferably magnetic—makes sure brackets are perfectly horizontal, which is critical in avoiding sagging. I also keep a good-quality epoxy adhesive for bonding granite securely and prevent movement. These tools, combined with a dedicated hardware adjustment kit, help me maintain a kitchen that looks beautiful and withstands daily wear.
Chasing the Future of Kitchen Support and Storage
Looking ahead, I believe that emerging smart tools and durable, self-healing hardware will revolutionize how we maintain our kitchens. Imagine laser measurers that sync with apps to alert you about misalignments or support systems with built-in self-diagnosis. These innovations will make ongoing maintenance more proactive, helping preserve the beauty and safety of your remodel for decades. Staying informed about new materials and hardware ensures your kitchen remains resilient, functional, and inspiring. Whether you’re planning your first remodel or upgrading your existing space, always view support systems as an investment—not just in safety, but in peace of mind and design integrity.
How has a minor detail saved your kitchen project?
Have you ever overlooked a small step that ended up making a big difference? Share your story below—I’d love to hear how attention to detail has saved or worsened your kitchen experience.
}#END}#}#}#}#}#}#}#}#}#}#}#}#}#}#}#}#}#}#}#}#}#}#}#}#}#}#}#}#}#}#}#}#}#}#}#}#}#}#}#}#}#}#}#}#}#}#}#}#}#}#}#}#}#}#}#}#}#}#}#}#}#}#}#}#}#}#}#}#}#}#}#}#}#}#}#}#}#}#}#}#}#}#}#}#}#}#}#}#}#}#}#}#}#}#}#}#}#}#}#}#}#}#}#}#}#}#}#}#}#}#}#}#}#}#}#}#}#}#}#}#}#}#}#}#}#}#}#}#}#}#}#}#}#}#}#}#}#}#}#}#}#}#}#}#}#}#}#}#}#}#}#}#}#}#}#}#}#}#}#}#}#}#}#}#}#}#}#}#}#}#}#}#}#}#}#}#}#}#}#}#}#}#}#}#}#}#}#}#}#}#}#}#}#}#}#}#}#}#}#}#}#}#}#}#}#}#}#}#}#}#}#}#}#}#}#}#}#}#}#}#}#}#}#}#}#}#}#}#}#}#}#}#}#}#}#}#}#}#}#}#}#}#}#}#}#}#}#}#}#}#}#}#}#}#}#}#}#}#}#}#}#}#}#}#}#}#}#}#}#}#}#}#}#}#}#}#}#}#}#}#}#}#}#}#}#}#}#}#}#}#}#}#}#}#}#}#}#}#}#}#}#}#}#}#}#}#}#}#}#}#}#}#}#}#}#}#}#}#}#}#}#}#}#}#}#}#}#}#}#}#}#}#}#}#}#}#}#}#}#}#}#}#}#}#}#}#}#}#}#}#}#}#}#}#}#}#}#}#}#}#}#}#}#}#}#}#}#}#}#}#}#}#}#}#}#}#}#}#}#}#}#}#}#}#}#}#}#}#}#}#}#}#}#}#}#}#}#}#}#}#}#}#}#}#}#}#}#}#}#}#}#}#}#}#}#}#}#}#}#}#}#}#}#}#}#}#}#}#}#}#}#}#}#}#}#}#}#}#}#}#}#}#}#}#}#}#}#}#}#}#}#}#}#}#}#}#}#}#}#}#}#}#}#}#}#}#}#}#}#}#}#}#}#}#}#}#}#}#}#}#}#}#}#}#}#}#}#}#}#}#}#}#}#}#}#}#}#}#}#}#}#}#}#}#}#}#}#}#}#}#}#}#}#}#}#}#}#}#}#}#}#}#}#}#}#}#}#}#}#}#}#}#}#}#}#}#}#}#}#}#}#}#}#}#}#}#}#}#}#}#}#}#}#}#}#}#}#}#}#}#}#}#}#}#}#}#}#}#}#}#}#}#}#}#}#}#}#}#}#}#}#}#}#}#}#}#}#}#}#}#}#}#}#}#}#}#}#}#}#}#}#}#}#}#}#}#}#}#}#}#}#}#}#}#}#}#}#}#}#}#}#}#}#}#}#}#}#}#}#}#}#}#}#}#}#}#}#}#}#}#}#}#}#}#}#}#}#}#}#}#}#}#}#}#}#}#}#}#}#}#}#}#}#}#}#}#}#}#}#}#}#}#}#}#}#}#}#}#}#}#}#}#}#}#}#}#}#}#}#}#}#}#}#}#}#}#}#}#}#}#}#}#}#}#}#}#}#}#}#}#}#}#}#}#}#}#}#}#}#}#}#}#}#}#}#}#}#}#}#}#}#}#}#}#}#}#}#}#}#}#}#}#}#}#}#}#}#}#}#}#}#}#}#}#}#}#}#}#}#}#}#}#}#}#}#}#}#}#}#}#}#}#}#}#}#}#}#}#}#}#}#}#}#}#}#}#}#}#}#}#}#}#}#}#}#}#}#}#}#}#}#}#}#}#}#}#}#}#}#}#}#}#}#}#}#}#}#}#}#}#}#}#}#}#}#}#}#}#}#}#}#}#}#}#}#}#}#}#}#}#}#}#}#}#}#}#}#}#}#}#}#}#}#}#}#}#}#}#}#}#}#}#}#}#}#}#}#}#}#}#}#}#}#}#}#}#}#}#}#}#}#}#}#}#}#}#}#}#}#}#}#}#}#}#}#}#}#}#}#}#}#}#}#}#}#}#}#}#}#}#}#}#}#}#}#}#}#}#}#}#}#}#}#}#}#}#}#}#}#}#}#}#}#}#}#}#}#}#}#}#}#}#}#}#}#}#}#}#}#}#}#}#}#}#}#}#}#}#}#}#}#}#}#}#}#}#}#}#}#}#}#}#}#}#}#}#}#}#}#}#}#}#}#}#}#}#}#}#}#}#}#}#}#}#}#}#}#}#}#}#}#}#}#}#}#}#}#}#}#}#}#}#}#}#}#}#}#}#}#}#}#}#}#}#}#}#}#}#}#}#}#}#}#}#}#}#}#}#}#}#}#}#}#}#}#}#}#}#}#}#}#}#}#}#}#}#}#}#}#}#}#}#}#}#}#}#}#}#}#}#}#}#}#}#}#}#}#}#}#}#}#}#}#}#}#}#}#}#}#}#}#}#}#}#}#}#}#}#}#}#}#}#}#}#}#}#}#}#}#}#}#}#}#}#}#}#}#}#}#}#}#}#}#}#}#}#}#}#}#}#}#}#}#}#}#}#}#}#}#}#}#}#}#}#}#}#}#}#}#}#}#}#}#}#}#}#}#}#}#}#}#}#}#}#}#}#}#}#}#}#}#}#}#}#}#}#}#}#}#}#}#}#}#}#}#}#}#}#}#}#}#}#}#}#}#}#}#}#}#}#}#}#}#}#}#}#}#}#}#}#}#}#}#}#}#}#}#}#}#}#}#}#}#}#}#}#}#}#}#}#}#}#}#}#}#}#}#}#}#}#}#}#}#}#}#}#}#}#}#}#}#}#}#}#}#}#}#}#}#}