5 Hidden Appliance Garages That Fix Countertop Clutter Fast
It was a typical Saturday morning when I finally lost it. Standing in my cluttered kitchen, I looked around at the chaos of appliances—blender, toaster, coffee maker—all sprawling over every available surface. The countertop had become a battleground of gadgets vying for space, and I realized I was tired of feeling overwhelmed every time I cooked or tried to find that one specific blender blade. That lightbulb moment hit me hard: there had to be a better way. So, I started digging into solutions that could hide away these everyday nuisances and reclaim my kitchen’s peaceful vibe.
The Hidden Appliance Garages: Your Fast-Track to a Cleaner Countertop
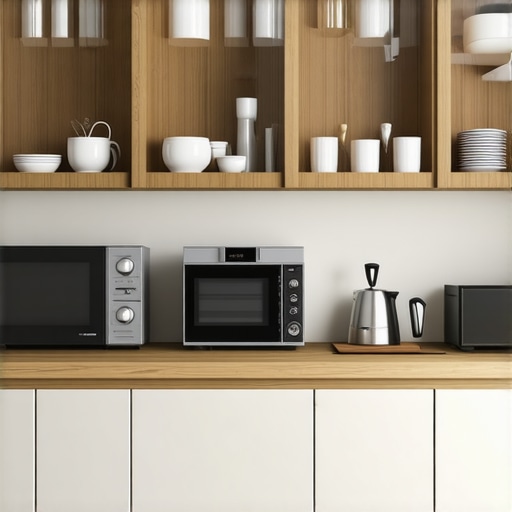
Imagine your kitchen countertops—clean, spacious, and inviting. No more cluttered surfaces. Instead, sleek storage tucked out of sight—yet easily accessible when you need it. That’s what hidden appliance garages offer. These clever storage spaces are often overlooked but can dramatically transform your cooking experience. After trying several approaches, I found that incorporating one or more of these hidden garages — strategically placed and thoughtfully designed — can make even small kitchens feel expansive and organized.
But I know what you’re thinking: “Do these garages really work, or are they just hype?” Well, I’ll admit, I was skeptical at first. I’d made the mistake early on of simply stuffing appliances into random cabinets, which only made things worse. When I built my first custom cabinet with an integrated appliance garage, I learned that proper execution is everything, and you can see how to do it right in my other guide on [custom cabinets as a game-changer in your kitchen remodel journey](https://artisancabinetworkz.com/custom-cabinets-as-a-game-changer-in-your-kitchen-remodel-journey).
Before I get into the how-tos, let’s clear up some common doubts.
Is Installing an Appliance Garage Actually Worth the Hype?
Initially, I worried that creating a dedicated space for appliances would be a waste—it might be cumbersome and unnecessary. But I learned the hard way that small details make a huge difference. A mugging mistake I made was underestimating the importance of measuring carefully; I didn’t account for door swing paths or countertop clearance, which wreaked havoc during installation. That taught me to plan meticulously—something I recommend you do too. Properly designed, these garages can hide appliances with style and keep your counters clear, which, according to expert tips on [maximizing space with innovative storage solutions](https://artisancabinetworkz.com/maximize-space-with-innovative-storage-solutions-for-every-room), is crucial for a stress-free kitchen.
As we move forward, I’ll share the best tips, tricks, and ideas to help you create your own hidden appliance garages—so you can finally enjoy a clutter-free, joyful cooking space. Ready to get started?
Plan Your Space Before Cutting Into Cabinets
Start by measuring your appliances and available space meticulously. For example, I once used a tape measure to determine the width of my upright blender and then added an extra inch for clearance, ensuring it would slide comfortably into its new hideaway. Sketch out a layout that allows easy access without obstructing door swings or having appliances protrude when stored. Think of this as designing a custom outfit—every measurement counts for a perfect fit.
Choose the Right Materials and Hardware
Select durable, moisture-resistant materials such as plywood or HMR (High Moisture Resistance) board to withstand kitchen humidity. For hinges and slides, opt for soft-close, heavy-duty options to prevent slamming and wear over time. I learned from my first project that inexpensive slides failed after a few months, so investing in quality hardware like those detailed at this guide ensures longevity.
Cut and Assemble the Cabinet Frame Accurate to Specifications
Use a table saw or circular saw with a straightedge to cut panels precisely. For a specific task, I cut my side panels to 18 inches wide, then used clamps and glue to assemble the frame, ensuring squareness. Think of this stage as building a sturdy box; if the corners aren’t perfect, the entire structure can warp or misalign. Precise measurement and clamps are your best friends here.
Install Sliding Mechanisms and Test Fit
Attach heavy-duty slides according to manufacturer instructions, ensuring they are level and aligned. During my installation, I initially misaligned one slide and had to redo it, which cost time but saved me frustration later. Use a level and a helper if needed. Once installed, slide in a test appliance to verify smooth operation and clearance. This trial-and-error step saves many headaches down the line.
Seal and Finish for a Seamless Look
Finish the cabinet with paint or veneer that matches your existing cabinetry. Seal all edges with edge banding or trim to hide raw cuts. I applied a coat of matte finish to reduce fingerprints and scratches, similar to techniques discussed at this resource. In my case, the final look was sleek, and the appliances disappeared, keeping my countertops clear.
Test the System with Real Appliances
Insert your appliances one by one, checking ease of access and clearance. Remember, appliances vary in size, so consider stacking smaller items or customizing compartments for specific gadgets. I encountered a tricky situation with my toaster, which had a wider cord clearance, prompting me to adjust the shelving height slightly—highlighting the importance of flexible design. Document these measurements for future modifications or projects.
When it comes to optimizing kitchen storage, many homeowners and even some designers fall into a trap of oversimplified solutions that don’t account for nuanced details. A prevalent misconception is that installing generic cabinets or standard built-ins will automatically deliver a perfect, clutter-free kitchen. However, the devil is in the details, and overlooking these nuances can lead to costly mistakes and unsatisfactory results. For example, many believe that deep drawers are universally better than cabinets, but without proper internal organization and precise measurements, these can become unwieldy and actually hinder efficiency. It’s essential to recognize that *customization and attention to detail* are key. In fact, the story is different when you involve expert-level planning, such as precise measurements for appliance heights or understanding the material behaviors in high-humidity environments—details that are often missed by beginners. Failing to consider these subtleties often results in issues like misaligned doors, sticky hinges, or inaccessible storage zones, which can diminish the overall functionality of your kitchen. Another common myth is that built-in solutions are only for large spaces—they are invaluable in smaller kitchens when thoughtfully implemented, such as utilizing dead space for hidden compartments or integrating vertical dividers. Remember, a well-designed storage solution like this not only saves space but also streamlines workflow, making your daily routines easier. As highlighted in expert guides, the best strategies involve detailed planning, custom cabinetry tailored to specific needs, and choosing the right hardware and materials to ensure longevity and performance. Don’t underestimate the importance of these nuances, as they often determine the difference between a well-organized kitchen and one plagued by clutter and inefficiency.
Are there advanced techniques to ensure your custom cabinets stand the test of time and usage?
Absolutely. Incorporating high-quality hinges and slides, such as soft-close or self-closing mechanisms, can prevent wear and tear over the years. Moreover, understanding material properties—like choosing moisture-resistant plywood for humid environments—can dramatically improve durability. For those interested in elevating their kitchen design, exploring innovative storage solutions and smart optimizations is recommended. Check out [expert tips on selecting storage solutions for a perfect kitchen upgrade](https://artisancabinetworkz.com/expert-tips-on-selecting-storage-solutions-for-a-perfect-kitchen-upgrade). Remember, a successful kitchen remodel hinges on mastering these intricate details. Have you ever fallen into this trap? Let me know in the comments.Achieving a clutter-free, functional kitchen isn’t just about good design—it’s about reliable maintenance and selecting the right tools to keep everything working smoothly over time. One essential tool I’ve come to rely on is a high-quality, magnetic level. I use this during every installation of cabinets or built-ins because precision is critical to prevent misalignments that can cause doors to warp or drawers to stick later on. For example, my favorite is the Kraft Tool Magnetic Aluminum Level, which offers durability and a magnetic edge to hold against metal surfaces, making it easier to check alignment without constantly repositioning. For software solutions, I recommend Trello or Asana to track your maintenance schedules, inventory, and upcoming projects. These platforms help me keep organized—setting reminders for hardware tightening, hinge lubrication, or hardware upgrades, which are often overlooked but vital for longevity. As your kitchen evolves, staying proactive with regular inspections prolongs the life of your cabinetry, hardware, and surfaces. I also swear by silicone spray, like the 3-IN-ONE Multi-Purpose Spray, for lubricating drawer slides and hinges, preventing squeaks and sticky mechanisms—saving you costly repairs or replacements down the line. Looking ahead, incorporating smart sensors in cabinet interiors could further revolutionize long-term care, alerting you when hinges need oil or when moisture levels climb, especially in humid climates. This trend is emerging rapidly, with IoT tech making maintenance more intuitive and less time-consuming.
How do I maintain my storage solutions without hassle?
I recommend establishing a routine inspection schedule, such as quarterly checks. Use your magnetic level to ensure cabinets stay plumb and slides operate smoothly. Regularly applying silicone lubricant prevents buildup and keeps hardware functioning flawlessly. Also, adopt digital tools like maintenance apps to set reminders—this ensures you catch small issues before they turn into expensive repairs. Finally, always invest in high-quality hardware and materials—cheap components may save money upfront but often fail prematurely, costing you more in the long run. If you’re interested in more detailed guides on upkeep, check out my comprehensive approach to cabinetry maintenance. Start today by trying that silicone spray on your drawer slides—you’ll be surprised how much easier it makes daily use and how it prolongs service life. Remember, a little preventive effort now saves significant headaches later—your kitchen’s efficiency depends on it.
Embarking on a kitchen transformation journey has taught me that every detail — especially hidden storage — can make or break your space’s functionality. My biggest revelation? Precision planning and personalized solutions are the secrets that elevate a kitchen from good to extraordinary. Over time, I realized that conventional storage approaches often fall short because they overlook the nuanced needs of real households. Instead, embracing custom, thoughtful designs has led me to enjoy a clutter-free, efficient kitchen that truly feels like a sanctuary.
The Unspoken Rules That Transformed My Storage Game
- Measure Twice, Cut Once: I can’t stress enough the importance of meticulous measurements. One tiny miscalculation can turn a sleek appliance garage into an inaccessible nightmare. A tool that became my best friend? A high-quality digital caliper. Trust me, it saves time and frustration, making your custom cabinets fit like a glove.
- Prioritize Material Durability: Using moisture-resistant plywood and high-quality hardware has been a game changer. I learned this the hard way when cheaper materials warped under humidity. Now, I source from trusted suppliers and focus on longevity, knowing my investment will pay off in years of smooth operation.
- Think Beyond the Obvious: Hidden storage isn’t just about cramming appliances out of sight. It’s about creative use of dead zones—like toe-kicks, under-sink spaces, and wall cavities—transformed with custom cabinetry. These tiny tweaks drastically reduce clutter and improve flow.
Tools and Resources That Truly Made a Difference
- Custom cabinet guides: They helped me understand how tailored storage can fit my unique kitchen layout, maximizing every inch.
- Quality hardware reviews: Investing in durable slides and hinges prevented me from costly repairs down the line.
- Design inspiration projects: Seeing real-world examples boosted my confidence in creating a cohesive aesthetic combined with functionality.
Turn Your Kitchen Dreams Into Reality Today
Remember, the journey to a perfectly organized kitchen isn’t about chasing perfection but about making smart, personalized choices that suit your lifestyle. Whether you’re considering those custom drawers, hidden spice racks, or smart shoe storage in the mudroom, every improvement brings you closer to a space that works for you. Mastering these details will empower you to design a kitchen that’s not only beautiful but also a joy to live in. So, why wait? Take the first step toward transforming your space into a tailored haven that reflects your needs and style.
Have you ever struggled to find the perfect spot for a bulky appliance or hidden that clutter? Share your stories below — I’d love to hear how you’re making your kitchen uniquely yours!