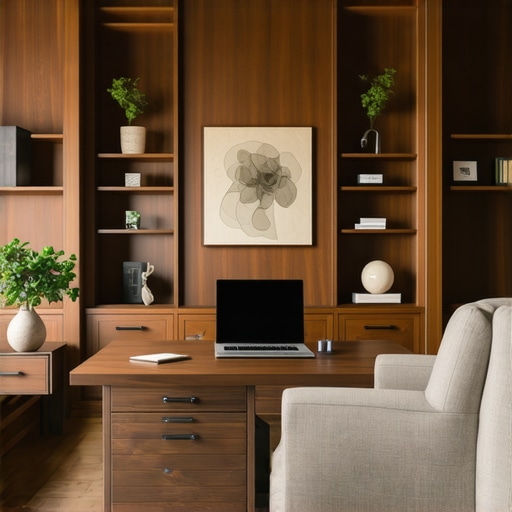
Why Solid Walnut Is Worth the Premium for Home Office Built-Ins
It was a frustrating weekend at my remodel site—my hand trembling slightly as I tried to match the new cabinetry with the existing floors. The veneer on my cheaper cabinets started peeling just a few months after installation, leaving me with a soggy feeling I couldn’t shake. That was the lightbulb moment: I realized that cutting corners on quality cost me far more in the long run. Since then, I’ve become convinced that investing in solid walnut for my home office built-ins was one of the smartest decisions I’ve made.
The Warmth and Durability That Lasts a Lifetime
Choosing the right material isn’t just about looks; it’s about creating something that endures. Solid walnut offers a richness and depth unmatched by synthetic veneers or cheaper woods. Its fine grain and natural oils provide resistance to warping and moisture—common culprits behind early cabinet failure. Unlike veneer, which can peel or delaminate over time, solid walnut ages gracefully, developing a beautiful patina that tells a story of years well-lived.
But why do so many homeowners still hesitate to step up to solid walnut? Cost, mainly. Premium materials seem like a splurge initially, especially when you’re trying to keep a remodel budget in check. However, consider this: according to a recent study by Houzz, the cost of replacing low-quality cabinets within a decade far exceeds the investment in high-quality, durable options from the start. It’s a classic case of paying now or paying twice later.
My fellow DIYers or homeowners who’ve found themselves disillusioned with quick-fix solutions may worry about the price tag. I get it—I made this mistake early on, thinking I could save a few bucks. Instead, I ended up with cabinets that sagged and stained easily, forcing me into costly repairs or replacement. That’s why I’m such an advocate for carefully selecting high-quality materials like solid walnut.
In upcoming sections, I’ll guide you through how to identify the best walnut, what to look for in craftsmanship, and how to incorporate this premium wood into beautiful, functional built-ins. If you’ve faced this dilemma—whether to settle for less or to invest in the future—stay tuned. The next steps will help you transform your home office into a space that’s both stunning and built to last.
Select the Right Walnut for Your Built-Ins
Start by choosing the highest grade of walnut available, such as FAS or select grade, which ensures minimal imperfections and a consistent grain pattern. Visit local lumber yards or specialty suppliers to inspect the wood in person, checking for any voids or warping. I once spent an afternoon at a supplier examining a batch, feeling each plank’s weight and inspecting the grain before selecting a few perfect pieces for my project. This hands-on approach guarantees you’ll get durable, beautiful material that ages gracefully and resists moisture.
Prepare Your Workspace and Cut Accurately
Measure your space meticulously, using a laser distance meter for precise readings. Sketch your design carefully, marking cut lines directly on the wood with a sharp pencil. Think of this as drafting a map before embarking on a journey; accuracy here saves time and material wastage later. I recall a time when I mistakenly cut a panel an inch too short—causing a delay while I reordered the wood. To avoid that, double and triple-check measurements and take your time with the layout.
Joinery and Assembly Techniques
Use strong, concealed joinery methods like dado and rabbet joints for cabinet sides and shelves, which provide stability without visible fasteners. Drill pilot holes before screwing to prevent splitting, especially in dense walnut. I once assembled a corner cabinet where I used pocket-hole screws reinforced with wood glue, resulting in a seamless, sturdy piece. Clamping pieces firmly during assembly ensures tight joints. Remember, precision during this stage guarantees the lasting integrity of your built-in units.
Finish to Enhance and Protect the Wood
Sand the surfaces smoothly through multiple grit levels, ending with a 220-grit for a polished feel. Apply a penetrating oil finish like Danish oil or tung oil, which enhances the grain and provides a natural look while protecting against moisture. I experimented with finishing my cabinet doors, applying thin coats and buffing lightly between layers, achieving a rich, lustrous surface that deepened the walnut’s natural beauty. Avoid over-application to prevent tackiness and uneven color.
Design Smart Storage with Collaboration
Plan your storage units to maximize space, incorporating features like pull-out shelves, soft-close drawers, and dedicated spice racks. Use https://artisancabinetworkz.com/smart-storage-ideas-to-maximize-your-kitchen-space-this-year to inspire your layout, ensuring everything is within easy reach. When I built a custom spice drawer, I integrated a vertical divider, making it easy to find herbs and spices without rummaging. Use internal dividers and adjustable shelving to adapt storage to your needs, making everyday access effortless and clutter-free.
Incorporate Built-ins for Seamless Integration
Design your cabinets to align with existing architectural elements, creating a cohesive look. Use full-extension slides for deep drawers to access items at the back easily. Think of it as customizing a wardrobe that fits perfectly; attention to detail transforms functionality into elegance. During my project, I created a recessed niche for my microwave, which freed up counter space and styled the appliance as part of the cabinetry—visual harmony and efficiency in one move. Refer to https://artisancabinetworkz.com/transform-your-kitchen-with-custom-cabinets-expert-guide-for-2025 for advanced ideas.
Final Assembly and Adjustments
Once assembled, check all doors and drawers for smooth operation. Adjust hinges like Blum or Soft-Close, ensuring gaps are uniform and doors close flush. Use a carpenter’s square to verify 90-degree angles and tweak as needed. I learned the hard way that a tiny misalignment can cause doors to stick or not close properly; hence, tedious adjustments right after installation guarantee a professional finish. Visit https://artisancabinetworkz.com/how-to-adjust-concealed-hinges-to-level-uneven-cabinet-doors for detailed hinge adjustment techniques.
Many homeowners assume that designing a kitchen or installing built-ins is straightforward—pick a style, choose some cabinetry, and go. However, there are subtle pitfalls that even seasoned DIYers often miss, leading to costly mistakes or designs that fall short of their potential.
Why Bigger Isn’t Always Better or Smarter
One common myth is that increasing storage space or adding more cabinets automatically creates a better kitchen. In reality, overstuffing your space can hinder movement, create cluttered looks, and diminish open-concept appeal. An expert approach involves strategic planning—prioritizing quality over quantity and designing with intention. For instance, incorporating smart storage solutions like pull-out shelves or hidden compartments maximizes usability without sacrificing aesthetics. To get inspiration on this, check out smart storage ideas that elevate your kitchen’s functionality.
Another frequent misconception involves the choice of materials. Many believe that cheaper woods or veneers suffice, but this often leads to disappointing longevity and appearance. A nuanced understanding of materials, such as the advantages of white oak’s durability and finishes, helps prevent future disappointments. Advanced homeowners focus on details like grain consistency, moisture resistance, and aging properties, which are often overlooked in initial planning.
When it comes to built-ins, the trap many fall into is thinking modular or pre-made solutions are enough. This misses the importance of custom design that fits your home’s unique architecture and your specific needs. Tailored built-ins ensure seamless integration, whether it’s a recessed niche for appliances or a bespoke bookshelf that aligns perfectly with crown molding. For ideas to make your built-ins truly stand out, explore custom cabinet ideas and realize how customization transforms spaces.
Advanced storage isn’t just about space but how you organize access. The misconception that all cabinets should have standard shelves neglects the benefits of specialized options like tilt-out trays, adjustable dividers, and integrated charging stations. These nuanced features can drastically improve daily use, especially in small or busy kitchens. For a comprehensive review of innovative solutions, visit storage innovations that make your remodel smarter.
Finally, misconceptions about renovation timelines and budgets can cause frustration. Underestimating the complexity of detailed cabinetry and custom solutions often leads to delays and overspending. Working with a skilled professional who understands these nuances ensures realistic expectations and a finished result that exceeds simple functionality. Reach out to experts who can help you navigate these hidden challenges with confidence.
Understanding these subtle nuances distinguishes average remodels from truly exceptional ones. It’s all in the details—craftsmanship, material choices, and thoughtful design—that ensure your investments endure and impress over time. Have you ever fallen into this trap? Let me know in the comments and share your experience.When investing in custom kitchen storage and built-ins, having the right tools and maintenance habits is essential to ensure longevity and peak performance. From selecting precise equipment to establishing routine care, these practices keep your cabinets and storage solutions functioning flawlessly over time.
Which Tools Make the Difference in Maintaining Your Cabinets
One indispensable tool I recommend is a high-quality cordless oscillating multi-tool. Its versatility allows for gentle sanding, minor adjustments, or even removing old paint without damaging the wood. I personally use the Dremel Multi-Max because its variable speed and interchangeable accessories provide the control needed for delicate walnut surfaces, preventing gouging or uneven wear. Coupled with a soft rubber abrasive pad, it can tackle accumulated grime or scratches effectively, extending the cabinet’s aesthetic life.
Next, invest in a digital moisture meter. Proper humidity levels are critical for preventing warping or cracking—especially in solid hardwoods like walnut used in custom cabinets. I use an affordable yet precise model from General Tools, which helps me monitor indoor conditions and apply preventative measures, like dehumidifiers or air purifiers, during seasonal fluctuations. Ensuring stable moisture content in your wood minimizes expansion and contraction, preserving joint integrity and finish quality.
For finishing tasks, a dual-action (DA) electric sander dustless system—such as the Festool RO 150 FEQ—makes your finish surfaces smoother and more uniform. It also reduces dust, helping you maintain a cleaner workspace, which is vital for detailed cabinetry where imperfections are more noticeable. I use this sander for applying oil finishes, as it creates an even, matte surface that enhances walnut’s natural beauty without dulling the grain.
Keeping Built-ins Functional and Beautiful Over Time
Routine inspections are your best defense against minor issues turning into costly repairs. Regularly check hinges and slides for smooth operation; lubricate with a premium silicone spray like undetectable dry lubricant. This prevents squeaking and ensures, for example, soft-close mechanisms last well beyond their warranty. For stubborn hinges that squeak despite lubrication, I advise using a small brush to remove dust or debris and then applying the lubricant sparingly.
Clean your cabinets with a gentle, pH-neutral cleaner and a soft microfiber cloth. Avoid harsh abrasives or ammonia-based products that can damage finish layers. I personally prefer a mixture of mild dish soap and distilled water, followed by a dry buff, to maintain walnut veneer or solid wood. Incorporate periodic oiling with penetrating wood oils to refresh the finish—particularly in high-traffic or moisture-prone areas. Doing so helps the wood develop a rich patina, protecting it against moisture ingress and surface staining.
Future Trends in Maintenance and Tools
Looking ahead, smart maintenance systems might become more prevalent. Imagine cabinet hinges with Bluetooth connectivity that alert you when a screw is loose or lubricants running low. Such innovations could revolutionize how we care for built-ins, making proactive upkeep effortless. I predict handheld IoT devices will become common for real-time moisture and structural monitoring, enabling homeowners to address issues before they escalate.
If you’re inspired to upgrade your maintenance routine, I recommend trying out a dual-action sander. Its ability to deliver smooth, even finishes in less time will undoubtedly improve your cabinetry’s lifespan and appearance. Stay ahead of wear and tear by integrating these advanced tools and habits into your remodeling process.
How do I maintain my built-ins to ensure they last?
Consistency is key. Regularly inspect hardware, clean surfaces gently, and reapply protective finishes when they show signs of wear. Monitoring moisture levels with a reliable meter or considering future smart maintenance gadgets can prevent the most common causes of deterioration. Remember, proactive care today saves you from costly replacements tomorrow. For tailored guidance or professional support, don’t hesitate to reach out to our experts. By adopting these practices, your custom cabinets will serve you beautifully for decades to come, ensuring your investment continues to pay off.
Lessons from the Trenches that Changed My Perspective
One key insight I realized was that rushing the material selection often leads to regrets down the line. Waiting to source high-grade walnut meant I avoided surprises like warped or inconsistent planks, saving me headaches later. Additionally, I learned that proper finish work isn’t just about aesthetics—it’s crucial for protecting your investment against moisture and daily wear. Trusting craftsmanship over shortcuts became the guiding principle in my remodel journey. Finally, I discovered that integrating smart storage solutions, inspired by expert designs, can truly elevate both form and function, making all the difference in a lasting aesthetic.
Tools and Resources That Make This Journey Real
My essential toolkit included a high-precision moisture meter, which helped me maintain optimal humidity levels during installation—preventing warping and cracking. For finishing, I relied on a dual-action, dustless sander to achieve a flawless, even surface—crucial when working with beautiful walnut grain. To design my built-ins, I turned to innovative platforms like storage solutions for modern kitchens, pushing me to think beyond traditional layouts. Lastly, tapping into expert advice via custom cabinet ideas ensured my project stayed aligned with both quality and style.
Your Next Step to Lasting Beauty and Functionality
Embrace the opportunity to craft built-ins that truly reflect your home’s character and your personal style—there’s a satisfying confidence that comes with investing intelligently. Every detail, from material choice to finish, contributes to a durable, timeless piece that will serve your family for decades. Remember, meticulous planning, the right tools, and expert resources are your greatest allies on this journey. I encourage you to start imagining how your space can be transformed, knowing that quality craftsmanship today pays dividends tomorrow. Your dream kitchen with built-ins that last is within reach—dare to make it real!