How to Use Every Inch of Your Toe-Kick for Secret Step Stool Storage
One morning, I crouched down to grab the last of my cleaning supplies from behind the kitchen cabinet, only to realize I had no idea what was hidden behind that toe-kick panel. It was a real eye-opener—those few inches at the bottom of your cabinets are often overlooked or dismissed as dead space. But I discovered something incredible: with a little innovation, that space can become your secret weapon for neat, accessible storage.
Unlocking the Hidden Potential of Your Toe-Kick
If you’re like me, you’ve likely cursed that tiny gap at the base of your cabinets, wishing it could serve a purpose instead of just trapping dirt and dust. Well, the truth is, that space offers more than meets the eye. It’s an untapped resource waiting to be harnessed for clever, discreet storage.
Imagine a shallow, pull-out platform concealed right under your feet, accessible when needed but hidden when not. I promise, it’s a game-changer. Today, we’ll explore how to transform that mundane area into a functional, secret compartment for step stools, cleaning supplies, or even wine bottles—whatever suits your lifestyle and kitchen layout.
Is Using Your Toe-Kick for Storage Really Worth the Hype?
I used to think this was just a clever idea—fancy, but impractical. I remember a misstep early on where I installed a too-heavy panel that jammed after a month. That mistake taught me the value of proper planning. Now, I approach toe-kick storage as a serious upgrade, not just a trendy hack. And according to industry experts, maximizing every inch in your kitchen isn’t just about convenience; it can significantly boost your space efficiency, especially in homes with limited square footage. For more inspiration, check out custom cabinet ideas that transform your home’s style.
So, if you’ve ever faced a cluttered countertop or struggled to find a spot for that handy step stool, you’re in the right place. Let’s dive into practical, proven ways to turn that gap into a hidden storage powerhouse without sacrificing style or accessibility.
Measure and Plan Carefully
Start by measuring the height, depth, and width of your toe-kick area. Remember, the space is usually around 3-4 inches high and 3-5 inches deep. During my last remodel, I used a tape measure and a notepad to chart these dimensions, ensuring the design would fit precisely. Accurate measurements prevent the common mistake of fitting a panel that’s too tight or too loose, which can cause jamming or gaps.
Select Your Materials and Hardware
Choose durable plywood or MDF for the platform, depending on your budget and desired finish. I opted for plywood because it holds heavy loads better, especially when storing items like small appliances or canned goods. For hardware, consider soft-close slides to prevent slamming, which I found immensely helpful during installation. Visit this guide to pick the right hardware for your needs.
Build the Pull-Out Platform
Using your measurements, cut the plywood to size, leaving just enough clearance to slide smoothly. Attach the slides to the platform base, making sure they are evenly aligned. I once misaligned the slides, which caused the platform to jam. After reworking the slides, the operation became silky smooth. Think of this step as crafting a drawer but underneath your feet—precision is key.
Install the Drawer Slides into the Cabinet
Identify the best mounting points inside your toe-kick space, installing the slides level and secure. For a flush look, hide the mounting brackets behind the panel. During my installation, I used a level and clamps to keep everything straight, avoiding the frustration of crooked slides that cause uneven movement. This step is like fitting a drawer—attention to detail makes all the difference.
Finish with a Concealed Panel and Access
Attach a matching panel or toe-kick cover to conceal the mechanics and blending seamlessly with your cabinetry. You can also add a discreet handle or a push-to-open mechanism for a sleek look. I painted mine the same color as the cabinets, making it almost invisible. This final touch transforms a simple platform into a secret storage zone that maximizes space without sacrificing style. For more on custom cabinetry options, check out this collection.
By following these steps, you’ll create an effortlessly accessible and concealed storage solution that feels like a custom upgrade. Before you start, review your measurements carefully and gather quality materials to ensure a flawless finish—your kitchen’s hidden storage might just become your favorite feature.
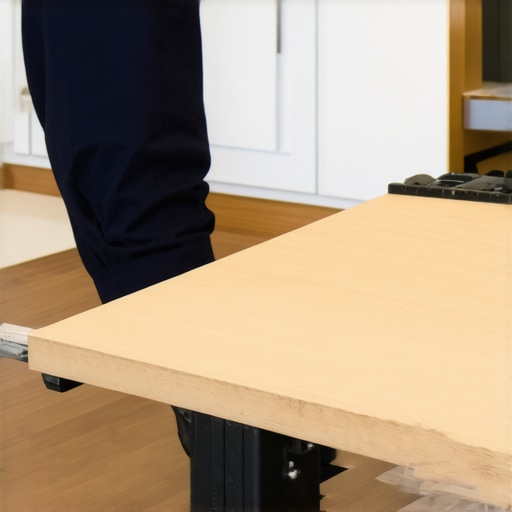 While many believe that installing custom cabinets and built-ins is a straightforward way to maximize kitchen space, the reality is more nuanced. A frequent misconception is that all storage solutions are one-size-fits-all; in truth, they require careful consideration of your specific layout and needs. For example, popular ‘magic’ drawers or hidden compartments often overlook the importance of proper hardware and material selection. Poor choices can lead to sagging, jamming, or even damage over time, which many homeowners learn the hard way. Advanced homeowners understand that details like load-bearing capacity and moisture resistance are crucial factors—skipping these can diminish the longevity of your investment.
Another widespread myth is that built-ins automatically make your kitchen look cluttered. This couldn’t be further from the truth if executed with intentional design. Think of it as an art form: your storage should balance accessibility, aesthetics, and functionality. Custom cabinets designed with intelligent compartmentalization can eliminate clutter and streamline workflows, but only if the design process accounts for your lifestyle. An expert approach involves precise measurements and tailored hardware, which can be a game-changer for small or awkward spaces.
Be wary of the trap of over-segmentation. Overly compartmentalized storage can make items difficult to find and retrieve, defeating the purpose of efficient design. Instead, focus on creating zones within your cabinetry—such as dedicated baking, coffee, or quick-access snack areas—that suit your routines. This approach ensures that cabinets enhance your daily habits rather than complicate them.
For those considering a remodel, investing in quality materials like high-grade plywood or moisture-resistant finishes pays dividends. Skimping on these can lead to warping, especially in humid climates. Remember, a well-constructed cabinet isn’t just about aesthetics; it’s about durable performance over time.
In your quest to optimize kitchen storage, avoiding these common pitfalls can save you both time and money. Don’t forget that seeking professional input, like consulting with experts at artisancabinetry, can help you sidestep these issues and make smarter decisions. To dive deeper into customizing solutions for your space, visit this collection of inspiring cabinet ideas. Have you ever fallen into this trap? Let me know in the comments.
Maintaining the quality and functionality of your kitchen after a remodel is essential to ensure lasting beauty and performance. Over the years, I’ve experimented with various tools and methods that help me keep my built-ins, custom cabinets, and storage solutions in top shape. Investing in the right equipment not only extends the lifespan of your cabinets but also makes future updates or adjustments more manageable.
Precision Tools for Long-Term Maintenance
One indispensable tool I rely on is a high-quality cordless oscillating multi-tool. Its versatility allows me to perform delicate tasks such as sanding edges, removing old sealant, or tightening hardware with precision. I personally prefer brands like Dremel or Fein because of their durability and battery life. For example, when adjusting Blum hinges, having a reliable multi-tool helps me remove and reattach doors without damage, maintaining perfect alignment over time.
Another must-have is a digital moisture meter. Proper moisture control is crucial for wooden cabinetry, especially in high-humidity environments. I use this device periodically to monitor wood health, preventing warping or deterioration before it becomes visible. This proactive approach saves me from costly repairs down the line.
Software That Keeps Your Projects Organized
If you’re tackling a large kitchen remodel or ongoing upgrades, project management software like Trello or Notion can be game changers. I create dedicated boards for each area—storage solutions, cabinet refinishing, hardware replacements—tracking progress and scheduling routine checkups. Keeping detailed records of measurements, material specifications, and hardware models ensures consistency and simplifies future modifications. For deeper insight into planning your cabinetry, have a look at this expert guide for 2025.
Using the Right Lubricants and Sealants
To keep moving parts like soft-close slides operating smoothly, I recommend applying a silicone-based lubricant annually. It’s non-staining and provides long-lasting lubrication. For sealing gaps or maintaining the finish, I prefer high-quality polyurethane or shellac-based sealants, which resist moisture and wear better than generic options. Regularly inspecting and reapplying these compounds helps prevent jamming or peeling, extending the life of your cabinetry and storage features.
Future Trends: Smarter Maintenance for Your Kitchen
Looking ahead, I predict an increase in the integration of smart tools like Bluetooth moisture meters and app-controlled lubricants. These innovations will make maintenance more precise and less time-consuming, helping homeowners and professionals alike to keep kitchens in top shape with minimal effort. As smart home technology advances, expect to see more devices that automatically alert you when maintenance is needed, making your kitchen truly future-proof.
How do I keep my built-ins functioning perfectly over time?
The key lies in routine inspections, proper lubrication, and using quality hardware designed for durability. Incorporate annual checks of hinges, slides, and sealants, and never underestimate the value of maintaining your hardware with appropriate lubricants. Additionally, reading technical guidance, like the heavy-duty hinge fix guide, can provide specific solutions for common issues. Don’t hesitate to try out one of these advanced tips—your future self will thank you for it.
The Hard Lessons That Shaped My Storage Approach
One pivotal moment was realizing that overcomplicating cabinet design often leads to more issues than solutions. I once tried installing an elaborate pull-out system for spices, only to find it jammed after a few months due to poor hardware choices. This taught me that simplicity and quality hardware trump complexity every time.
Secondly, I learned that everyday convenience often trumps aesthetic perfection. A beautifully concealed toe-kick storage is useless if it becomes a hassle to access. Striking a balance between hidden features and user-friendliness is crucial, especially for those who want functionality without fuss.
Finally, patience is key. Rushing through measurements or choosing subpar materials can compromise the whole project. Waiting for the right tools or materials up front saves headaches down the line and ensures your custom solutions perform flawlessly.
Tools and Resources That Changed My Game
My go-to for precise measurements is a laser distance measurer — I trust brands like Bosch for their accuracy and durability. They eliminate the guesswork, ensuring your hidden storage fits perfectly every time. For hardware, soft-close slides from Blum or Hettich offer a whisper-quiet operation that elevates your kitchen’s feel and functionality. Additionally, the comprehensive guides at expert cabinet hardware insights have helped me avoid common pitfalls. Lastly, project management software like Notion keeps my plans coordinated, ensuring nothing slips through the cracks during complex builds.
Your Next Step to Elevate Kitchen Storage
The journey to a smarter kitchen starts with confidence and a willingness to think beyond traditional cabinets. Incorporate hidden storage solutions that suit your lifestyle, invest in quality hardware, and remember—every inch counts in creating a space that is both beautiful and functional. Whether you’re redesigning a small apartment kitchen or renovating a spacious family room, these lessons can help you avoid pitfalls and achieve truly transformative results.
What’s one clever storage idea you’re excited to try in your kitchen? Share your thoughts below — I’d love to hear about your plans!