Why Most Corner Cabinets Are Wasted Space and the Blind Corner Pull-Out Solution
I remember the moment I realized I had been neglecting the most wasted space in my kitchen for years. It was a busy Saturday morning, and I reached into what I thought was an expertly organized corner cabinet. Instead of finding a treasure trove of neatly stacked pans or a hidden spice drawer, I was met with a jammed, impossible-to-reach jumble of old pots, neglected gadgets, and a mountain of frustration. That lightbulb moment made me question: how many of us are actually wasting valuable space right under our noses, simply because we don’t know better?
Why Corner Cabinets Often Turn Into Storage Black Holes
Corner cabinets are notorious in kitchen design circles for becoming the black holes of storage. They promise convenience but often deliver clutter or inaccessible chaos. Interestingly, studies show that up to 80% of corner cabinet space is underutilized or wasted entirely, mostly because of conventional shelving that leaves a significant portion unreachable. The typical lazy susan or fixed shelf may seem like a good solution at first, but they often fall short in maximizing space and ease of access.
In my early kitchen remodel attempts, I made the mistake of assuming that more shelves and larger cabinets were the answers. But after a few months, I found myself pulling out pans with half my kitchen in my hands, or worse—discarding items because they never saw the light of day. That’s when I stumbled upon the concept of blind corner pull-out solutions, and everything changed.
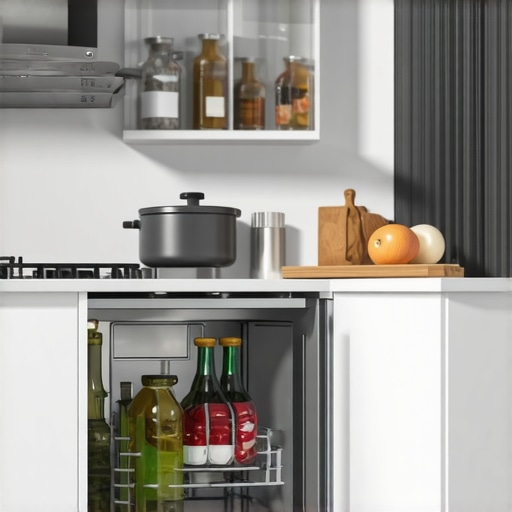
These ingenious systems transform a dead corner into a practical, accessible, and visually appealing part of your kitchen. It’s no exaggeration to say that they can double your storage capacity without raising your kitchen’s footprint. If you’re tired of losing half of your cabinet space to inaccessible corners, stick with me. Today, I’ll guide you through how to turn your wasted nook into a functional masterpiece.
But first, let me ask—have you ever faced the frustration of digging through your corner cabinet only to find a pan that’s just too difficult to access? If that sounds familiar, you’re not alone. And there’s good news: the right storage solutions can make a huge difference.
Before we dive into specific fixes, I want to share a common mistake I made early on—assuming that all corner storage options are created equal. Not every system works for every kitchen, and selecting the wrong one can turn your upgrade into wasted effort. For expert tips on how to choose the perfect storage solution for your space, feel free to visit [this trusted guide](https://artisancabinetworkz.com/expert-tips-on-selecting-storage-solutions-for-a-perfect-kitchen-upgrade). Now, let’s explore some real-world strategies to reclaim your corner space and upgrade your kitchen’s functionality.
Identify the Wasted Space and Prepare for Custom Solutions
Begin by removing everything from your corner cabinet to see its full extent. Use a tape measure to record its dimensions—width, depth, and height. Take note of any obstructions or irregularities like uneven walls or damaged corners. I once spent Saturday afternoon in my cluttered corner cabinet, carefully measuring and sketching a rough diagram on scrap paper. This step clarifies what types of storage systems will fit and work best, and it prevents costly mistakes later.
Choose the Right Hardware and Materials
Invest in high-quality pull-out shelves or swing-out trays that fit your measured dimensions. Consider materials like steel or solid wood for durability. Visualize your new setup as a well-organized toolbox; each component should serve a purpose and function smoothly. For a small kitchen, smart use of space means selecting narrow, sliding units that maximize every inch. For inspiration and a variety of options, visit this resource.
Remove and Modify Existing Cabinet Structures
Take out the current shelves if they hinder full access. Use a level to mark the position of your new pull-out tray tracks on the cabinet sides and back. If walls are uneven or surfaces irregular, apply a scribe or shim to ensure perfect fit. I recall installing a custom swing-out tray last spring; aligning the tracks was a mess at first, but double-checking with a square and patience made all the difference. Cutting out obstructions or adjusting interior surfaces upfront saves headaches during installation.
Install the Hardware with Precision
Follow the manufacturer’s instructions carefully. Use a drill with a countersink bit to prevent splintering when attaching tracks or hinges. Secure everything tightly—loose hardware can cause jams or uneven movement. During my in-progress project, I discovered that dedicating focused time to level and secure each component reduced future frustration. Test the smoothness of operation before completing the final assembly. Remember, the goal is seamless access, not just aesthetics.
Test, Tweak, and Finalize Your Setup
Load your new system gradually, checking for stability and ease of movement. Adjust tracks or hinges as needed; often, minor tweaks can significantly improve functionality. For example, I added extra shims beneath the tracks of a pull-out shelf to level unevenly sliding units. If you find persistent issues, revisit your measurements and hardware placement. Once satisfied, replace the cabinet contents, organizing items logically—keep frequently used items within easy reach, and seasonal or seldom-used belongings in the back. This systematic approach ensures your corner storage isn’t just functional but truly optimized.
Many homeowners assume that choosing high-end custom cabinets or sleek built-ins automatically guarantees optimal storage and a cohesive aesthetic. However, even seasoned remodelers often miss the subtle complexities that can make or break a design’s functionality over time. Let’s dig deeper into common misconceptions and advanced pitfalls to avoid when elevating your kitchen or living space.
Are Aesthetics Always the Priority Over Practicality?
A frequent mistake is prioritizing style at the expense of usability. It’s tempting to select eye-catching cabinetry designs without considering accessibility or the specific needs of users. For example, custom cabinets with intricate moldings or high-gloss finishes might look stunning but can be harder to maintain or adapt as your needs evolve. Experts advise integrating smart storage solutions that balance visual appeal with tangible benefits, such as adjustable shelves or hidden compartments. For innovative ideas on combining beauty and function, visit this resource.
Why Most People Overlook the Importance of Material Choices
The choice of materials influences both durability and overall performance. Many assume that solid wood is always the best, but certain hardwoods can warp or crack in high humidity zones, leading to costly repairs later. Conversely, high-quality engineered wood or composites with proper sealing can outperform traditional materials if selected judiciously. According to industry expert John Male, understanding the environmental context and selecting appropriate core materials prevent premature deterioration, especially in kitchen environments where moisture, heat, and weight load benefit from tailored solutions. Additionally, avoid the trap of overestimating the longevity of MDF in vanity doors or back panels, which can swell or delaminate, causing structural issues that compromise your remodel’s longevity. Dive deeper into material impacts by reading this detailed comparison.
Advanced Mistakes When Customizing Storage that Could Cost You
A nuanced mistake is neglecting the weight capacity and hardware compatibility of your chosen systems. For instance, installing pull-out shelves or swing-out trays without ensuring they can handle the weight of bulky pots and pans often leads to sagging, jamming, or mechanical failure. Furthermore, custom cabinetry designed without accounting for future needs—like additional appliances or seasonal items—can hinder long-term flexibility. It’s essential to incorporate modular, adaptable solutions that can evolve with your lifestyle, such as adjustable dividers or removable panels. While seemingly minor, these oversights can turn your dream storage into a maintenance nightmare. To avoid the pitfalls of poor planning, explore this expert guide.
Have you ever fallen into this trap? Let me know in the comments and share your experience so others can learn from it. Remember, understanding these hidden nuances ensures your investment in built-ins and custom cabinetry pays dividends in both form and function long after the remodel is complete.
Maintaining your custom-built cabinets, built-ins, and storage systems ensures your kitchen remains functional and beautiful over the years. Regularly inspecting hinges, slides, and hardware is vital; I personally check these every six months, tightening screws and replacing worn components with high-quality replacements like Blum soft-close hinges for smooth operation. Using precise tools such as a digital torque screwdriver helps maintain consistent tension, preventing hardware sagging. For cleaning, a microfiber cloth combined with gentler cleaners preserves finish integrity—steer clear of abrasive products that can damage surfaces.
Investing in a dedicated maintenance kit stocked with essential items—such as a small Level, a few screwdrivers, replacement hardware, and lubricant—makes routine upkeep straightforward and minimizes the need for costly repairs down the line. Since furniture and cabinetry materials can expand or contract with humidity, I recommend applying a silicone-based lubricant on moving parts annually to prevent seizing or squeaking.
Looking ahead, trend analysis suggests integrated smart sensors could alert you proactively about hardware failures or moisture intrusion, further extending the lifespan of your investments. Companies like Blum are pioneering these innovations, promising a future where maintenance becomes almost automatic.
**How do I maintain built-ins and custom cabinetry over time?**
A crucial step is creating a regular inspection routine—checking hinges, slides, and hardware for signs of wear or misalignment. Tightening screws and applying lubricants exactly where needed keeps moving parts functioning smoothly. Additionally, cleaning with non-abrasive solutions preserves the finish and prevents deterioration. For especially high-traffic or moist environments, investing in protective sealants or finishes adds an extra layer of defense. Remember, addressing small issues early can prevent larger, more costly repairs later.
If you want to streamline your maintenance, I highly recommend integrating smart sensors that monitor hardware and detect moisture—these can send alerts directly to your phone, saving you time and avoiding surprises. For advanced tips on hardware longevity, explore this expert guide.
Don’t wait until a hinge breaks or a slide jams. Instead, set a quarterly reminder to perform quick checks and maintenance routines. Incorporating these habits will keep your built-ins functional and stunning for years to come, making your kitchen remodel a truly long-term investment.
Reflecting on my experiences with built-ins, custom cabinets, and innovative storage, I’ve uncovered some invaluable insights that aren’t commonly shared. These lessons have transformed my approach and can do the same for your remodeling projects.
The Benefits of Listening to Your Gut Over Popular Trends
While trendy designs and popular hardware often catch our eye, trusting my instinct about what truly works in my space proved more valuable. Sometimes, what seems stylish doesn’t serve function, especially when it comes to corner cabinets or storage solutions. Personal experience taught me to prioritize practicality over fleeting trends.
Nearly Perfect Is Better Than Flawless and Unusable
I once obsessed over achieving perfect alignment in my cabinetry, but in the process, I compromised accessibility. The real takeaway? Aim for a balanced compromise that ensures usability. Small adjustments—like leveling a pull-out tray—have enormous benefits, making daily use seamless and stress-free.
My Top Tip: Embrace Modular Storage for Flexibility
Flexibility in storage solutions, such as adjustable dividers or removable panels, allowed me to adapt my kitchen for different needs over time. Investing in modular, adaptable hardware has kept my space organized and ready for evolving lifestyles, minimizing frustration and maximizing efficiency.
How Continuous Maintenance Saves Money and Headaches
Regularly inspecting hinges, slides, and hardware—rather than waiting for things to break—kept my kitchen functioning smoothly. Simple routines like applying lubricant or tightening screws prevented costly repairs and extended the lifespan of my cabinets. Trust me, a small time investment here pays huge dividends.
Prioritize Quality Materials That Match Your Environment
Choosing durable, moisture-resistant materials for my cabinets meant fewer warped doors and sagging shelves down the line. Understanding the environmental demands of my kitchen helped me avoid common pitfalls, reinforcing the importance of tailored material choices in successful remodels.