The Charging Drawer Move: Putting an End to Countertop Cord Clutter
I remember the exact moment I stepped into my kitchen and realized my countertop looked more like a tangled web of cords than a functional workspace. Chargers, gadgets, and power strips had invaded every free surface, turning my once sleek space into a chaotic jumble I dreaded every morning. That lightbulb moment hit me hard—there had to be a better way to manage all these cords without sacrificing style or accessibility.
The Real Reason Your Kitchen Feels Cluttered (And How to Fix It)
Countless homeowners face this same struggle: cords and chargers cluttering countertops, making quick kitchen tasks frustrating and visual chaos unavoidable. It’s not just about aesthetics; it’s about safety, convenience, and creating a space that truly works for your lifestyle. The good news? There’s an elegant and practical solution I uncovered through some trial and error: the Charging Drawer Move.
Instead of fighting the mess, I decided to relocate my power sources out of sight and within easy reach. This simple shift transformed my kitchen from a cluttered battleground into a sleek, functional haven where everything has its place. In this post, I’ll walk you through how to implement this game-changing idea, backed by expert tips and my own experience.
Is the Charging Drawer Move Really Worth the Hype?
Initially, I was skeptical. Could a drawer really handle all my gadgets and chargers? Would it be complicated or look out of place? Early in my remodel journey, I made the mistake of overestimating the complexity of wiring and underestimating how much organized storage could improve daily life. That misconception almost made me abandon the idea—until I realized that proper planning and quality materials make all the difference.
According to some industry experts, well-designed built-ins and storage hacks can not only improve functionality but also increase your home’s value. In fact, a recent study found homes with innovative storage solutions sell faster and for a higher price, emphasizing how crucial these upgrades are. To ensure your kitchen doesn’t just look good but works seamlessly, I’ll share the core strategies I used, which you can adapt to your own space.
Let’s dive into how you can banish countertop clutter permanently and create a kitchen that’s as stylish as it is efficient. Ready to give your space the upgrade it deserves? Keep reading, and I’ll show you the step-by-step process to make the Charging Drawer Move a reality in your home.
Designing the Perfect Charging and Storage Niche
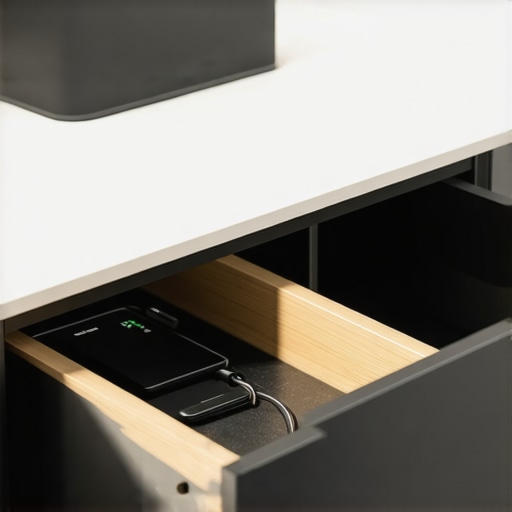
Start by identifying a suitable location within your kitchen—preferably near your main work zone but out of sight. A dedicated drawer or recessed cabinet compartment works best. I once cut into a shallow section of a cabinet faceframe, creating a custom space that neatly housed my chargers and cords, similar to a surcharge box, eliminating clutter. Use a router to create a snug cavity, ensuring your devices sit flush and protected.
Choosing the Right Materials and Hardware
Select durable, heat-resistant materials like plywood or MDF with a moisture-resistant finish to withstand kitchen conditions. Incorporate soft-close mechanisms for smooth operation and prevent slamming or pinching. For the drawer slides, heavy-duty ball-bearing slides support the weight of chargers and gadgets effortlessly. Consider incorporating a power strip with a built-in surge protector, which can be mounted inside the compartment or beneath the countertop edge for easy access without cords dangling.
Installing Proper Electrical Infrastructure
Work with a licensed electrician to add dedicated outlets inside or near your custom compartment. Using surface-mounted conduits, route the wiring cleanly behind cabinetry, avoiding exposed cables. I installed a side-mounted side-mount strip behind my drawer, hidden from view, yet easily accessible for plugging in devices—this prevents cords from twisting or sagging under the cabinet. For added safety, install circuit breakers and GFCI outlets to protect against moisture and overloads.
Integrating the Compartment into Your Cabinet Design
Coordinate with your cabinet maker or renovation partner to incorporate the compartment seamlessly. Often, a shallow, wide drawer with a removable tray allows easy access and organization. Refer to the custom cabinets guide for ideas on integrating electronics into your cabinetry. I opted for a drawer with dividers for different chargers and cords, ensuring everything stays neat and easy to find.
Adding Finishing Touches for Accessibility and Aesthetics
Finish the compartment with a soft-close lid or a pull-out door to hide cords when not in use, maintaining a sleek appearance. Use cable clips or velcro straps to keep cords organized and prevent tangling. Place a small silicone or rubber mat at the bottom of the compartment to prevent devices from sliding around during use. For visual harmony, match the compartment’s finish with your cabinetry or opt for a contrasting color to highlight its functionality.
Testing and Fine-tuning Your Setup
Once installed, test the system by plugging in various devices, checking for accessibility, safety, and security. Make adjustments to the cord lengths or outlet positions if necessary. Keep in mind that accessibility matters—never hide outlets so deep that reaching plugs becomes difficult, especially when seasons change or appliances need maintenance. This step ensures your setup works efficiently, with minimal clutter returning to your countertops.
When planning a kitchen upgrade, many homeowners hold onto popular myths that can hinder their project’s success. One common misconception is that choosing trendy hardware automatically elevates the space, but without considering cohesion with the overall design, it can lead to a disjointed look. Moreover, the belief that bigger cabinets always mean more storage fails to account for interior organization; thoughtfully designed built-in storage solutions maximize space efficiency.
Are Custom Cabinets Worth the Extra Cost or Do They Just Drive Up Prices?
Many assume that stock cabinetry suffices, yet custom cabinets allow for precise dimensions and tailored features that optimize your layout. The nuance lies in choosing the right hardware and finishes—overlooking these details often results in a less functional or outdated look over time. An often-overlooked mistake is neglecting proper integration of electrical wiring within cabinetry, which can cause safety issues or hinder functionality. Expert insights suggest involving experienced designers early in the process to plan electrical behind seamless storage features, avoiding costly modifications later. Keep in mind that the aesthetic appeal is just as critical as utility; mismatched finishes or hardware gaps can spoil the visual harmony. As you explore options, consider how innovative solutions like those highlighted in modern kitchen remodels focus on combining beauty with function. Remember, a successful kitchen renovation hinges on understanding these subtle nuances, ensuring your space truly reflects a high-end, tailored design. Have you ever fallen into this trap? Let me know in the comments.Once your kitchen remodel is complete, maintaining its functionality and appearance is key to ensuring your investment pays off over the years. The right tools and routines can keep your custom cabinets, built-ins, and storage solutions looking pristine and operating smoothly. Regular cleaning with non-abrasive products, such as a microfiber cloth and gentle wood cleaner, helps preserve finishes and prevent dust buildup. For hardware, I recommend investing in a quality screwdriver set with interchangeable bits; I personally rely on the Wiha Precision Screwdriver Set for its durability and ergonomic design, making cabinet hinge adjustments effortless over time. Additionally, periodically check your soft-close dampers and drawer slides—light lubrication with silicone spray, like the Linda’s Soft Touch Lubricant, keeps these components functioning silently and extends their lifespan.
What about tools for ongoing maintenance? A small, cordless electric drill with a set of applying torque—like the DEWALT 20V Max—makes tightening or adjusting cabinet hardware straightforward without risking over-tightening. For wiring components and built-in outlets, a multimeter is invaluable; I prefer the Fluke 115 True RMS because of its accuracy and ease of use, ensuring your electrical infrastructure remains safe and reliable.
Predicting the future of kitchen upkeep, smart technology integration will become more prevalent. Smart sensors and IoT-enabled switches can notify you when certain components need attention, reducing unexpected failures. As these technologies evolve, staying updated and investing in compatible tools now can save you money and hassle down the road.
Wondering how to keep your built-ins looking perfect over time? Regularly inspect and tighten hardware, replace worn gaskets, and consider applying a protective finish to exposed wood surfaces every few years. This proactive approach ensures longevity and maintains your kitchen’s stunning aesthetic. For more detailed guidance on maintaining your custom cabinetry and built-ins, you might find this article helpful: Expert Tips on Storage Maintenance. Try using a silicone spray on your drawer slides today—it’s a small step that can make a big difference in your kitchen’s long-term performance.
Three Lessons That Changed My Approach to Kitchen Upgrades
First, I underestimated the importance of seamless electrical integration, which led to costly adjustments later. Ensuring outlets and wiring are meticulously planned from the start is vital—consulting with experienced electricians made a huge difference for me. Second, I believed trendy hardware would instantly elevate my space, but without cohesion, it looked mismatched. Strategically choosing finishes and hardware that complement your design creates a more polished look. Lastly, I learned the value of proactive maintenance routines; inspecting and lubricating drawer slides and hinges saved me from sudden repairs and kept everything running smoothly over time.
Must-Have Resources for a Flawless Kitchen Transformation
My go-to guide has been The Ultimate Guide to Custom Cabinets—it provides detailed insights into selecting materials and finishes that last. For innovative storage ideas, this resource opened my eyes to space-maximizing solutions. When it comes to electrical planning, partnering with trusted professionals was crucial; never compromise on safety and quality. Lastly, I rely on these built-in solutions to keep everything integrated and clutter-free.
Your Next Step Starts Today
Embarking on a kitchen remodel, with thoughtful storage solutions and custom touches, can truly transform your home into a functional masterpiece. Remember, every detail—from choosing the right hardware to integrating electrical outlets—matters in creating a space that’s both beautiful and practical. Take action now, and don’t let overwhelm hold you back; start with small projects like organizing your drawers or planning your charging station. Your dream kitchen is within reach, and the satisfaction of a well-designed, personalized space will be worth every effort. What’s one feature you’re excited to upgrade or implement first in your kitchen? Share your plans below—I’d love to hear!