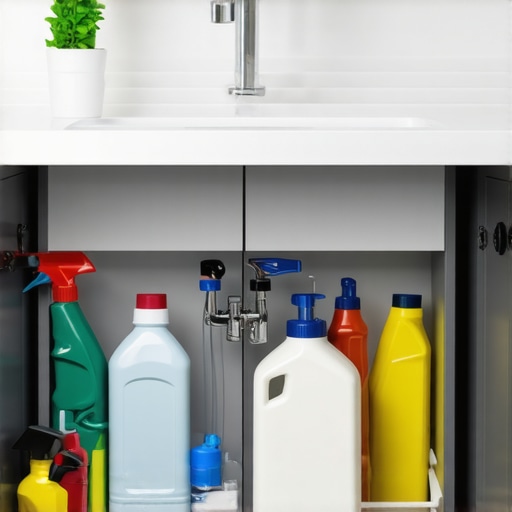
Why You Need a Waterproof Liner in Your Sink Base Cabinet
I remember the moment vividly—standing in my kitchen, eyes fixed on a puddle slowly spreading beneath my sink. It was late evening, and that unexpected leak was a wake-up call I didn’t see coming. That small dribble turned into a full-blown nightmare, forcing me to scramble and pause my busy day. It was then I realized a simple, often-overlooked fix could have saved me from so much stress: installing a waterproof liner.
The Hidden Hero in Your Kitchen Remodel: Waterproof Liners
Many homeowners focus on the style, cabinetry, or countertops during a kitchen renovation, but little things like waterproof protectors often get sidelined. Yet, they’re the unsung heroes that shield your investment from water damage, mold, and costly repairs. If you’ve ever had to replace a warped cabinet or deal with stubborn mold lurking behind your sink, you know what I mean. The truth is, water doesn’t just cause surface stains; it seeps into wood, encouraging rot and leading to extensive repairs.
Imagine this: a tiny crack in your sink’s base or a slow drip from a faulty connection that goes unnoticed. Over time, water infiltrates your cabinet box, damaging the structure from within. According to the Home Improvement Research Labs, water damage is responsible for over 70% of home repairs related to cabinetry. That’s a staggering figure, highlighting the importance of preventive measures.
But here’s the kicker—you don’t need to face these issues head-on, nor should you wait until a leak turns your kitchen into a disaster zone. Installing a waterproof liner in your sink base cabinet is a straightforward, cost-effective way to protect your home’s most vulnerable spots. Think of it as giving your cabinetry a raincoat—shielding it from the unseen, relentless drip.
Now, you might be wondering: Is this little liner really worth the effort? Can it truly make a difference in the long run? Well, I made the mistake early on of neglecting this step, and trust me, the repair process was anything but simple. I learned the hard way that prevention is far better—and cheaper—than cure.
Stay with me as I walk you through how to choose the right waterproof liner and ensure your kitchen remains dry, beautiful, and durable for years to come. If this sounds familiar or you’ve faced similar frustrations, keep reading—your future self will thank you.
Selecting the Right Waterproof Liner Material
Begin by choosing a durable, flexible, and waterproof material like PVC, polyethylene, or rubber foams. I once went to a local hardware store and ended up inspecting multiple samples, finally selecting a high-grade polyethylene sheet that was resistant to moisture and easy to cut. This critical step ensures your liner withstands water exposure without deteriorating over time.
Measuring Your Cabinets Accurately
Measure the interior dimensions of your sink base cabinet precisely—height, width, and depth. I recommend measuring twice to avoid errors; I once misjudged the depth, leading to a cut that didn’t cover the entire area, which caused frustration. Use a tape measure and record measurements in inches, noting any irregularities due to cabinet warping or discrepancies caused by uneven flooring.
Cutting the Liner to Fit
Transfer your measurements onto the liner material using a marker or chalk. Cut the liner with scissors or a utility knife for clean edges. When I cut my liner, I used a straightedge to guide my knife, which resulted in smooth, precise edges. Ensure the liner slightly overlaps the edges of the cabinet to prevent water from seeping underneath.
Preparing the Surface for Placement
Clean the cabinet interior thoroughly, removing dust, grease, and debris. For better adhesion, dry the surface completely. During my installation, I used a damp cloth followed by a dry towel; this step proved crucial in ensuring the liner stayed in place without slipping.
Installing the Liner Correctly
Position the liner, pressing it into the corners and along the sides. Use waterproof adhesive or double-sided tape along the edges if necessary to keep it stable. I once applied a flexible adhesive along the perimeter, which prevented the liner from shifting, especially when shelves or items were placed inside.
Sealing the Edges for Maximum Protection
Apply a waterproof sealant along all seams and edges to prevent water from escaping or seeping underneath. During my first attempt, I forgot this step, resulting in minor leaks during a heavy water spill. Now, I seal all seams generously with a silicone-based sealant, ensuring a tight, waterproof barrier.
Testing the Installation
Pour a small amount of water inside the cabinet to check for leaks or misalignments. I tested with a cup of water, and if any seepage was detected, I adjusted the liner or reapplied sealant as needed. This step confirms the effectiveness of your installation before putting the cabinet back into regular use.
Maintaining Your Waterproof Barrier
Regularly inspect the liner for signs of damage or displacement, especially after cleaning or heavy use. I set a reminder to check mine quarterly, and it’s always a relief to catch minor issues early before they escalate into costly repairs.
Implementing these concrete steps can significantly extend the life of your cabinet units and prevent water damage. For more insights on kitchen upgrades, don’t hesitate to explore additional resources like the latest trends in modern remodels or consult professionals through our contact page.
When it comes to kitchen renovations, many homeowners operate under misconceptions that can lead to costly mistakes. One prevalent myth is that investing solely in high-end materials or trendy designs guarantees a durable, timeless kitchen. However, advanced remodeling requires a nuanced understanding of structural integrity and long-term maintenance, areas often overlooked by DIY enthusiasts. For example, selecting the most aesthetically pleasing cabinets without considering the mechanics of door hinges or drawer slides can cause frustration over time. According to industry experts, focusing on the quality of hardware and proper framing is essential for longevity.
Why do most people oversimplify storage solutions in their kitchen upgrades? Perhapsbecause they underestimate the importance of tailored configurations or assume universal solutions suffice. Yet, the truth is that every kitchen’s footprint and usage patterns demand customized approaches. For instance, implementing standard-sized cabinets in a space with irregular walls might seem convenient but often results in wasted space or awkward gaps. Advanced designers recommend detailed measurements and bespoke solutions, such as adjustable shelving or integrated pull-out units, which significantly enhance functionality. selecting durable storage solutions.
Finally, do a quarterly check-up, testing for loose screws or hardware misalignments, and re-tighten as needed. A simple, proactive routine like this ensures your cabinets, built-ins, and custom features function seamlessly over time. Remember, a little maintenance now avoids major repairs later—think of it as giving your kitchen a health checkup every few months. Why not start today by lubricating your hinges or inspecting your drawer slides? Your future self will thank you for the extra effort!
Every renovation journey teaches us invaluable lessons, and my experience with installing waterproof liners in kitchen cabinets was no exception. One of the most eye-opening realizations was how overlooked details like proper sealing and precise measurements could make or break the longevity of your cabinets. I learned that investing a little more time into selecting quality materials and double-checking every cut saved me from future headaches—and costly repairs. This journey also taught me the importance of embracing smart, simple maintenance routines, which keep your kitchen looking pristine and functioning flawlessly for years. Lastly, I discovered that sharing knowledge—whether through detailed guides or approachable advice—can empower homeowners to avoid common pitfalls and achieve a seamless, durable remodel.