The Real Reason Your Pull-Out Trash Can Keeps Derailing
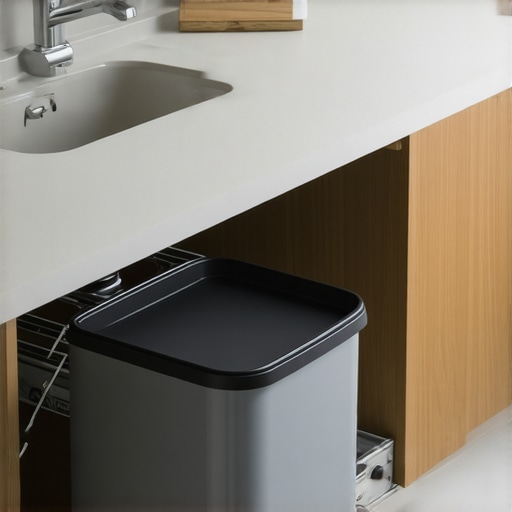
Ever since I installed a pull-out trash can in my kitchen, it’s been a source of endless frustration. Every time I open the cabinet, I hold my breath, praying this time it won’t derail or wiggle loose. Honestly, I used to think I was doing something wrong—maybe I just didn’t install it right. Turns out, the real issue was something much simpler, and I had been overlooking it the entire time.
Why Your Pull-Out Trash Can Keeps Coming Off Track (And How to Fix It)
In my experience, the most common culprit isn’t poorly designed hardware or a bad install; it’s a simple misalignment or an overlooked detail that, once corrected, transforms your messy cabinet into a smooth-operating paradise. This problem is surprisingly prevalent—many of us don’t realize that the way we install and maintain these systems makes all the difference. If your pull-out trash can feels more like a petulant toddler than a sleek kitchen helper, don’t worry, you’re not alone. I promise, there’s a fix.
But first, a quick admission. Like many beginners, I made the mistake of rushing through the installation without paying attention to the slide mechanics or ensuring the cabinet sides were perfectly level. That’s a mistake I see many homeowners making early on. For more detailed guidance on choosing the right storage solutions for your space, check out the expert tips at [artisan cabinetworkz](https://artisancabinetworkz.com/expert-tips-on-selecting-storage-solutions-for-a-perfect-kitchen-upgrade).
Have you ever faced this frustrating wobble or derailment with your pull-out trash can? If so, you’re in the right place, because I’m about to walk you through some easy, proven steps to keep it running smoothly—no more detours or wobbles. It’s all about identifying the real cause and using a few clever adjustments to put you back in control. Ready? Let’s dive into the solution that saved my sanity and can do the same for you.
Ensure Proper Alignment to Keep Your Trash Can on Track
My first step was to check how the trash can slides within its runners. Think of these as the train tracks guiding your cart—if misaligned, the whole system falters. I removed the trash can and examined the rails and the mounting brackets. Using a level, I confirmed the rails were perfectly horizontal; a tilted track causes derailments. I adjusted the mounting screws and shims, making sure the slides were flush and level, which prevented the can from wobbling or coming off track. Remember, improper alignment is like a boat with a crooked rudder—it won’t steer correctly.
Simplify the Track Setup with Correct Hardware Placement
Check for Proper Mounting of Runners
I inspected the mounting brackets on the cabinet walls and the slides themselves. If these are loose or uneven, the trash can will have a mind of its own. I tightened all screws with a drill, ensuring each bracket was securely fastened to flat, studded framing—this is like anchoring a tent guyline tight so it doesn’t sway. For best results, use hardware designed for heavy regular use—cheap screws will sag over time, causing misalignment.
Level the Cabinet Opening
Next, I confirmed that the cabinet opening was plumb. An uneven wall or crooked cabinet frame shifts the track alignment, just like an uneven foundation makes a building lean. I used a laser level to identify any tilts, then shimmed the cabinet sides accordingly. This step is crucial—think of it as setting the foundation; all subsequent steps depend on a level platform. If you prefer, check out options for custom cabinets that ensure perfect lines and support before installation.
Adjust the Soft-Closing Mechanism for Consistency
Once the hardware was aligned, I turned my attention to the soft-close dampers. Over time, these can stiffen or lose their dampening effect, making the trash pull a jarring experience. I gently loosened the damper screws, adjusted the tension according to the manufacturer’s specs, and retested the movement—similar to tuning a musical instrument for harmony. Proper tension ensures smooth, quiet operation every time, preventing the trash can from jumping or bouncing during closure. For design inspiration and innovation, explore storage solutions for modern kitchens.
Double-Check the Track Limit Stops
The final step was to verify that the track stops are positioned correctly. Think of these as the bumper guards on a bowling alley—they prevent the trash can from sliding out completely or derailing. I slid the can back and forth, confirming it stopped precisely at the intended points. If the stops are misaligned, the can may hang or fall out unexpectedly. Adjust the stops using a screwdriver, setting them 1/8 inch before the can fully reaches the end—this gives a smooth, controlled motion, much like a well-oiled hinge.
Extra Tips for Long-Term Durability
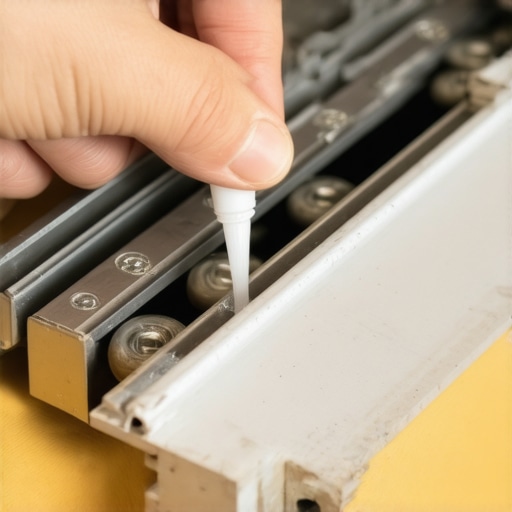
Regular maintenance extends the life of your hardware. Every few months, I wipe the rails with a silicone-based lubricant, akin to oiling bike chains to prevent squeaks and rust. Also, periodically check the screws and brackets for looseness, especially if something feels off during operation. This proactive approach saves you from bigger repairs down the line and keeps your pull-out system operating seamlessly. To explore further advanced storage setups, see custom cabinets for stylish upgrades.When tackling a kitchen renovation, many homeowners fall prey to misconceptions about built-ins, custom cabinets, and storage solutions, which can lead to costly mistakes. One widespread myth is believing that standard-sized, off-the-shelf cabinets suffice for personalized spaces. In reality, customizable options are designed to optimize your unique layout, revealing the importance of tailored solutions that maximize space and functionality. Relying solely on cookie-cutter components often results in wasted space and compromised aesthetics, as detailed in expert guides on selecting perfect storage solutions.
Many think that all built-ins or custom cabinets are prohibitively expensive, but a closer look shows there are scalable options that fit various budgets while delivering superior performance. For instance, investing in high-quality materials like quarter-sawn oak or specialized plywood can vastly increase longevity and visual appeal, challenging the misconception that only premium options suffice for upscale remodels.
A common oversight is underestimating the complexity of integrating built-ins seamlessly with existing architecture. This often leads to gaps, uneven finishes, or mismatched styles. Advanced homeowners are advised to pay attention to details like scribing cabinets to sloped ceilings or coordinating stain colors carefully—small nuances that elevate the overall look. For comprehensive insights, explore the ultimate guide to custom cabinets.
Are Built-Ins Truly Worth the Extra Effort and Cost?
This question often confronts those considering a remodel. While the initial investment might seem steep, specialized built-ins can increase storage efficiency by up to 30%, according to industry studies, reducing clutter and improving workflow. Also, they add to your home’s resale value when executed with attention to detail, as highlighted by design experts.
An elusive trap many miss is the temptation to DIY complex installations, assuming they can save money. Without precise measurements and proper tools, DIY efforts risk creating gaps, misalignments, or even structural issues that compromise safety. Professional guidance or consulting experienced artisans can prevent these pitfalls, ensuring your investment enhances both functionality and style.
Finally, understanding the nuances of hardware durability and finishes—such as choosing moisture-resistant paints or soft-close hinges—can make or break your project’s success. For an in-depth exploration of materials and finishes, visit European-style cabinets for smarter storage.
In the end, debunking these myths and recognizing the fine details can drastically transform your renovation experience. Are you aware of any misconceptions that might be holding back your project? Share your thoughts in the comments!Once you’ve installed your custom cabinets and built-ins, the key to ensuring they serve you well for years is consistent maintenance and using the right tools. I personally recommend a few specialized products that have transformed my approach to upkeep, making repairs and adjustments much simpler. For example, I rely heavily on a high-quality orbital sander with fine-grit sandpaper to smooth out minor scratches or surface inconsistencies over time, especially on painted doors. This simple tool allows me to refresh surfaces without stripping or repainting entire sections, saving me both time and money.
Now, what about hardware that tends to wear out? I use a blast of compressed air to clear dust from hinges and slides every few months, preventing buildup that causes squeaks or resistance. For more precise adjustments, I trust a set of micro screwdrivers; these are essential when fine-tuning soft-close dampers or realigning cabinet doors. Investing in a digital thickness gauge helps me measure gaps accurately, ensuring that everything remains level and aligned. These small tools might seem basic, but their impact on preserving the aesthetic and function of your built-ins is significant.
In terms of cleaning, I swear by a silicone-based spray to lubricate drawer slides and hinges. Unlike oil-based lubricants, silicone doesn’t attract dust or dirt, which keeps the moving parts smooth without creating a mess. Regularly checking and tightening mounting screws is also vital since wood can expand and contract with humidity changes. I loop in during seasonal transitions to prevent loose fittings that could lead to misalignment or hardware failure.
Looking toward the future, I predict that smart maintenance kits, integrating sensor technology with portable tools, will become mainstream. These kits could provide real-time feedback on hardware tightness, lubrication needs, or even suggest proactive repairs before issues become noticeable. For now, trusting your eyes and simple tools like a level and a straightedge remains the best practice.
Ever wondered how to extend the life of your high-end cabinetry? Regularly using these specific tools—like the orbital sander or micro screwdrivers—can drastically reduce the need for expensive repairs or replacements. I encourage you to try incorporating one or two of these into your routine and see how much smoother and longer-lasting your storage solutions become.
How do I maintain built-in storage systems over time?
Implementing a consistent schedule for cleaning, minor adjustments, and hardware checks will keep your cabinets functioning flawlessly. Remember, a little preventive care goes a long way in preserving the beauty, function, and value of your investment. For more insights on selecting resilient materials that stand the test of time, check out our guide to choosing the best storage materials. By staying proactive, you can prevent common issues like squeaking hinges or misaligned doors, saving you from costly repairs down the line.Building and maintaining custom storage solutions taught me invaluable lessons that go beyond basic installation tips. One of the most surprising realizations was how crucial it is to think long-term: what seems perfect now might cause issues down the line if not planned thoughtfully. I learned to pay attention to subtle details like moisture-resistant finishes and hardware that withstands daily wear—these small choices greatly extend the lifespan of your built-ins. Additionally, I discovered that embracing flexibility during installation, such as adjustable shelving or modular components, allows for future updates without significant rework. Finally, I understood the importance of integrating smart organization systems from the start, turning wasted space into easy-to-access storage, which truly elevates the functionality of any kitchen or living area.