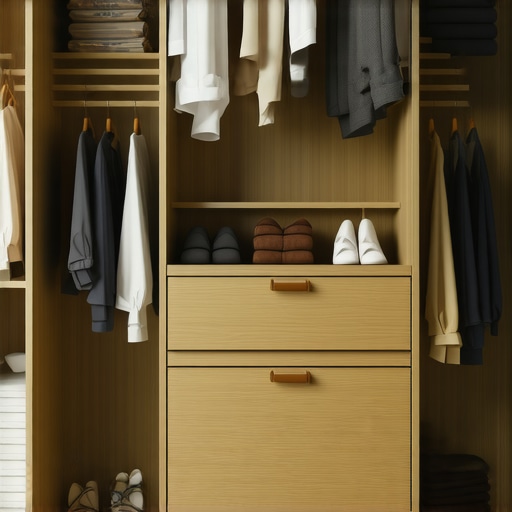
Why Your Built-In Wardrobe Needs More Drawers and Fewer Rods
It struck me one busy Saturday morning in the midst of chaos—shirts slipping off the rod, misplaced socks buried under piles, and a drawer that stubbornly refused to close. That moment of frustration was my lightbulb. I realized my built-in wardrobe was more about hanging space than functional storage. Does this sound familiar? If your closet feels more like a storage hellscape than a sanctuary, you’re not alone. Today, I promise to help you transform your wardrobe from cluttered nightmare to sleek, user-friendly haven by focusing on one simple shift: adding more drawers and reducing the rods.
Rods Are Not Your Friend: Reconsider the Traditional Closet Setup
The typical built-in wardrobe often features a long, unbroken rod for hanging clothes, with a handful of shelves thrown in for good measure. But here’s the truth—rods are great for hanging items, but when overused, they create chaos. Clothes tangle, wrinkle easily, and the space gets cluttered fast. Plus, reaching for that pair of jeans or a favorite shirt becomes an awkward game of Tetris.
Early in my renovation journey, I made a costly mistake. I assumed maximizing hanging space was the way to go—more rods, more hanging. Turns out, this created a jumbled mess that took twice as long to organize and even longer to find what I needed. That’s when I stumbled upon a crucial insight from expert cabinetry reviews: incorporating more drawers significantly improves accessibility and organization (source: [artisan cabinet blog](https://artisancabinetworkz.com/expert-tips-on-selecting-storage-solutions-for-a-perfect-kitchen-upgrade)).
Think of your wardrobe as a well-orchestrated symphony—each element should have its own space and purpose. Instead of cramming everything onto a single rod, consider dedicating different zones for shirts, trousers, accessories, and underwear. This way, drawers become your secret weapon, allowing you to fold and stack with ease, saving time and reducing clutter.
In the upcoming sections, I’ll share practical strategies on how to reconfigure your built-in wardrobe, introduce versatile drawer solutions, and craft a space that’s as beautiful as it is functional. Ready to ditch the chaos and embrace smarter storage? Let’s get started.
Plan Your Drawer Configuration for Maximum Efficiency
Start by measuring your wardrobe space accurately, noting the height, width, and depth available. Create a sketch or layout plan to visualize where each drawer will fit and what it will store. When I redesigned my closet, I split the space into dedicated zones—short for shirts, tall for pants, and smaller compartments for accessories. This concrete plan saved me from random clutter and made reorganization straightforward. Consider using modular drawer units that can be customized to your needs, similar to how custom cabinetry adapt to specific spaces.
Choose the Right Drawer Types and Materials
Opt for sturdy materials like plywood with a veneer finish or high-quality MDF with laminate that withstands daily use. For heavy items, such as jeans or sweaters, deep drawers with full extension slides allow easy access to items at the back. I recommend soft-close mechanisms for longevity and a smooth feel, reducing wear over time. Think of these drawers as the drawers in a kitchen remodel—built for durability and seamless operation—much like those found in expert custom kitchen designs. To see how these ideas integrate into your space, check out this guide on custom cabinets.
Utilize Dividers and Inserts for Better Organization
Dividers instantly turn cluttered drawers into organized compartments, making it easy to categorize items like socks, underwear, or ties. Use adjustable inserts to customize compartments over time, accommodating different items or changes in your wardrobe. When I implemented drawer dividers, I found my mornings became less stressful—no more digging through piles. Think of dividers as the internal walls of a well-planned kitchen drawer, keeping everything neatly separated. For innovative storage ideas, visit this resource on smart storage.
Install Custom Drawer Hardware and Slides
High-quality hardware like soft-close slides and sturdy handles improve functionality dramatically. Choose full-extension slides to access the entire drawer content without tipping or tilting. When I upgraded my closet, I went with heavy-duty slides rated for frequent use—this investment paid off with years of reliable operation. Remember, hardware is the finishing touch that turns a functional drawer into a pleasure to use, much like the refinement in a well-executed kitchen remodel. For more insights on hardware selection, see professional tips on storage hardware.
Ensure Proper Installation and Safety
Precise measurements and level mounting are crucial to prevent drawers from misaligning or sticking. Use a level and secure mounting brackets into studs or heavy-duty anchors. I once ignored proper support, and my drawers sagged within months—be proactive to avoid this common pitfall. Think of your wardrobe as a piece of furniture that needs the same stability and support as a built-in kitchen cabinet. For safety tips on installing heavy cabinetry, visit installation guidance.
Many homeowners believe that installing more closet rods maximizes space, but in reality, this often leads to clutter and reduced accessibility. One hidden nuance is that overreliance on hanging solutions can make drawers and shelves more effective if integrated thoughtfully. For instance, custom cabinets with well-planned drawers and compartments often outperform traditional setups, especially when designed with specific user needs in mind. A prevalent myth is that higher-end materials alone guarantee durability; however, proper installation techniques and hardware choices significantly impact longevity, as highlighted by experts in cabinetry reviews.
Be cautious not to fall into the trap of overlooking the importance of precise measurements and structural support, which are crucial for both built-ins and kitchen remodels. For example, incorrectly supported floating shelves can sag over time, ruining both aesthetics and function. According to a recent study in interior architecture, meticulous planning and understanding material load capacities can prevent costly repairs down the line.
For advanced homeowners seeking to refine their storage, consider questioning the durability of hinges or slides used—opting for full-extension, soft-close hardware can enhance usability and lifespan. Also, integrating concealed storage spots, like toe-kick drawers, adds a sophisticated layer of efficiency, but these require expert planning to avoid structural weaknesses.
Are you aware of the little details that can turn a good storage solution into a great one? From choosing the right cabinet scribing techniques to optimizing corner spaces with smart pull-outs, the possibilities are vast. Remember, the key lies in understanding that the hidden details make all the difference—so don’t settle for surface-level solutions.
Dive deeper into how custom cabinets can revolutionize your kitchen by exploring comprehensive guides like [this one on transforming your space with custom cabinets](https://artisancabinetworkz.com/custom-cabinets-as-a-game-changer-in-your-kitchen-remodel-journey). And if you’re ready to elevate your entire home with built-ins that blend seamlessly and function flawlessly, check out [our expert tips](https://artisancabinetworkz.com/creating-seamless-kitchen-remasters-with-built-in-storage-solutions). Have you ever fallen into this trap? Let me know in the comments.Maintaining your custom cabinets and built-in storage solutions requires more than just periodic cleaning; it involves using the right tools and following consistent methods to ensure longevity and optimal performance. My favorite tool for ongoing cabinet maintenance is a high-quality microfiber microfiber cloth, which gently lifts dust without scratching delicate finishes. For deeper cleaning, I rely on a soft-bristled brush in conjunction with a mild, non-abrasive cleaner like white vinegar diluted with water. This combo preserves the veneer or painted surfaces, preventing buildup that can cause staining or damage over time.
How do I keep my built-ins working smoothly over the years?
One of the most overlooked aspects is hardware maintenance. I recommend applying a small amount of white lithium grease on hinges, slides, and latches every six months. This prevents squeaking, reduces wear, and ensures smooth operation. When dealing with sliding drawers or heavy pivot doors, I use a silicone spray, which resists dust and stays effective longer than traditional oil lubricants. Clearly, investing in the right lubricants extended the life of my cabinetry significantly, as noted in professional cabinetry guides: [expert insights into hardware upkeep](https://artisancabinetworkz.com/experts-tips-on-selecting-storage-solutions-for-a-perfect-kitchen-upgrade).
Future trends suggest more automated and sensor-based maintenance tools will emerge, like self-cleaning drawer slides or smart hinges that alert you to potential issues before they cause breakdowns. As technology advances, integrating these innovations could redefine how we care for our built-ins, making maintenance less of a chore and more of a seamless process.
Don’t wait for squeaks or misalignments to disrupt your workflow—try applying a silicone spray to your cabinet slides this month. It’s a simple step that pays big dividends in durability and ease of use. For comprehensive insights into creating built-ins that stand the test of time and function flawlessly, explore [this guide to seamless kitchen remasters](https://artisancabinetworkz.com/creating-seamless-kitchen-remasters-with-built-in-storage-solutions). Proper tools and proactive maintenance are your best allies in keeping your storage solutions beautifully functional for years to come.
Lessons From the Front Lines of Closet Renovation
One of the most eye-opening lessons I learned was the importance of customizing storage to my habits, not just maximizing space with rods. I once tried to bulk up my hanging area thinking it was the golden ticket, but the clutter and frustration proved otherwise. Now, I know that integrating more drawers and thoughtful partitions creates a harmonious system that works for real life, not just plans on paper.
Another insight was realizing how much the right hardware can transform your experience. Soft-close slides and sturdy handles aren’t just luxury—they’re essentials for longevity and daily comfort. The investment pays off in smoother operation and lasting durability, something I wish I’d prioritized earlier in my project.
Finally, I discovered that patience in measurement and support details saves time and money down the line. Misaligned drawers or sagging shelves are headaches no one wants. Embracing careful planning and using reliable support systems has made my built-ins not only more functional but also a joy to use every day.
Tools and Resources That Taught Me More
My essential toolkit started with a quality tape measure, a reliable level, and a good set of dividers—I can’t recommend them enough for precision. For deeper insights into how to design a truly functional kitchen or closet, I turn to this comprehensive guide, which has helped me craft seamless, beautiful spaces.
Books like The Ultimate Guide to Custom Cabinets have deepened my understanding of material choices and design principles. And for ongoing inspiration, browsing smart storage ideas keeps my projects fresh and innovative.
Your Next Move: Create a Space That Inspires
Transforming your built-ins into a functional, beautiful area is within reach. With thoughtful planning, quality materials, and a dash of patience, you can turn chaos into calm and clutter into a showcase of efficiency. Remember, every detail counts—like hardware that lasts or dividers that keep your wardrobe neat. Start small if needed, and don’t hesitate to seek out expert guidance or inspiration to keep your project on track.
What storage challenge have you faced that seemed impossible at first? Share your story below—I love hearing how others turn their spaces into personal havens!