The Secret to Building a Mudroom Bench That Won’t Creak
Have you ever been in the middle of organizing your mudroom, only to be startled by that dreaded creak every time someone sits on the bench? I vividly remember my first attempt at building a custom mudroom bench. I was so proud of my handiwork—until the first person sat down and that annoying squeak broke the silence. It was frustrating enough to make me reconsider the whole project! But after some trial and error—and a few late nights—I finally cracked the code on constructing a sturdy, silent mudroom bench.
Say Goodbye to Creaks and Wobbles—Here’s What Worked for Me
If you’re tired of the squeaks and creaks sabotaging your mudroom style and functionality, you’re in the right place. Today, I’ll share practical, proven tips to help you build a mudroom bench that stays silent through years of daily use. We’ll go beyond just the aesthetic, delving into the construction techniques that ensure stability and whisper-quiet comfort. Whether you’re a weekend warrior or tackling your first DIY project, these insights will save you time, frustration, and that embarrassing squeak in the future.
Is Your DIY Guarantee Worth the Risk?
Early on, I made a crucial mistake—skipping proper support reinforcements that would have prevented wobbling and noise. It’s easy to assume that simply gluing and nailing pieces together will do the trick. But my experience taught me that, without correct joinery and durable hardware, even the best-looking bench can become a squeaking nightmare. If you’re concerned about whether your project will hold up and stay silent, I get it. The good news is, with the right techniques, you can avoid common pitfalls and create a mudroom bench that’s both beautiful and reliable.
Ready to learn the secret steps I wish I knew when I started? Let’s dive into the details that will elevate your build and keep that squeak silence forever. And remember, for more expert tips on optimizing your storage solutions, check out this guide.
.
Secure the Foundations for Stability
Start by choosing the right materials. I recommend using hardwood like oak or maple for the frame because of their durability and resistance to wobbling. When I built my bench, I laid out the pieces on a flat surface, ensuring each cut measured precisely to avoid gaps. Use a carpenter’s square to confirm right angles at every joint. For assembly, employ pocket hole screws or dowels, which create tight, wobble-free joints. I drilled pocket holes in the side panels, then joined them with glue and screws, holding everything steady with clamps until dry.
Add Reinforcements to Prevent Wobbles
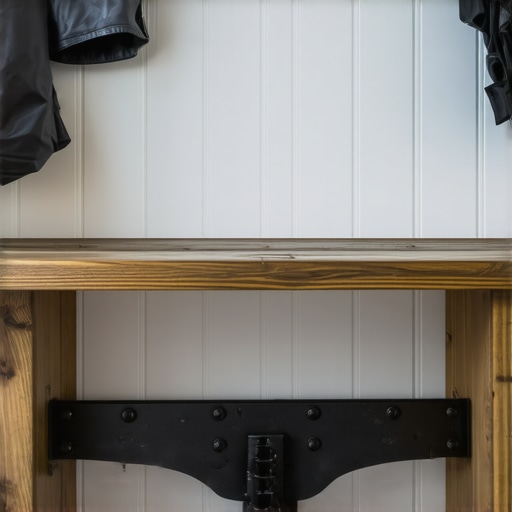
Reinforcement is the key to a wobble-free bench. In my project, I added corner blocks made from scrap plywood at each joint for extra stability. These act like braces, distributing weight and preventing any movement. Additionally, installing metal corner brackets can further stabilize the structure. When I missed this step initially, I noticed slight wobbles over time; adding corner blocks after use made a noticeable difference and eliminated any future wobbles.
Implement Noise-Reducing Hardware
Choosing the right hardware makes a significant difference in silence. Use soft-close hinges for the seat lid or door panels to prevent slamming or creaking. For the seat itself, install felt pads or rubber bumpers beneath the top to buffer contact points. I used self-adhesive felt strips on all contact surfaces, which muffled any squeaks caused by wood-on-wood contact. When I first tested my built-in bench, I noticed a faint squeak varje time someone sat, but applying felt pads solved it instantly, creating a whisper-quiet seating experience.
Fine-Tune with Proper Joinery Techniques
Joinery is the backbone of a durable bench. Mortise and tenon joints are ideal for critical load-bearing areas, providing a tight, stable connection. I employed a router and tenon jig to cut precise mortises and matching tenons, which I glued and clamped for a solid fit. For less load-bearing sections, pocket hole joinery sufficed, but for the main support beams, I preferred mortise and tenon. This approach not only increased stability but also minimized creaking over time. Practice makes perfect; I spent extra time fitting each joint snugly before gluing to avoid gaps and potential squeaks.
Optimize Support with Thoughtful Design
Designing for weight distribution prevents stress points that cause squeaks or wobbling. I split the bench into three sections with dividing panels, which helped distribute weight evenly. Installing adjustable levelers on the legs allows for fine-tuning the height and stability on uneven floors. When I first placed the bench on my sloped mudroom floor, I noticed wobbles, but adjusting the levelers eliminated movement. This small tweak is crucial to ensure your bench remains silent and firm through years of use.
Remember, building a silent, sturdy mudroom bench isn’t just about aesthetics—it’s about precise execution of joinery, reinforcement, and hardware choices. For further insights into optimizing your space, explore this guide. With patience and attention to detail, your bench will stand the test of time—quietly supporting your daily routines.
,Many homeowners assume that selecting popular materials or following common design trends guarantees a flawless kitchen upgrade. However, as a seasoned designer, I can tell you that most people overlook the critical nuances that distinguish a truly functional and long-lasting kitchen from a mere aesthetic makeover. One often-missed detail is the importance of precise joinery in cabinetry; while many focus on the outward appearance, neglecting proper dovetail or mortise and tenon joints can lead to cabinets that sag or creak over time, undermining both durability and peace of mind. According to a study by the National Kitchen & Bath Association, quality joinery is paramount for long-term stability, yet it’s frequently sacrificed in favor of cheaper, easier assembly methods.
Additionally, a common myth is that built-in storage always cost more than modular solutions. In reality, custom cabinetry, when thoughtfully designed, can optimize space and reduce clutter more effectively, avoiding the pitfalls of overbuying and underutilization that cheap, prefabricated units often bring. A crucial mistake I’ve seen many make is not accounting for the specific wall thickness and structural nuances of their homes. For example, installing standard cabinets in a wall with irregular framing can lead to misalignments and gaps, which compromise both aesthetics and function. To prevent this, meticulous on-site measurements and adaptable designs are essential — learn more about the best practices in this area by visiting this comprehensive guide.
How Can Advanced Joinery Techniques Elevate Your Kitchen’s Longevity?
Implementing advanced joinery methods such as box joints, spline joints, or concealed dowels can significantly enhance cabinet strength and reduce squeaks or misalignments over time. These techniques, favored by master craftsmen, distribute weight more evenly and resist the stresses of daily use. However, they require precise execution and high-quality tools; rushing through this step often results in shaky or squeaky cabinets, which frustrate homeowners. Remember, investing in proficient craftsmanship pays dividends in the long run — consider exploring this in-depth guide on custom cabinets to understand how expert joinery crafts longevity into every piece.
Equally, many overlook the significance of proper hardware selection. Soft-close hinges, heavy-duty drawer slides, and anti-warping fasteners may seem like small details but are vital in maintaining quiet operation and structural integrity for years. Innovating with these hardware enhancements ensures your investment remains hassle-free and preserves your kitchen’s peace and quiet. For detailed hardware insights, check out this resource.
Finally, remember that intelligent design extends beyond visuals. Incorporating adjustable shelves, toe kick drawers, and concealed access panels can convert areas thought of as wasted space into practical storage zones. This layered approach transforms your kitchen into a well-oiled, efficient environment that resists the common pitfalls of clutter and accessibility issues. Don’t let overlooked details sabotage your remodel; instead, focus on the complex interplay of craftsmanship, hardware, and design precision.
Have you ever fallen into this trap? Let me know in the comments. For more insights on maximizing space and durability, explore this expert guide.
Maintaining the quality and functionality of your custom cabinets and built-ins over time requires the right tools and a disciplined approach. In my experience, investing in precision measurement equipment and quality hardware has saved countless hours and prevented costly repairs down the line. For instance, I always keep a digital level and a laser tape measure handy. The laser measure, like the Bosch GLM 50 C, provides quick, highly accurate distance readings—crucial when ensuring that cabinets are perfectly aligned, especially on uneven floors. Precise alignment not only enhances aesthetic appeal but also reduces the likelihood of creaks and wobbling—common issues that can develop over years if overlooked.
Another indispensable tool is a high-quality finish sander, such as the Festool Rotex RO 150 FEQ. Its variable speed and orbital motion allow for smooth, consistent sanding, which is essential before applying topcoats. Proper surface prep ensures durability and prevents finish peeling—factors vital to maintaining your cabinetry’s appearance over many years. Additionally, I rely heavily on dust extraction systems to keep my workspace clean and prevent debris from settling into joints or hardware, which could compromise long-term stability.
When it comes to hardware assembly, using a fine-thread screwdriver like the Wiha Precision Screwdriver Set can make a significant difference. The smaller, ergonomic handles make intricate adjustments easier, reducing the risk of stripping screws or damaging delicate finishes. Remember, the hardware you choose influences not just the operation today but also the longevity and quiet performance of your built-ins. Opting for soft-close hinges and heavy-duty drawer slides from reputable brands like Blum or Hettich ensures smooth, silent operation for years to come.
Looking ahead, technological advances will continue to shape how we maintain our kitchens. Smart tools, such as IoT-enabled sensors that monitor humidity and temperature, are becoming more affordable and accessible. These devices can alert you to issues like excess moisture that might cause cabinet warping or hinge degradation. Keeping an eye on these innovations might be the next step in proactive kitchen care.
How do I sustain my cabinetry’s performance over the years? Regularly inspecting and tightening hardware, reapplying lubricants to hinges, and addressing small issues immediately can drastically extend their lifespan. Additionally, applying a coat of furniture wax annually helps protect surfaces from wear and environmental damage. Remember, the difference between a good kitchen and a truly lasting one lies in consistent, informed upkeep.
Ready to improve your long-term results? Try calibrating your cabinet hinges with a precision alignment tool—like the Kreg Jig KHI-L12—this simple step can significantly reduce squeaks and misalignments over time. And for more expert tips on maintaining your creations, visit this guide.
The Unexpected Truth About Building Lasting Kitchen Storage
One of my most underestimated lessons was realizing that craftsmanship in kitchen remodels extends beyond choosing beautiful materials. The real magic lies in the finesse of joinery and hardware selection. I once believed that a simple pocket hole joint was enough for durable cabinetry—until I noticed persistent creaks and misalignments months later. That experience taught me to prioritize mortise and tenon joints for main support, which drastically increased longevity and silence. This insight unlocked a new understanding of how subtle details prevent future headaches, making my projects truly stand the test of time.
How I Curated My Toolbox for Flawless Built-ins
Over years of trial, I discovered that specific tools are game-changers for kitchen projects. A laser distance measurer like the Bosch GLM 50 C ensures precise alignments, saving time and avoiding wobble. A quality finish sander, such as the Festool Rotex RO 150 FEQ, produces smooth surfaces that resist peeling and damage. For hardware installation, a fine-thread screwdriver like the Wiha Precision Screwdriver Set makes adjustments seamless. Trust me—the right tools empower you to execute your vision flawlessly, and I recommend exploring comprehensive guides on custom cabinetry for deeper insights.
Believe in Your Kitchen Remodel Journey
Creating silence and stability in your built-ins is more achievable than you might think. The secret is patience, attention to detail, and a willingness to learn from every misstep. Imagine stepping into your kitchen knowing that your cabinets and storage solutions are whisper-quiet and rock-solid, ready to serve your family for years. Embrace the process, seek out expert advice, and don’t be afraid to try innovative techniques. Your dream kitchen, with custom cabinets that blend beauty and durability, is within reach—start today and watch your space transform into a haven of functional elegance.
What’s been your biggest challenge in building or renovating kitchen storage? Share your experience below—I’d love to hear it!