How to Level Base Cabinets on a Slab with Adjustable Feet
Have you ever spent hours installing kitchen cabinets, only to find that they wobble or sit unevenly once you step back and take a look? I remember the moment vividly—after a weekend of effort, my brand-new base cabinets looked more like a funhouse mirror than a sleek, functional part of my kitchen. It was frustrating, tilting, and definitely not the polished look I envisioned. That lightbulb moment led me down a rabbit hole of solutions for leveling cabinets on uneven slabs, and today, I want to share what I discovered along the way.
Why Uneven Floors Can Turn Your Dream Kitchen Into a Wobbling Nightmare
Many homeowners overlook the challenge of slab floors when planning their kitchen remodel. Concrete slabs can be uneven due to settling, foundation shifts, or poor initial installation. Left unaddressed, those small discrepancies can cause your cabinets to sit crooked, damaging doors and drawers over time or making your space feel unbalanced. The good news? Adjustable feet are a game-changer. They let you tweak each cabinet’s height individually, transforming a crooked lineup into a perfectly level bank of storage. But here’s the tricky part: ensuring those adjustable feet actually do their job on a concrete slab. That’s what I struggled with early on—and what you can master once you know how.
What Happens When You Don’t Plan for an Uneven Floor?
I learned this lesson the hard way—by rushing into installation without considering the floor’s unevenness. I thought, “How hard can it be?” Well, the answer is, quite tricky. Without proper planning, uneven cabinets can lead to gaps, sticking doors, and even structural stress. And don’t fall for the misconception that shimming alone will solve everything. The truth is, shims are a temporary fix, and over time, they can shift or degrade, causing more hassle down the line. So, I decided to dig deeper—and I found out that adjustable feet, combined with the right leveling techniques, are the real secret to a smooth, stable setup. Want to avoid my early mistake? Keep reading, and I’ll guide you through the process step by step.
Select the Right Tools and Prepare Your Space
Start by gathering a quality level, adjustable cabinet feet, shims, a drill, and a measuring tape. Clear the area around your cabinets to access the underside easily. I once ended up crawling under a cabinet in my pajamas, trying to hold a level, which was a mess, but setting up a clean workspace made the process smoother. Think of it as preparing your toolbox before fixing a bike—everything needs to be in place to avoid frustration.
Assess the Floor and Determine High and Low Points
Use the level across the front and sides of each cabinet to identify uneven spots. Mark the high and low areas with painter’s tape for reference. On my first attempt, I misjudged the high point, which caused me to shim unnecessarily, leading to unstable cabinets. Accurate measurement is crucial—imagine trying to balance a stack of books unevenly placed; the more you measure, the steadier the setup.
Remove Old Hardware and Clear the Cabinets
Take off cabinet doors and hardware to access the mounting surfaces. This prevents damage and allows you to work precisely. I learned this the hard way when a handle scratched the countertop because I didn’t remove the door first. Simplify your work by clearing everything that could obstruct the leveling process.
Adjust the Leveling Feet
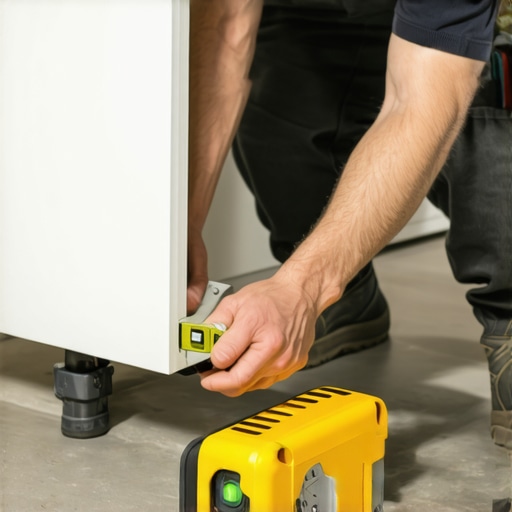
Install adjustable feet onto each cabinet base if not already present. For existing cabinets, screw the adjustable feet into the base, ensuring they’re tight. Place the cabinet on a flat surface and turn the feet clockwise to raise or counter-clockwise to lower. I once accidentally screwed a foot in too far, causing wobbling, so make gradual adjustments and test often. Think of it like tuning a guitar string—small turns make big differences.
Set the Cabinets on the Floor
Lift or slide the cabinets into position over the slab, aligning them carefully. Use shims beneath the feet if necessary, especially in extreme unevenness. When I did this, I used scrap wood as shims to fill gaps—similar to filling a pothole on a road for a smoother drive. Be prepared to adjust shims for each foot to sit flat on the concrete surface.
Level Each Cabinet Precisely
Place a level on the top edge of each cabinet, adjusting the feet until the bubble centers perfectly. Small adjustments can make a significant difference. I spent extra time on this step, and it paid off when all doors aligned flawlessly, eliminating uneven gaps. Remember, patience here prevents future headaches, especially with bulky or expensive cabinets.
Secure and Finish the Installation
Once cabinets are perfectly level, tighten all fasteners securely. Reattach doors and hardware, checking that everything swings and closes correctly. Use finishing shims or sand one last time if necessary. I once missed this step, leading to doors that squeaked or didn’t close properly, which was a hassle to fix later. This stage ensures your cabinets stay level, even with minor floor shifts over time.
Regular Checks and Adjustments
Over time, slabs can settle further, so periodically check the level and tweak the feet as needed. This is like monitoring a planted tree—you want to keep it steady for the long haul. Maintaining your cabinets ensures they stay functional and look sharp without wobbling or gaps. For more ideas on maximizing small spaces, check out smart storage solutions.
When embarking on a kitchen remodel or designing built-in storage, many homeowners fall prey to common misconceptions that can hinder their results. One widespread myth is that standard measurements and off-the-shelf solutions will perfectly suit unique spaces. In reality, every home has its quirks—uneven walls, irregular ceiling heights, or previous renovations that complicate installations. Overlooking these nuances often leads to costly adjustments or compromises on style and functionality. Experts emphasize the importance of custom solutions, such as tailored cabinetry and built-ins, which adapt seamlessly to your home’s specific dimensions, creating a polished look and optimizing space efficiency. Moreover, a frequent mistake is underestimating the significance of integrated storage features. For example, incorporating hidden drawers, pull-out shelves, or corner solutions can dramatically improve usability, but many skip these details during planning, resulting in cluttered counters and wasted space.
How can advanced planning prevent costly mistakes in custom cabinetry?
In-depth planning involves precise measurements, understanding your daily habits, and consulting design experts who can recommend innovative storage solutions. A study by the National Kitchen and Bath Association highlights that homes with properly planned storage see higher satisfaction and value. For instance, designing a deep corner cabinet with smart hardware or utilizing vertical space with tall pantry units can revolutionize your kitchen’s functionality. Avoiding the trap of generic designs is crucial; instead, prioritize bespoke features that cater to your lifestyle. For further insights, explore how built-ins that elevate your space can seamlessly blend style and practicality. Remember, a well-executed custom layout not only enhances aesthetics but also streamlines your routines, saving time and energy. Don’t forget to assess your current storage limitations thoroughly and think ahead—your future self will thank you. Have you ever fallen into this trap? Let me know in the comments.
Maintaining your built-in cabinetry and custom storage solutions is key to ensuring their longevity and continued functionality. Investing in the right tools and adopting consistent maintenance routines can save you both time and money in the long run. One essential tool I personally swear by is a high-quality magnetic screwdriver set. Its versatility allows quick adjustments without damaging delicate finishes, especially when tightening or replacing hardware—saving me from stripping screws or scratching surfaces. Additionally, a digital moisture meter is invaluable; it helps monitor humidity levels in your kitchen or storage areas, preventing warping or mold growth on wood components. Maintaining optimal humidity, ideally between 30-50%, ensures that your cabinets and storage solutions stay stable and free from damage over time.
Lessons That Only Experience Can Teach
- One of the toughest truths I discovered was that no two floors are exactly the same. Rushing into installation without carefully checking each section can lead to wobbling cabinets or uneven gaps. Patience and thorough measurements are your best allies when dealing with uneven floors.
- Another lightbulb moment was realizing that shimming isn’t a one-and-done fix. Over time, shims can shift or degrade, so integrating adjustable feet during installation offers a more permanent, reliable solution, saving you headaches down the line.
- Understanding the importance of precise leveling in the initial steps cannot be overstated. Spending extra time with a quality level and making micro-adjustments ensured my cabinets stayed level and beautiful much longer than I expected.
- Finally, the magic of integrating the right storage solutions became clear after I learned to visualize the whole space. Instead of just filling gaps, designing built-ins that fit the exact needs of my household transformed my kitchen into a true command center. To see how custom features can elevate your entire space, check out my favorite built-in innovations.
Tools and Resources That Make a Difference
- Digital Level: Unlike traditional bubble levels, a digital level gives precise readings, making leveling cabinets on uneven floors much easier. I trust mine implicitly after several successful projects.
- Adjustable Cabinet Feet: Investing in quality, easy-to-install adjustable feet helped me customize each cabinet’s height perfectly. They’re a game-changer for uneven surfaces.
- Measuring Tape and Marking Tools: Accurate measurements are the foundation of a successful build. I always keep a sturdy tape and painter’s tape handy for quick references and marking high and low points.
- Expert-Recommended Reading: For an in-depth understanding of innovative storage ideas, I recommend exploring this resource—it changed how I approached my projects and helped me think outside the box.
Bring Your Vision to Life with Confidence
“Building beautiful, functional built-ins and custom cabinets is a journey—one that demands patience, planning, and a willingness to learn from every misstep. Every challenge overcome boosts your skills and brings you closer to creating a space that truly reflects your personality and needs. Remember, the effort you put in now will reward you with a kitchen that’s not only stunning but also perfectly tailored to your lifestyle. Dive in, stay curious, and don’t hesitate to seek guidance along the way—your dream kitchen is within reach.”