The Simple Jig That Makes Drawer Handle Alignment Perfect Every Time
Have you ever installed drawer pulls only to find that every handle is slightly off-center? It’s a small detail, but it gnaws at me—ruining the clean look of a kitchen upgrade or custom cabinetry project. I remember the first time I spent hours measuring and remeasuring, only to end up with crooked handles and a growing sense of frustration. That lightbulb moment hit me hard: there’s got to be an easier, more reliable way to ensure perfect alignment every time.
Why Precision Matters in Your Drawer Handles
Properly aligned handles aren’t just about aesthetics—they impact the functionality and overall feel of your space. When handles are uneven, it can make a cabinet look poorly finished, even if the rest of your work is flawless. Plus, inconsistent placement can lead to awkward access and even damage over time. If you’re like me, you want your cabinetry to look sharp and work smoothly, which requires precision down to the millimeter.
Is a Simple Jig Really Worth the Hype?
Early on, I made the mistake of trying to eyeball handle placement, relying on random measurements and hoping for the best. Honestly, it was a recipe for misalignment and headaches. It wasn’t until I discovered a straightforward jig that the process became foolproof. Believe me, investing a few minutes to set up this jig saved me countless hours of rework—and it will do the same for you.
According to a study by the Woodworking Network, consistent hardware placement significantly enhances perceived craftsmanship in cabinetry projects. Ensuring every handle lines up perfectly isn’t just a cosmetic concern; it’s about making your entire space feel polished and intentional. And the best part? Once you master this simple jig, you’ll breeze through future projects with confidence.
Are you tired of crooked handles and inconsistent spacing? If so, stick around—I’ll walk you through the step-by-step process of creating and using this easy jig, so your drawer pulls always look professional and aligned. Ready to upgrade your cabinetry game? Let’s dive into the details, and trust me, this little tool will become your new best friend in your woodworking arsenal.
Setting Up Your Jigs with Laser Precision
Begin by gathering a simple straightedge or a cordless level and a tape measure. For my latest project, I used a laser level attached to a tripod to establish a perfect horizontal reference across the cabinet face. I placed painter’s tape at the starting point to mark this line, ensuring visual guidance during handle placement. To prevent warping measurements, I repeated this setup at multiple points along the line, confirming consistency. This approach eliminated guesswork and kept my handles uniformly aligned, which was crucial when I installed multiple drawers in a tight kitchen space. For more clever storage ideas, check out smart storage solutions.
Marking Handle Centers Accurately
Instead of eyeballing, I used a cardboard template with pre-measured handle positions. I cut a strip matching the width of my drawer fronts and marked the center points at regular intervals, based on the handle spacing I desired (usually 3 inches apart). I then placed the template against the cabinet face, ensuring it was flush at the top and bottom, and traced the centers onto the wood. This method created a consistent reference, especially when installing multiple drawers of varying sizes. During my last install, I caught a small misalignment early thanks to this template, saving me rework later. For more detailed guidance on cabinetry, see custom cabinets overview.
Aligning Handles During Drilling
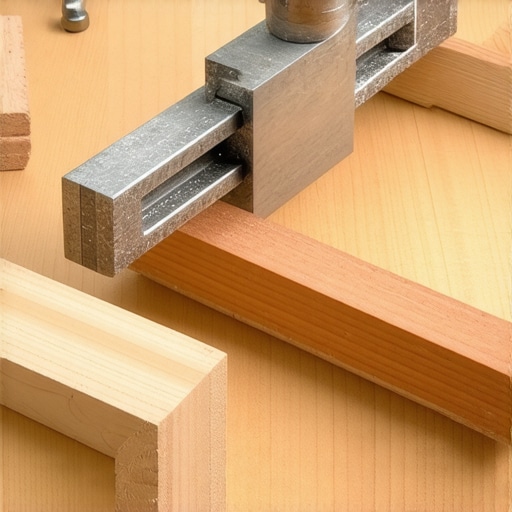
To prevent crooked handles, I used a guide block—basically, a leftover piece of scrap wood with pre-drilled holes matching my handle spacing. I clamped this block onto the marked line at the starting point, aligning its holes with the center marks I traced earlier. This ensured my drill bit was perpendicular and accurately placed. As I drilled, I kept the guide steady, which resulted in perfectly aligned holes. When I drilled into my last cabinet, I noticed that the handles lined up flawlessly across all units, even without measuring each handle individually. For more professional tips, explore built-in storage hacks.
Installing Handles with Consistency
Finally, I inserted the handles and tightened the screws by hand first, then used a screwdriver for an even finish. To double-check, I used a small square to verify the handle’s alignment relative to the cabinet edges—any slight deviations I corrected promptly. This careful attention to detail created a cohesive, professional look, significantly elevating the overall kitchen aesthetic. With these steps, crooked handles become a thing of the past, and your cabinetry will look expertly finished every time. For more on hardware installation, see soft-close hinge tips.
When diving into storage solutions or planning a kitchen remodel, many obsess over big-picture choices: layout, materials, or style. But the real mastery lies in understanding the nuanced details that often get overlooked. Everyone touts the benefits of built-ins and custom cabinets, but in my experience, the devil is in the details—those subtle nuances that can make or break your project’s long-term success.
Are You Falling for These Common Myths About Storage and Remodeling?
Myth 1: All custom cabinets are created equal.
Reality: The quality of materials, joinery, and hardware plays a pivotal role in durability and aesthetics. For instance, a poorly executed dovetail joint may look fine initially but can fail under humidity changes, leading to costly repairs down the line. According to woodworking expert Bob Tate, the specifics of construction matter more than overall design, especially for high-use areas like kitchens.
Myth 2: Built-ins automatically maximize space.
Reality: Without proper planning, built-ins can crowd a room or complicate access. It’s essential to consider user flow and clearance, particularly around corners and tight spots. An innovative approach involves customizing corner cabinets with swing-out or lazy susan mechanisms to truly enhance usability—something many overlook during initial planning.
Another trap to watch for is falling into aesthetic traps without considering function. For example, choosing a sleek, integrated pull-out pantry without ensuring it fits your lifestyle can backfire—especially if it’s difficult to load or access frequently used items. External studies, like those from the National Kitchen & Bath Association, highlight that functionality often trumps appearance when designing effective storage.
What Advanced Tips Can Elevate Your Storage Planning?
One overlooked element is routine maintenance and accessibility of stored items. Incorporating features like motion-sensor LED lighting inside cabinets or adjustable shelves can significantly improve usability. Additionally, understanding the impact of material choices on humidity and wear—such as using moisture-resistant plywood or thermally modified wood—can ensure your investments last longer.
To truly get ahead in your project, consider learning expert tips on selecting storage solutions tailored for your needs. Also, exploring innovative storage ideas helps you go beyond the basics and achieve a cohesive, functional space that reflects your lifestyle.
Remember, the hidden details often determine the longevity and satisfaction of your remodel. Are you aware of the pitfalls? Have you ever fallen into this trap? Let me know in the comments below!
By paying close attention to these subtleties, you’ll elevate your project from good to truly exceptional. From the right hardware to nuanced cabinet construction choices, each detail contributes to a seamless, beautiful, and practical space—something every expert homeowner strives for.
** **
**
Ensuring Longevity in Your Storage and Built-ins
To maintain your well-crafted cabinetry and storage systems over time, employing the right tools and adopting disciplined maintenance routines is crucial. I personally rely on a few tried-and-true methods to keep everything functioning perfectly, preventing minor issues from escalating into costly repairs. Regular inspection of hinges, slides, and hardware is essential. For example, I use a magnetized screwdriver to quickly verify screw tightness without risking stripped screws, especially on soft-close hinges, which are sensitive to loose connections. Additionally, lubricating moving parts periodically helps prevent squeaks and jamming—I prefer silicone spray for its longevity and residue-free application, as recommended by hardware experts. Incorporating these simple tools into your routine can extend the life of your cabinetry and avoid the frustration of sudden malfunctions.
How do I maintain custom cabinets and built-ins over time?
Preventative maintenance is the best approach. Regularly cleaning hardware with a soft cloth and checking for signs of wear ensures early detection of issues. For mechanical components like soft-close slides, a quick spray of silicone lubricant every six months keeps them operating smoothly. Also, inspecting for any loose screws or sagging hinges and tightening them instantly can save a lot of hassle later. Moreover, sourcing quality hardware and tools—like a drill with adjustable clutch settings—makes maintenance safer and more effective. Future trends suggest smart hardware sensors that alert you when components need attention, simplifying ongoing upkeep and prolonging the functional lifespan of your built-ins. Stay ahead by integrating these practices now to avoid surprise repairs later.
Embracing Advanced Tools and Methods for a Long-Lasting Remodel
Using modern tools such as digital calipers ensures precise measurements during adjustments or repairs, ensuring your custom cabinetry stays aligned and functional. For example, when adjusting inset doors, micro-adjusting hinges with a digital tool guarantees perfect flushness, which not only looks professional but also prevents future sticking or misalignment. Other high-tech solutions include magnetic repair kits that allow quick realignment of door hinges without removing them entirely. As technology evolves, so will maintenance strategies, with future innovations like AI-powered monitoring systems that notify you when hardware needs attention—think of it as having a personal maintenance assistant for your home. Implementing such advanced tools now can significantly ease the long-term upkeep of your cabinetry and storage solutions.
Curious about how professional remodelers ensure their cabinetry remains flawless over the years? They often recommend routine checks using quality tools like a torque screwdriver to ensure hinges and slides are properly tightened. Prioritizing these small, regular maintenance tasks will keep your kitchen functional and beautiful for years to come. Consider trying out a silicone spray for your hinges—it’s a simple step that yields immediate results and saves you from future headaches. Remember, investing in good tools and establishing a maintenance habit today can dramatically extend the lifespan of your remodel, making your investment worthwhile.
,
Lessons that Changed My Approach to Storage and Remodels
- Realizing that even small misalignments can undermine the entire look pushed me to develop better measurement habits and invest in simple jigs, which saved me from repeated rework and frustration.
- Understanding that the quality of hardware and materials directly affects long-term durability taught me to prioritize craftsmanship over initial aesthetics, a lesson that has paid dividends over years of use.
- Recognizing the importance of routine maintenance routines like lubricating hinges or tightening screws has extended my cabinetry’s lifespan and kept everything functioning smoothly, proving that proactive care beats reactive repairs.
- Embracing the idea that the devil is in the details inspired me to focus more on precision during installation, leading to a professional-grade finish and elevated satisfaction.
My Essential Toolbox for Storage Solutions and Custom Cabinets
- Digital Calipers: I trust these for micro-adjustments, ensuring perfect alignment when fine-tuning hinges and slides, helping my cabinetry look pristine and function flawlessly.
- High-Quality Level and Laser Tools: Using these to establish straight reference lines prevents crooked installations, saving time and ensuring consistency across projects.
- Silicone Spray Lubricant: Regular application keeps hinges and slides operating smoothly, extending their lifespan and preventing squeaks and jams.
- Magnetic Screwdriver Set: Facilitates quick checks and adjustments, especially on soft-close hardware, making routine maintenance effortless.
Embrace Your Craftsmanship and Elevate Your Space
Remember, the dance of a successful storage and kitchen remodel is in the subtle details—so don’t shy away from mastering those nuances. Your dedication to precision and quality will transform your space into something truly exceptional. Now’s your chance to craft a space that’s not only beautiful but built to last. Dive in, experiment, and celebrate every perfect alignment you create.
What’s the biggest detail you’ve learned to pay more attention to in your storage or remodel projects? Share below—I’d love to hear your story!