How to Scribe Crown Molding to a Ceiling That Isn’t Level
I’ll never forget the moment I installed crown molding in my living room and stepped back to admire my handiwork. Instead of a seamless finish, I was greeted with awkward gaps and misaligned edges where the ceiling dipped unexpectedly. That lightbulb moment made me realize: dealing with a ceiling that isn’t perfectly level is a challenge many DIYers shy away from—but it’s entirely manageable once you understand the secrets.
Why You Shouldn’t Let an Uneven Ceiling Keep You from Beautiful Crown Molding
The truth is, most walls and ceilings aren’t perfectly straight—that’s just the way older homes settle over time or due to construction quirks. Yet, many people avoid crown molding or struggle to install it properly because they think an uneven ceiling will ruin the look or make their efforts look amateurish. But here’s the thing: with the right techniques, you can achieve a professional finish that looks deliberate and polished. Taking on this project not only adds charm to your space but also boosts your home’s value and aesthetic appeal.
If you’re among those who hesitated because you’re worried about crooked ceilings, rest assured you’re not alone. I faced that exact dilemma early on—making the mistake of trying a standard
Level the Surface First
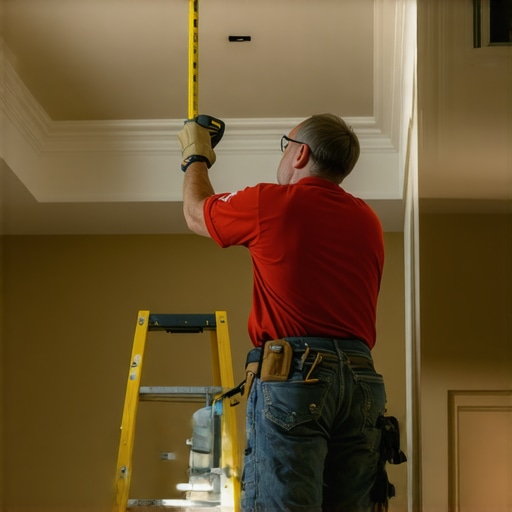
Begin by assessing the ceiling’s unevenness with a long level or straightedge. In a project where I installed crown molding, I found a variance of up to 1/2 inch across the ceiling length. To address this, I marked high spots and low spots directly onto the plaster. Then, I used shims behind the molding to create a consistent plane, mimicking the look of a perfectly level ceiling. This approach ensures the crown appears straight and professional, regardless of underlying imperfections.
Cutting the Molding for a Flawless Fit
Precise cuts are essential. Use a miter saw with a stop block set to 45 degrees for angle cuts. When I cut the molding for my corner joints, I tested the fit by dry-fitting pieces before finalizing the cuts. For uneven ceilings, bevel cuts combined with custom filler strips can hide gaps. This method gives you more control over the final appearance, especially when joints don’t line up perfectly. Remember, measuring each corner individually helps prevent mismatches.
Applying Consistent Adhesion and Nails
Secure the molding using a high-quality construction adhesive, applied evenly along the back. I used painter’s tape to hold the molding in position during curing, which helped avoid sagging. Nailing the molding into ceiling joists or studs ensures stability. For uneven surfaces, I aimed nails into the higher spots while filling the gaps with caulk afterward. This sealing step is vital for a seamless look, making gaps disappear and creating a clean edge.
Hiding Gaps and Imperfections
After installation, gaps or inconsistencies are inevitable. I used caulk designed for wood or plaster to fill small gaps. Smooth it with a wet finger or caulk tool to blend seamlessly. Sand lightly once dry and paint over with a matching finish. For larger uneven surfaces, applying a decorative molding strip or a bead of caulk before painting can distract the eye from imperfections. This finishing touch elevates the overall appearance.
Final Touches for a Flawless Finish
After painting, inspect the crown molding from different angles. Touch up any spots where paint might have missed or where caulk is visible. In my recent project, I added small wooden filling strips at joints to ensure the seams stayed tight over time. These simple yet effective steps create a clean, professional look—even on less-than-perfect ceilings. Remember, patience and attention to detail make the biggest difference when working with uneven surfaces.
Many homeowners believe that choosing the fanciest cabinets or the most expensive finishes guarantees a perfect outcome. However, the truth is, overlooking nuanced details often leads to costly mistakes and unsatisfactory results. One common misconception is that all custom cabinets are created equal; in reality, skill level, craftsmanship, and material choices significantly impact longevity and aesthetics. For instance, opting for cheaper materials like MDF over HDF for painted cabinet doors might seem cost-effective initially but can result in durability issues over time, especially in high-moisture areas, which experts warn can compromise your entire kitchen aesthetic.
Is Your Designer Overlooking the Power of Proper Support in Built-ins?
Many advanced homeowners ask whether they should prioritize support structures when planning built-ins. The answer is a resounding yes. Proper framing and anchoring prevent sagging, especially in upper cabinets or long open shelving, which is a mistake some make by neglecting heavier-duty hardware or reinforcement at critical points. According to a study by the National Kitchen & Bath Association, these structural oversights are the leading cause of early failure in home storage solutions. Moreover, rushing through measurement and fitting details—like misjudging toe kick heights or not accounting for wall irregularities—can create gaps and misalignments, turning a crafted piece into an eyesore, despite being visually appealing on paper. Always verify your measurements in different lighting conditions and consider professional advice on nuanced issues like uneven floors or ceiling dips. When selecting hardware, choosing high-quality options with smooth operation and solid mounting can add years to your investment, especially if your cabinets are custom-made. For further ideas on elevating your home’s style, explore custom cabinets that truly transform your home. Remember, a successful remodel hinges on paying attention to these often-overlooked details. What common pitfalls have you encountered in your projects? Let me know in the comments!
Invest in Quality Tools for Precision and Durability
When it comes to keeping your custom cabinetry and storage solutions in top shape, having the right tools makes all the difference. I personally swear by a high-quality oscillating multi-tool, such as the Fein MultiMaster, because it allows me to perform delicate tasks like removal of old sealants or detailed sanding without damaging surrounding surfaces. For measuring, a digital level like the Bosch D-tect 150 ensures accuracy, especially in spaces where walls and ceilings aren’t perfectly straight. Investing in these tools not only streamlines maintenance but also ensures your fixes are long-lasting.
Question: How do I maintain the integrity of built-ins over time?
Regular inspection is key. Check for loose joints or hardware, especially in areas prone to humidity or temperature fluctuations. Applying a fresh coat of protective finish, like a quality polyurethane or oil-based stain, every few years helps protect against moisture and wear. For moving parts like hinges and slides, I recommend using a silicone-based lubricant such as Wahl Natural Boar’s Hair Brush Oil to keep everything operating smoothly.
Sustainable Care with Proper Cleaning Methods
Maintaining the appearance of your cabinets and storage solutions requires proper cleaning. I avoid harsh chemical cleaners; instead, I opt for a mild solution of dish soap and water applied with a soft cloth. For stubborn stains or grease buildup, a mixture of white vinegar and water works wonders. This gentle approach preserves the finish, especially in custom-painted or veneered surfaces. Remember, over-cleaning can sometimes do more harm than good, so establishing a regular but gentle cleaning routine is ideal.
Adapting Maintenance Techniques as Trends Evolve
The future of cabinetry maintenance points towards smart solutions. Technologies like nano-coatings can provide self-cleaning surfaces, reducing the need for manual upkeep. Meanwhile, advances in finish materials are making cabinets more resistant to scratches and moisture. Staying current with these innovations ensures your pieces remain functional and beautiful for years to come. For inspiration, explore modern remodel ideas that incorporate durable, low-maintenance finishes.
Opt for Tools That Boost Longevity and Functionality
In my experience, employing proper hardware—like soft-close hinges and high-quality drawer slides—can prevent misalignments and reduce wear over time. Remember, regularly tightening screws and lubricating moving parts prolongs their lifespan. For those wanting to take maintenance a step further, consider installing monitoring systems that alert you to hardware issues before they become costly repairs.
Try This Advanced Maintenance Trick
One game-changing tip is to implement a periodic check of your cabinet’s internal support structures. Using a borescope camera (like the DEPSTECH Wireless Endoscope) allows you to inspect hidden areas for signs of stress or damage. Spotting an issue early prevents costly repairs down the line and preserves the integrity of your custom storage. For more ideas on keeping your investments in perfect shape, visit tips on selecting durable storage solutions.
Don’t forget to document your maintenance routine. Keeping a log helps you track when your cabinets received their last treatment and alerts you to upcoming upkeep needs. Ready to elevate your maintenance game? Incorporate these expert tips and tools today and enjoy beautifully functional cabinetry for decades.
Lessons Hidden in the Labors of a DIY Enthusiast
- One of the hardest lessons I learned was that perfection with custom cabinets often comes from embracing imperfections. Attempting to achieve absolute perfection on uneven walls and floors is a recipe for frustration; instead, accentuating these quirks with smart techniques yields a more satisfying result.
- I discovered that patience in measuring and cutting dramatically reduces errors during installation. Rushing leads to mismatched panels or uneven joints, which can be costly and time-consuming to fix later.
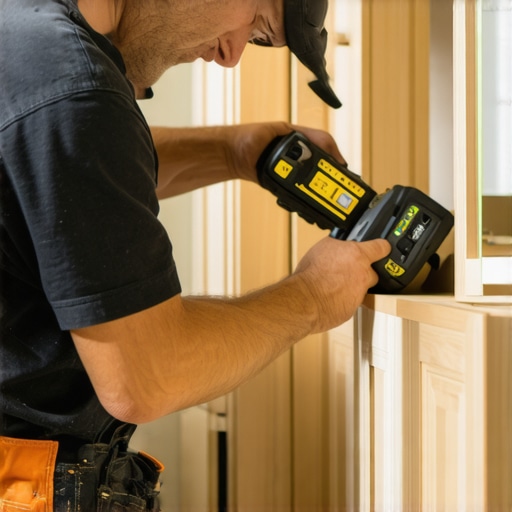
- Investing in quality tools, especially for leveling and measuring, is a game-changer. They not only improve accuracy but also make the entire process more enjoyable, transforming a daunting task into a creative challenge.
- Learning to tailor filler strips and custom cuts for each corner or irregular surface emerged as a cornerstone skill. This adaptability is what truly elevates a good installation to professional caliber.
- Finally, understanding that finishing touches—caulking, sanding, and proper painting—are where the magic happens. These details often hide underlying imperfections and unify the overall aesthetic.
Tools and Resources That Elevate My Craft
- Fein MultiMaster Oscillating Tool: My go-to for delicate trimming and sanding, especially around awkward corners and uneven surfaces. Its versatility saves time and creates cleaner edges.
- Bosch D-tect 150 Digital Level: Ensures my measurements are precise, even on irregular surfaces. Knowing I’m working within acceptable tolerances boosts confidence and quality.
- Craftsman Miter Saw with Stop Block: Precise cuts are crucial, and reliable equipment makes all the difference. It’s a foundation for seamless joints and professional finishes.
- Online Tutorials from Artisan Cabinetry Experts: Resources like detailed videos and blogs offer insights that accelerate learning and inspire new ideas—check out the ultimate guide to custom cabinets for inspiration.
Your Next Move Starts Here
Remember, the most successful home upgrades stem from a mix of patience, skill, and a willingness to learn from every project. With thoughtful planning and the right tools, you can transform even the most imperfect spaces into stunning showcases of craftsmanship. Dive into your next built-in or cabinet project—your future self will thank you for it!
What’s been your biggest challenge when working with uneven surfaces? Share your experiences below or ask for tips—I’m here to help!