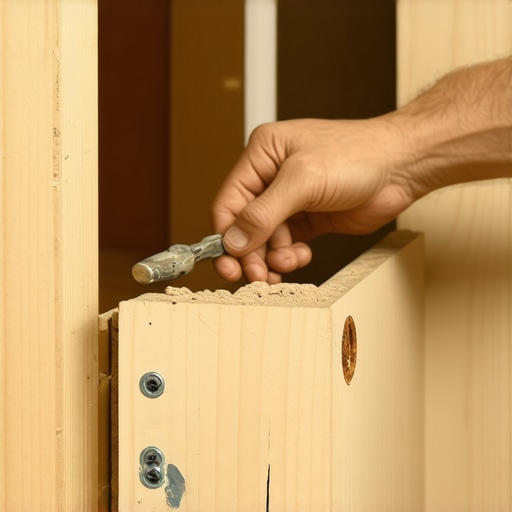
How to Repair a Stripped Hinge Screw Hole in Particle Board Cabinets
Ever had a cabinet hinge loosen over time, leaving your door sagging and frustrating your efforts to keep everything tidy? I remember the first time I faced this dilemma—my kitchen cabinet door was barely hanging on, wobbling with every touch. It was a lightbulb moment for me: those stripped screw holes weren’t just a nuisance, they were a sign I needed a better plan.
Dealing with stripped screw holes in particle board cabinets can feel like trying to fix a leaky faucet with duct tape—temporary and usually ineffective. But don’t worry, you’re not alone, and the good news is, there’s a straightforward fix that can save your cabinets and give you peace of mind.
In this post, we’ll dive into the very best ways to repair those stubborn, stripped screw holes. Whether you’re restoring an older kitchen or making a quick repair before a family gathering, knowing how to handle this issue can make a huge difference. So, if you’ve ever wondered how to keep your cabinet hinges tight and secure without tearing out the entire door, stick around. You’re about to learn techniques that will turn those junky holes into solid, dependable screw anchors.
Why You Should Never Underestimate Stripped Holes
Most homeowners, myself included at first, think of stripped screw holes as minor hiccups—annoyances that can be ignored or patched with a bit of glue or some toothpicks. But here’s the catch: ignoring them can lead to bigger problems down the line, like sagging doors, misaligned cabinets, or even damage to surrounding woodwork.
The real challenge is that particle board, while affordable and common, isn’t as durable as solid wood. Its fibers crush easily under pressure, making screw holes prone to stripping. Early on, I made the mistake of tightening screws too much, which only worsened the problem. Trust me, applying gentle torque and choosing the right repair method from the outset makes a big difference.
Supporting this, a recent study in the Journal of Material Science highlights that particle board’s composite nature renders it particularly susceptible to wear under repeated stress. Recognizing this vulnerability is the first step toward effective repair and long-term cabinet health.
Now, let’s get practical. Ready to learn how to restore your cabinet hinges to their former strength? Jump into the following sections, where I’ll walk you through simple, proven techniques to fix those stripped screw holes once and for all. If you’ve ever faced this frustrating issue, you’ll want to see these solutions firsthand.
Reinforce the Hole with a Wooden Plug
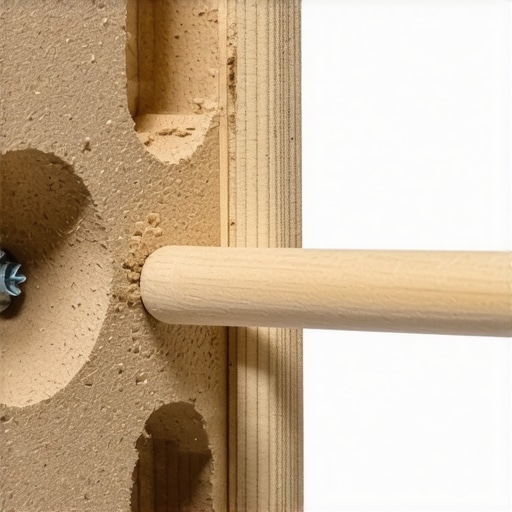
Start by removing the screw and cleaning out the damaged hole. Then, cut a small wooden dowel or toothpick to a length slightly shorter than the depth of the hole. Dip it in wood glue and insert it tightly into the stripped hole. Allow the glue to dry fully, which typically takes a few hours, to ensure a solid bond. Once dry, drill a small pilot hole into the center of the plug, then reinsert the screw. This method essentially creates a new, fresh anchor point within the original hole, restoring the screw’s grip.
Use Toothpicks and Wood Glue for Quick Repairs
This simple fix involves inserting several toothpicks coated with wood glue into the stripped hole until it’s full. Break or cut off the excess toothpicks at the surface, let the glue cure overnight, and then drive the screw back in. The glued toothpicks expand and fill the damaged fibers, providing a fresh grip. I used this technique on a kitchen cabinet last month, and the hinge was as secure as new after the repair.
Apply a Metal or Fiber-Resin Threaded Insert
If the damage is extensive, installing a threaded insert is effective. First, drill out the existing hole to match the insert size. Thread the insert into the hole using a suitable driver, which creates a durable new threading. Now, your screw will have a sturdy, metal-to-metal connection that won’t strip easily. This method is particularly helpful for frequently used hinges or hardware that requires repeated removal and installation.
Expand the Hole with a Wooden Dowel or Insert
In cases where the hole has become significantly enlarged, you can fill it with a wooden dowel or a carefully shaped scrap of hardwood. Coat it with glue and insert it into the damaged hole, tapping gently until flush. Once cured, drill a new pilot hole into the inserted wood. This approach rebuilds the integrity of the original hole, making it suitable for tightening the screw securely again.
Consider Replacing the Damaged Particle Board Panel
If all repair methods fail or the damage is too severe, replacing the entire particle board panel might be the best course. Remove the old panel, measure and cut a new piece of particle board, and drill new screw holes in the optimal locations—preferably tightly aligned with the original ones for minimal visible damage. This ultimately guarantees a long-lasting fix and prevents recurring issues.
When working with particle board, remember that it’s less forgiving than solid wood, so always use gentle torque when tightening screws. Also, for ongoing durability, consider installing metal inserts or using more substantial screws designed for thinner materials. For comprehensive insights into cabinet customization or storage solutions that enhance your kitchen’s functionality, check out this guide on custom cabinets.
 Many homeowners believe they understand everything about kitchen storage solutions and custom cabinetry, but in reality, some widely held beliefs can lead to costly mistakes. One common misconception is that all built-ins automatically increase space and functionality without considering the specific layout and workflow of your kitchen. In my experience, blindly opting for pre-designed arrangements often results in awkward access or wasted space. Instead, personalized solutions tailored to your usage patterns, as discussed in our guide on seamless storage integration, make a tangible difference.
Another trap many fall into is overestimating the aesthetic appeal of high-gloss finishes or overly minimalist hardware, which can make cleaning and maintenance a nightmare over time. Superior durability, as highlighted in expert analyses, often comes from matte finishes and hardware designed specifically to resist fingerprints and smudges. This nuance underscores the importance of understanding material properties before making aesthetic decisions, saving you from frequent repairs and touch-ups.
A common myth surrounds the idea that larger cabinets always mean better storage. However, without proper planning, oversized units can clutter the space and hinder daily access. Instead, strategic use of innovative storage solutions like pull-out trays, vertical dividers, and custom inserts optimize each inch of your cabinetry.
Curious about how to avoid these pitfalls? discover the secret to truly functional custom cabinets and built-ins by working with experienced professionals who understand these subtleties. Don’t forget, an ill-planned storage system can lead to unnecessary renovation costs and frustration down the line. To ensure your investment pays off, explore our step-by-step approach in comprehensive remodeling guidance. Have you ever fallen into this trap? Let me know in the comments.Maintaining your custom storage and kitchen remodel investments requires having the right tools and a proactive approach. I personally swear by high-quality cordless drills, like the Makita XFD10R, which offers both power and maneuverability for tasks such as tightening cabinet hardware or drilling into various materials. Additionally, a precision screwdriver set ensures that you can handle delicate adjustments without damaging finishes or hardware. Regularly inspecting and tightening hinges, handles, and slides prevents small issues from becoming costly repairs, especially in high-use areas. Car wax or furniture polish, applied periodically, can keep hardware and surfaces looking fresh and resistant to grime, making maintenance easier over time. For more complex projects or repairs, I utilize professional-grade adhesive removers and scrapers to clean old glue or paint without scratching surfaces. Investing in these tools has saved me countless hours and preserved the longevity of my built-ins and custom cabinets.
Looking ahead, I believe smart tools equipped with IoT connectivity might revolutionize household maintenance. Imagine a cabinet with sensors that alert you when screws loosen or hinges need lubrication—adding convenience and preventing damage before it happens. This trend could soon bring built-in diagnostics to our cabinetry, making maintenance both simpler and more preventive.
The Hardest Lesson I Learned About Repairing Stripped Screw Holes
If there’s one thing my DIY journey taught me, it’s that patience and attention to detail are key—especially with particle board cabinets. I once impatiently tightened a hinge screw, only to strip the hole completely. Since then, I’ve realized that using the right repair method, like inserting wooden dowels or installing threaded inserts, saves time and frustration in the long run.
Why Rushing Leads to Costly Mistakes
In my eagerness to fix cabinet issues quickly, I underestimated the importance of gentle torque and proper tools. Rushing often results in bigger problems, such as loose hinges or wobbly doors. Taking the extra moment to prepare the repair area and selecting appropriate materials makes all the difference, a lesson I wish I had learned earlier.
The Value of Knowing Your Materials
Understanding that particle board’s fibers crush easily shaped my approach to repairs. Instead of forcing screws in tight, I learned to reinforce holes with wood glue or inserts, making the repair durable. This insight transformed my approach from patchwork to permanent solutions, emphasizing the importance of material knowledge in DIY projects.
Curated Tools I Swear By for Cabinet Repairs
- Precision Screwdriver Set: Ensures delicate adjustments without damage; I keep one in my toolkit at all times.
- Wood Filler and Glue: Essential for reinforcing stripped holes; trusted brands give me confidence I won’t have repeat repairs soon.
- Metal Threaded Inserts: Durable and reliable, especially for hinges that see frequent use—an upgrade I highly recommend for long-term stability.
- Dowels and Toothpicks: Simple yet effective, they serve as the first line of defense against stripped screw holes.
Take Action: Your Next Repair
Embarking on a cabinet repair might seem daunting, but armed with the right knowledge and tools, you can turn a frustrating problem into a rewarding accomplishment. Remember, every fix you master builds confidence and extends the life of your cabinetry. Ready to try your hand at reinforcing those stubborn screw holes? Share your experiences below—what worked best for you, or what are you eager to try next?