The Vertical Pull-Out That Finally Organizes Your Water Bottles
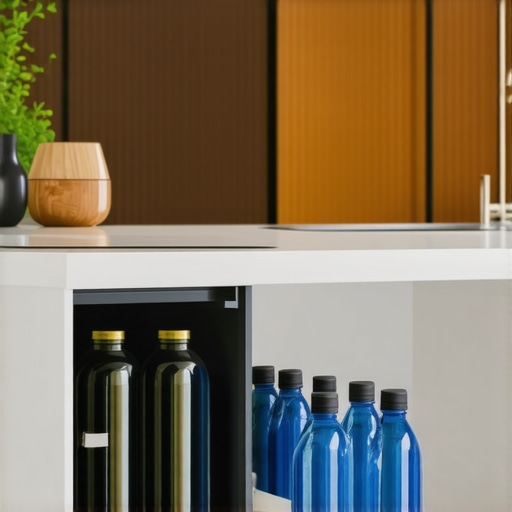
It was a typical Sunday morning when I opened my kitchen cabinet and found water bottles stacked precariously, threatening to tumble out every time I reached for a glass. That frustrating moment sparked a lightbulb: why had I accepted this chaos for so long? After all, we rely on water bottles daily, yet they had turned my cabinet into a disorganized mess. I knew there had to be a better way, a simple upgrade that could transform the chaos into order. Today, I want to share a solution that finally made my water bottle nightmare vanish—a sleek, efficient vertical pull-out that organizes and eases access.
Why Water Bottle Storage Becomes a Battle in Our Kitchens
Everyone who drinks water knows the struggle: bulky bottles taking up precious space, tumbling when you reach in, and wasting your countertop or pantry real estate. Over time, I tried stacking them in bins, using dividers, even balancing them on the door… none of it worked. They looked cluttered, and retrieving one often meant displacing half a dozen others. It’s a common problem, especially in kitchens where space is tight and every inch counts. The chaos not only consumes time but also drains your patience each morning. According to a recent study, inefficient storage can lead to an average of 30 minutes wasted weekly just searching or reorganizing.
What I needed was a storage solution that allowed me to see all bottles at once, grab the one I wanted without disrupting the others, and fit seamlessly into my existing cabinet layout. That’s when I discovered the magic of a vertical pull-out. It’s a game-changer—truly an upgrade that elevates your storage to a new level of practicality and style.
If you’ve faced similar frustrations—perhaps you’ve tried every hack and still find your bottles in disarray—then keep reading. I’ll walk you through how this simple upgrade can resolve your water bottle woes and add a touch of order to your kitchen. Ready to finally get organized? Let’s dive into how you can implement this smart solution, step by step.
Measure Your Space Precisely
Start by removing all water bottles from your cabinet and measure the depth, width, and height available. Use a tape measure to note dimensions accurately; this prevents surprises during installation and ensures the pull-out fits snugly. I once overlooked this step and ordered components that were slightly off, which caused delays and frustration, but now I double-check before proceeding.
Choose the Right Materials and Hardware
Select durable plywood or hardwood for the pull-out shelves, matching your cabinet’s finish or style. Opt for heavy-duty ball bearing slides rated for the weight of water bottles—these ensure smooth operation and long-lasting use. When I upgraded my cabinet, I picked stainless steel slides, which handle the weight and resist moisture, significantly improving functionality. Learn more about storage innovations for kitchen remodels.
Build or Order Custom Shelves
For a seamless fit, consider building custom shelves or ordering pre-made ones from a cabinet maker. If you’re comfortable with DIY, cut shelves to size, ensuring they can hold the bottles upright without tipping. I assembled mine with precise measurements and attached lipping to prevent bottles from sliding off. Visiting built-ins and storage hacks gives ideas for integrating custom solutions.
Install High-Quality Slides
Following manufacturer instructions, mount the slides to the sides of your cabinet and shelves. Use a level to ensure proper alignment; misaligned slides can cause jerky movements or sticking. I invested extra time in this step, and the result was a perfectly smooth glide that made accessing bottles effortless. For detailed guidance, see storage solutions tips.
Assemble and Test the System
Attach the shelves to the slides and slide them into place inside your cabinet. Load water bottles carefully, checking for stability and smooth movement. Adjust the slides if needed, making sure each shelf aligns properly and pulls out fully without resistance. My first attempt was a bit wobbly, but fine-tuning the slides fixed the issue, resulting in a sleek, functional storage system that transformed my mornings. For more advanced tips, visit leveling and aligning cabinetry.
When it comes to customizing your kitchen, many assume that choosing a high-end cabinet style or trendy finish alone guarantees a flawless remodel. However, even seasoned homeowners often overlook nuanced details that make or break the project’s success. For example, a prevalent myth is that all custom cabinets are created equal; in reality, craftsmanship varies wildly, affecting durability and functional longevity. Rushing into a design without understanding the differences between face-frame and frameless cabinets can lead to costly mistakes, such as misaligned doors or uneven reveals, which compromise aesthetics and access. Additionally, some believe that modern built-ins are just aesthetic choices, but they are powerful tools for maximized storage, provided they’re designed with precise measurements and integration in mind. Overlooking this can result in inefficient spaces that feel cramped or unusable. Many people also fall into the trap of underestimating the importance of proper hardware, like soft-close hinges, which not only enhance comfort but significantly extend cabinet lifespan. This oversight could lead to early wear and annoying repairs. An advanced consideration is understanding the impact of material selection on humidity and temperature fluctuations—choosing the wrong wood species or finish can cause warping, especially in moisture-prone areas. According to experts, failure to account for climate compatibility leads to costly repairs down the line, undermining the initial investment. Recognize that a successful kitchen remodel isn’t just about trendy finishes or luxurious hardware; it’s about detailed planning, understanding material nuances, and avoiding simplistic assumptions. Always scrutinize your choices, ask questions about craftsmanship, and consider future needs to ensure your project stands the test of time. For more insights on how to avoid these common mistakes, visit [the ultimate guide to custom cabinets](https://artisancabinetworkz.com/the-ultimate-guide-to-custom-cabinets-for-a-stylish-kitchen-overhaul). Have you ever fallen into this trap? Let me know in the comments.Maintaining your custom kitchen cabinets and storage solutions is key to ensuring they stay beautiful and functional for years to come. One of my favorite tools for routine upkeep is a high-quality microfiber cloth paired with a gentle, pH-balanced cleaner. I avoid abrasive cleaners that can damage finishes; instead, I recommend using a soft cloth to dust weekly and a damp cloth for more thorough cleaning. For deep cleaning, especially on painted or lacquered surfaces, I use a DIY solution of warm water with a few drops of mild dish soap, followed by drying with a clean microfiber to prevent streaks.
Tools I Recommend for Longevity and Ease
Beyond basic cleaning, I rely on a few specific tools. A flexible plastic scraper helps remove stubborn grime without scratching delicate surfaces. For stubborn stains or grease buildup around hardware, a soft-bristled toothbrush combined with isopropyl alcohol really does wonders. When it comes to hardware, a precision screwdriver set makes regular tightening of pulls and hinges straightforward, preventing loose components that can cause misalignment or damage. Investing in a quiet, cordless drill with multiple attachments, including a countersink and screwdriver bits, can expedite hardware maintenance and installation tasks.
Keeping Your Cabinets in Top Shape Over the Years
Long-term results depend on proactive maintenance. Regularly inspecting for loose hinges or pulls allows you to tighten or replace parts before they cause bigger issues. Applying a clear, matte furniture wax once or twice a year can protect wood finishes from moisture and scratches. For built-ins, sealing gaps with quality caulk and ensuring proper ventilation offsets humidity damage, especially in high-moisture areas. I also recommend reviewing your storage organization periodically; a well-organized cabinet prevents overstuffing, which can strain hinges and slides. Using smart storage ideas from this resource has helped me extend the lifespan of my cabinetry.
Reach for the Right Software or Maintenance Systems
In the digital realm, I utilize maintenance tracking apps that remind me of periodic checks and cleaning. Apps like Todoist or specialized property management software can keep a schedule for inspections, hardware tightening, and touch-ups, especially if you have multiple built-ins across your home. Predictably, technology will only improve for homeowner convenience, with future advancements focusing on diagnostic tools that can alert you to moisture or structural issues before they become visible.
*Image title:* Digital maintenance management for cabinets
*Alt:* Smartphone showing maintenance app with scheduled tasks for cabinet upkeep
Looking ahead, I predict that smart sensors embedded in cabinetry will become more widespread, alerting homeowners to humidity levels or wood movement. I encourage you to try integrating one advanced tip today: set up a quarterly inspection routine using your favorite app, and schedule a maintenance session with your preferred handyman or do-it-yourself approach. This proactive step ensures your investment continues to serve your home beautifully and practically for years to come.
Through my journey of upgrading my kitchen storage, I realized that often, it’s the finer details—like proactive maintenance and smart planning—that truly elevate a space from good to exceptional. One key insight was understanding that investing time into tailored solutions, such as a custom pull-out for water bottles, can make daily routines smoother and more enjoyable. Moreover, familiarizing myself with trusted resources, like built-in storage hacks and smart kitchen storage ideas, has empowered me to make informed decisions that last. Remember, your kitchen is an ongoing project—embrace continuous care, and it will reward you with years of beauty and function.