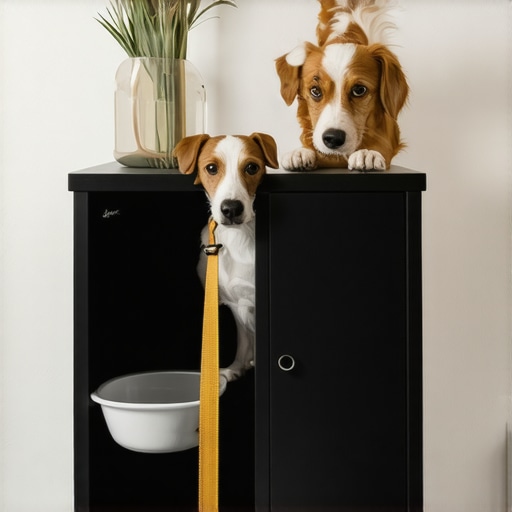
The Pet Station Built-In That Hides Food Bowls and Leashes
It was a typical Saturday morning when I realized my rescue pup, Max, had claimed half of the kitchen counter as his personal snack zone, and I was still battling a jumbled collection of leashes and food bowls cluttering the entryway. That eye-opening moment, when I tripped over a rogue leash and nearly spilled coffee, was the catalyst that led me to rethink my kitchen’s layout. I knew there had to be a better way to manage our pet gear while maintaining a sleek, organized space.
Why Pet Storage Solutions Matter in Modern Homes
Living with pets isn’t just about providing them love and attention—it’s about designing a home that functions for everyone. An inefficient arrangement of pet supplies can make daily routines frustrating and even clutter your living areas. I learned early on that incorporating dedicated storage, especially built-ins that subtly hide food bowls and leashes, not only keeps the space tidy but also enhances the overall aesthetics. Plus, it can prevent those accidental tripping hazards that turn into an injury or chaos in the middle of busy mornings.
Is a Pet Station Built-In Actually Worth the Investment?
Initially, I questioned whether a custom solution was justified versus just buying some storage bins or hooks. My first mistake was underestimating the importance of seamless integration. I thought a few wall hooks would do the trick, but those quickly turned into a messy jumble, and I still faced the daily hunt for leashes and spare bowls. Over time, I realized that a dedicated, hidden pet station could make all the difference—saving time, reducing clutter, and even helping my pet feel more at home.
Did you ever try to organize your pet gear with quick fixes only to find the mess creeping back in? You’re not alone. According to a study by the American Pet Products Association, over 67% of U.S. households own a pet, and many struggle with managing pet-related clutter. Investing in well-designed built-in storage solutions can be a game-changer, transforming chaos into calm.
This realization set me on a journey to explore how custom cabinets, hidden compartments, and clever storage hacks could revolutionize my kitchen and pet areas. Let’s dive into practical steps and clever ideas that personal experience has shown me truly work—so you can enjoy a more organized, pet-friendly home.
Plan Your Space Thoroughly Before Building
Start with a clear layout by measuring your available wall and floor areas. During my own project, I grabbed a tape measure and sketched a rough plan on graph paper, marking existing furniture and doorways, which saved me from costly mistakes. Consider where your pet’s favorite spots and daily routines fit into the design. This forethought ensures your built-in station is both functional and unobtrusive, seamlessly blending with your kitchen. For more insights, check out this guide on seamless kitchen remasters.
Choose Materials That Withstand Daily Wear
Select durable, pet-friendly materials like sealed hardwood, laminate, or high-quality plywood with a water-resistant finish. In my experience, opting for laminate panels made the cleaning process effortless and kept the surface looking fresh despite Max’s muddy paws. Avoid cheap or soft woods that scratch easily or stain over time. When planning your construction, consider how these choices will hold up against pet food spills, scratches, and moisture, ensuring longevity. For more material tips, explore this guide to custom cabinet materials.
Design Storage that Hides Clutter Effectively
Integrate pull-out drawers, hidden compartments, or swing-down doors to conceal leashes, food bowls, and toys. I installed a shallow pull-out drawer beneath the countertop to stash those items out of sight but within easy reach. Use dividers for small items like keys or brushes. Think of this as creating a back-stage dressing room—organized for efficiency yet invisible to guests. Incorporating built-ins that elevate your space can elevate your home’s style while managing pet gear seamlessly.
Utilize Vertical Space for Maximum Efficiency
Mount hooks or racks on the wall for leashes and harnesses. During my project, I used wall-mounted pegboards above the station, which kept everything accessible and off the counters. Consider stacking storage bins or adding overhead cabinets if space permits. This approach frees up valuable floor and counter space and makes cleaning easier. As discussed in smart storage ideas for your kitchen, vertical strategies are essential for compact areas.
Implement a Water-Resistant Finish for Durability
Protect your built-in with a waterproof sealant, especially around the bowls and feeding areas. I applied a marine-grade topcoat on my wood surfaces, which resisted spills and cleaning agents without cracking. This layer acts as a barrier, reducing damage over time and maintaining the appearance. Consider regular maintenance to reinforce protection, much like how I periodically re-sealed my stations to keep them in top shape. For detailed finishing techniques, visit this article on durable finishes.
Maintain Accessibility with Thoughtful Placement
Ensure the pet station is at an ergonomic height for your pet. During the installation, I noticed Max struggled to reach the upper shelves, leading me to lower some compartments. Use adjustable shelving to customize as your pet grows or their needs change. Accessibility encourages your pet to use the station properly and reduces clutter caused by misplaced items. Remember, a well-placed station reduces daily chaos, as I experienced firsthand when arranging Max’s supplies. For more tips on layout and accessibility, see this guide on thoughtful storage placement.
While many homeowners believe they understand what makes for a great built-in or storage solution, there’s often a gap between perception and reality. One common misconception is that custom cabinets are inherently more expensive and less practical than semi-custom or stock options. In reality, careful planning and selecting the right materials and features can make custom solutions more cost-effective and durable, especially when you consider their ability to maximize space efficiency—discover how to do so effectively here.
Don’t fall for the myth that built-ins are only for luxury homes
This idea overlooks the functional benefits that built-ins offer, such as eliminating clutter, creating seamless aesthetics, and improving overall workflow—especially crucial in busy kitchens. Many mistakenly think that installing built-ins requires a complete overhaul, but innovative storage hacks, like concealed compartments or vertical space utilization, can be integrated into existing layouts without massive renovations. For advanced homeowners, understanding the nuances of depth, load-bearing capacity, and finish durability is essential to avoid costly mistakes. For example, selecting the right hardware and finish can significantly extend the lifespan of your investments; learn more about durability here.
What gives most people away when designing storage solutions without expert input?
Overestimating the space needed for each item and neglecting user accessibility often leads to cluttered, inefficient designs. A common oops is designing drawers and compartments without considering how frequently items are used or how they are retrieved, which reduces the overall usability. Additionally, ignoring the importance of proper vertical and horizontal measurements can result in storage that looks good but is impractical—like shallow drawers that don’t hold baking sheets or tall doors that are cumbersome to open. Remember, a well-designed built-in considers both aesthetics and functional ergonomics, ensuring that every inch serves a purpose. Want to get started on your own project with expert guidance? Check out these expert tips.
How can homeowners avoid common pitfalls with custom cabinetry planning?
The fastest way to sabotage your project is neglecting detailed planning and not consulting with professionals early in the process. Failing to account for existing infrastructure, such as plumbing or electrical wiring, can lead to costly revisions. Another mistake is choosing finishes or hardware without considering maintenance and usage patterns—matte finishes are often more forgiving in busy kitchens, for instance. Furthermore, avoid rushing through measurements or assuming standard sizes will fit your space perfectly; precise measurements and custom adjustments are key. Using detailed plans and professional input ensures your built-ins will meet your expectations both functionally and aesthetically. For more advice on planning, explore this comprehensive checklist.
Have you ever fallen into this trap? Let me know in the comments.Achieving a functional and stylish kitchen overhaul relies heavily on the right tools and methods. Over the years, I’ve developed a trusted toolkit that ensures precision, efficiency, and durability in every project. One essential piece is a high-quality cordless drill, like the Makita XFD10Z, which provides ample power without cord clutter, enabling me to work efficiently in tight spaces. For measurements, I swear by a laser distance measurer such as the Bosch GLM 50 C; it saves time and guarantees accuracy, especially when planning custom cabinetry or built-ins. When it comes to cutting materials, a track saw like the Makita SP6000J1 allows for clean, straight cuts on plywood and hardwood, critical for seamless cabinets and shelves. For software, I rely on SketchUp to visualize layouts in 3D, ensuring everything fits perfectly before the physical work begins. This digital step saves money and prevents costly mistakes during installation. Investing in quality tools pays dividends in the long run; they facilitate detailed craftsmanship and can adapt to various stages of your remodel. Prediction-wise, I believe we’ll see more integrations between digital planning software and automated measuring tools, streamlining the entire renovation process even further.
How do I maintain tools over time?
To keep my essential tools working flawlessly, I follow a strict maintenance routine: regularly cleaning, lubricating moving parts, and storing them in a dry, organized toolbox. For power tools, I use protective cases and replace worn batteries promptly to prevent malfunctions. Additionally, I keep a log of usage to identify when a tool needs servicing or replacement. This proactive approach extends their lifespan and ensures peak performance for future projects.
For example, I recently replaced the brushes in my oscillating tool, which dramatically improved its efficiency during the trimming phase of custom cabinetry. Consistent maintenance not only prevents downtime but also helps you spot potential issues early. As projects grow more complex, having reliable tools becomes even more critical. Consider scheduling quarterly check-ups on your equipment or investing in tool-specific lubricants—these small steps can save you significant headaches down the line.
Try incorporating a maintenance checklist into your routine, especially for power tools. For instance, regularly inspecting cordless drills for dust build-up or ensuring blades are sharp can make a noticeable difference in quality of work. For detailed maintenance techniques, visit this resource. By staying on top of your tools, you’ll guarantee that your kitchen remodel remains smooth from start to finish, turning good ideas into stunning results.
Quiet triumphs — what I didn’t see coming
One of the most powerful lessons lingered in the subtle details. I discovered that custom-built pet stations not only decluttered my space but also subtly changed my daily rhythm, making routines smoother and less stressful. It’s often the small, overlooked tweaks that yield the most significant comfort.
My secret weapon for lasting transformation
Investing in high-quality tools like a laser measurer or a reliable router wasn’t just about ease; it meant precision that saved me countless hours and redo’s. The right equipment makes the complex seem manageable, turning ambitious projects into achievable milestones, especially when planning intricate built-in storage.
Understanding that homegrown solutions have limits
While DIY ideas are inspiring, I realized some things are worth professional input — from ensuring structural safety to choosing durable materials that withstand pet claws and daily spills. Knowing when to DIY and when to enlist expert advice is the difference between fleeting satisfaction and a lasting upgrade.
Experiencing the inescapable power of planning ahead
Meticulous measurement, thoughtful layout, and early consultation with specialists transformed a chaotic corner into a harmonious space. It underscored a truth I now hold: comprehensive planning isn’t just a step; it’s the backbone of seamless, functional, and beautiful built-ins and storage solutions.
Where to continue your journey
If you’re eager to elevate your home with smart storage, consider exploring innovative solutions for every room or dive into kitchen space maximization tips. These resources build on the lessons I’ve learned, helping you avoid common pitfalls and design with confidence.
Your move — embrace the challenge
Transforming your space with built-ins and storage solutions isn’t just about aesthetics; it’s about reclaiming your everyday comfort and efficiency. Start small, plan thoroughly, and don’t hesitate to seek expert guidance. Your dream, organized home is within reach.
What unanticipated challenge kept you from starting your own home upgrade? Share below — let’s inspire each other to turn vision into reality!
**