How to Fix a Striped Hinge Screw Without Replacing the Door
Ever had that moment when you’re trying to close your cabinet door smoothly, only to hear a frustrating squeak or notice it doesn’t quite sit right? I remember the first time I faced this dilemma—my beautiful kitchen remodel suddenly felt imperfect because one hinge screw was stripped, making the door hang unevenly and creak every time I opened it. That lightbulb moment hit me hard: I didn’t need to replace the entire door or hinge, just that pesky screw.
Why a Stripped Hinge Screw Can Ruin Your Kitchen’s Look and Feel
Stripped screws aren’t just a cosmetic annoyance—they can compromise your cabinet’s function and appearance. A loose or wobbly door isn’t just inconvenient; it can lead to further damage over time. Plus, the visual impact of a misaligned door can throw off your entire kitchen aesthetic. Trust me, the fix doesn’t have to be complicated or costly. I’ve learned some handy tricks that can save you from a full door replacement and preserve your remodel’s integrity.
Is It Worth the Trouble to Fix a Stripped Screw?
Early on, I made the mistake of rushing to buy a new hinge when all I needed was a simple repair. It’s easy to assume that replacing hardware is the only solution, but often, a more targeted approach works better. According to experts at Artisan Cabinetworkz, many common cabinet issues—like stripped screws—can be fixed with a few DIY techniques, saving you time and money. So, before you consider a costly replacement, let’s explore some effective methods to repair that stripped hinge screw and get your cabinets back to perfect functioning.
Natural solutions like using a toothpick or inserting a washer can often do the trick. And yes, I’ve tried them all and can vouch—they work. Ready to discover the exact steps? Keep reading, because a solid fix might be just a few minutes away. And if you want to take your kitchen upgrade to the next level, check out modern kitchen remodels with custom cabinets for inspiration.
Remove the Damaged Screw and Prepare the Hole
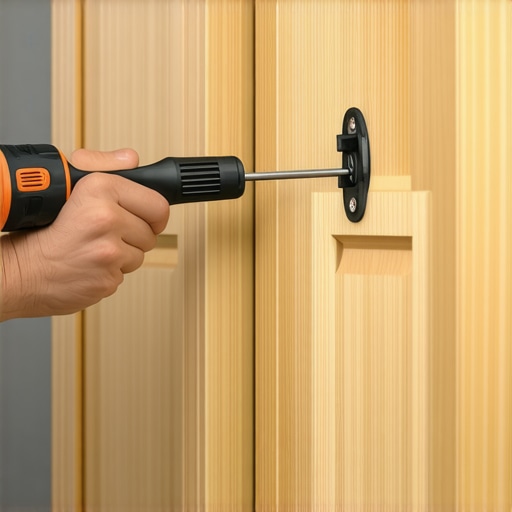
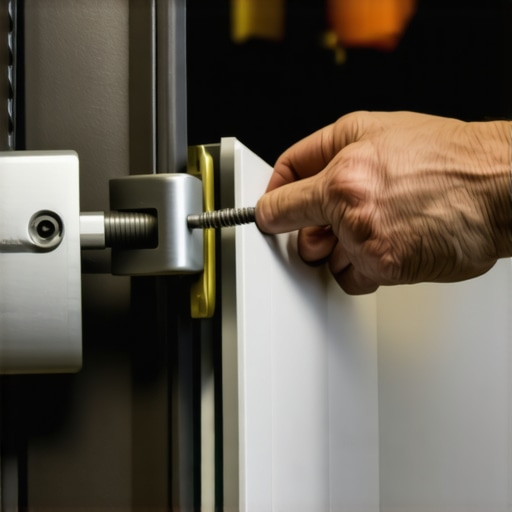
First, use a screwdriver or drill to gently unscrew what’s left of the stripped screw. If it won’t budge, try gripping it with locking pliers and twisting counterclockwise. Once removed, clean out the hole with compressed air or a small brush to clear debris. This step prevents dust and leftover material from weakening the new repair.
Choose the Right Fix Based on the Damage
Use Toothpicks or Matchsticks for Small Repairs
I once repaired a wobbly cabinet door in my kitchen by inserting a few soaked toothpicks into the stripped hole. Break small pieces and coat them with wood glue before stuffing them in. Once dried, screw the hinge back in tightly. This creates a packed, solid surface to hold the screw securely.
Insert a Mirror or Washer for Slightly Enlarged Holes
For larger holes, a flat washer or a coin can increase the screw’s grip. Place the washer into the hole, aligning the screw with the center. Tighten slowly to avoid over-stressing the cabinet material. This simple fix quickly stabilizes the hinge, keeping your doors aligned and functioning smoothly.
Use Plastic or Wood Filler for Deeper Damage
If the core of the hole is flattened or damaged beyond simple fixes, fill it with an epoxy-based wood filler. After applying, wait for it to cure as per instructions. Once hardened, drill a new pilot hole slightly smaller than your screw diameter. This method provides a fresh, solid surface for the screw to grip, ensuring long-lasting stability.
Screw in a Helicoil or Insert When Necessary
In cases of repeated stripping, consider installing a helicoil or threaded insert designed for wood or particleboard. These components allow the screw to thread into a reinforced metal or plastic sleeve, giving a durable, wear-resistant anchor. It’s perfect for high-use areas where screws are frequently removed and replaced.
Prevent Future Damage with Proper Technique
Always drill pilot holes before inserting screws—this prevents stress on the material. Use the correct screw length and diameter for your hinge and cabinet material. Tighten screws gradually, avoiding overtightening, which can strip or crack the wood. Regularly check and tighten hinges to prolong their lifespan and maintain cabinet appearance.
Key Tools and Materials You’ll Need
- Screwdriver or drill with appropriate bits
- Locking pliers
- Wood glue
- Toothpicks or matchsticks
- Washer or coin
- Epoxy-based wood filler
- Threaded inserts or helicoils (optional)
Taking these steps can transform a stubborn, stripped screw nightmare into a simple, quick repair. With minimal tools and a bit of patience, you can restore your cabinet hinges’ grip and ensure your doors open and close effortlessly. Next, consider exploring built-in storage solutions to elevate your entire kitchen space.
 Many homeowners assume that opting for custom cabinets and elaborate storage solutions automatically guarantees a perfect kitchen remodel, but this is a misconception that can lead to costly mistakes. One common myth is that more customization equals better functionality; in reality, overly bespoke designs can complicate maintenance and adjustments later on. For example, intricate built-ins often look stunning initially but may become problematic if not planned with accessibility and future changes in mind. Skilled designers know to balance aesthetics with practicality, ensuring that custom features serve long-term needs, not just the current trend.
Another trap many fall into is believing that maximizing storage volume always improves usability. According to industry experts at Artisan Cabinetworkz, smart organization beats sheer capacity. It’s easy to underestimate the importance of intuitive layout and accessibility in storage design. Overstuffed cabinets can make retrieving items cumbersome, decreasing the overall efficiency of your kitchen workflow. Instead of just adding more shelves or drawers, focus on features like pull-out trays and custom dividers that optimize space and reduce clutter.
Myth busting also involves the notion that built-ins are only for maximizing space. While they do offer a sleek, integrated look, they can become restrictive if not designed properly. For instance, fixed custom cabinetry might hinder flexibility for future appliances or changing lifestyle needs. This is where adaptive designs, like modular units, shine—they allow you to adjust and upgrade without extensive renovations. It’s crucial to discuss these options with professionals who understand the nuances of design for longevity and adaptability. For a comprehensive approach, I recommend consulting detailed guides like this expert guide for 2025 for insights on future-proofing your kitchen.
Many think that choosing premium materials automatically makes for a durable, high-quality remodel. While material choice is important, the craftsmanship and installation process often determine longevity more significantly. For example, poorly installed cabinet doors, regardless of their material, can lead to misalignments and early wear. Paying attention to details like hinge quality, proper fastening, and adjusting mechanisms can save you from frustration and extra costs down the line. Remember, even the most beautiful cabinets lose their appeal if they don’t function smoothly over time.
How do you balance aesthetics and practicality in custom kitchen design?
This question is particularly relevant for sophisticated homeowners aiming for both form and function. Experts at Artisan Cabinetworkz emphasize that tailored solutions need to be customized not only to the space but to user habits. Involving end-users early in the design process ensures that storage features align with everyday needs, preventing regrets after installation. The key is to approach renovations with a balanced mindset—value-driven, future-forward, and informed by expert advice. Have you ever fallen into this trap? Let me know in the comments.
Maintaining your custom cabinets and built-ins to keep them functioning flawlessly over time requires the right tools and consistent care. In my experience, having a dedicated toolkit tailored to cabinetry repairs makes all the difference. One indispensable item I rely on is a high-quality cordless drill with variable speed settings. It provides the precision needed for tasks like removing and installing hinges or tightening stubborn screws without damaging the wood. I personally use a DeWalt DCD791D2, which offers power and control, perfect for both minor adjustments and more extensive repairs.
In addition to a good drill, a set of precision screwdrivers with magnetic tips is invaluable. They help in accessing tight spaces and prevent scrubbing cross-threaded screws. For comes-in-handy is a glue applicator and a set of miniature brushes, especially when applying wood fillers or lubricants. I also keep a digital moisture meter—like the Wagner MMC220—for assessing wood stability in changing environments, which is crucial for long-term cabinet health.
How do I maintain my cabinetry over the years to prevent issues?
Regular inspections are key. Check for loose hinges, misaligned doors, and squeaks—addressing these early prevents bigger problems. Lubricate hinges periodically with a silicone-based spray; avoid WD-40 for this, as it attracts dust. When you notice a door squeaking or sticking, a few drops of silicone lubricant applied with an applicator can restore smooth operation. Additionally, tightening screws with your drill or screwdriver keeps hinges and pulls secure, maintaining both function and appearance.
Long-term results depend on preventive measures. Installing new soft-close dampers, for example, can reduce wear on hinges and prolong their lifespan. When replacing or upgrading hardware, always verify compatibility and quality—investing in premium hinges and slides ensures smoother operation over the years. For ongoing care, I recommend scheduling semi-annual checkups of your cabinetry as part of your home maintenance routine.
Looking ahead, I believe advances in smart home technology will soon integrate sensor-based monitoring for cabinetry health, alerting homeowners to issues before they become visible. Imagine hinges that notify you via an app when they need lubrication or adjustment—making maintenance more proactive and less intrusive.
Why is it worth investing in specialized tools for cabinet maintenance?
Using the right equipment not only simplifies repairs but also helps preserve your cabinetry’s finish and structural integrity. For example, a dedicated cabinet repair kit that includes hinge pin extractors and repair inserts can save you from costly replacements. I recommend trying a hinge repair toolset like the Kreg Hinge Pin Remover, which I’ve found incredibly effective for removing stubborn pins without damaging the surrounding wood. These tools make ongoing maintenance less intimidating and more manageable for DIY enthusiasts and professionals alike.
To stay ahead in managing your cabinetry, consider consulting resources like this expert guide to understanding materials and their maintenance needs. Equipping yourself with the right tools and knowledge can make all the difference in ensuring your built-ins stand the test of time. Don’t hesitate to reach out through this contact page for personalized advice or professional help. Start incorporating these tools and habits today, and you’ll enjoy seamless cabinetry function for years to come.
The Hardest Lesson I Learned About Custom Cabinets and Built-Ins
One of the most profound lessons I discovered is that craftsmanship and attention to detail outweigh the allure of high-end materials. Skimping on proper installation or neglecting routine maintenance can diminish even the finest cabinetry over time, reminding me that investing in reputable professionals and ongoing care yields the most rewarding results.
The Secret Reinforcements That Prevent Future Repairs
From experience, incorporating threaded inserts and helicoils during initial installation might seem like extra effort, but their durability pays dividends. These reinforcements act as insurance against stripping, especially in high-use areas of your kitchen. My tip? Always ask your contractor about these options—they truly make a difference in longevity.
How Precise Planning Transforms Your Space
Meticulous layout planning—considering workflow, access, and future needs—is the cornerstone of a successful kitchen remodel. Early visualization and detailed measurements help avoid costly adjustments down the line. My own remodel taught me that patience during planning saves frustration and money later, ensuring your custom cabinets serve you perfectly for years.
Where to Go from Here
For those eager to elevate their kitchen, exploring innovative storage ideas like hidden drawers, pullout racks, and smart dividers can revolutionize functionality. I recommend checking out this resource for inspiring solutions tailored to modern living. Remember, thoughtful design combined with quality craftsmanship creates a kitchen that’s both beautiful and practical.
Your Turn to Transform Your Kitchen
Are you ready to implement these insights into your own home? Whether it’s repairing a stripped screw or designing a new storage system, embracing these lessons can make your project more manageable and satisfying. What’s the first step you’ll take today? Share your thoughts below—I’d love to hear your plans!
,