The Marine-Grade Plywood Case for Outdoor Kitchen Cabinets
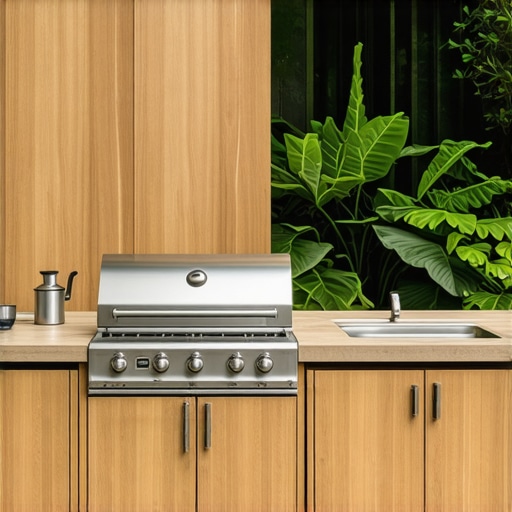
It was a blazing summer afternoon when I realized my outdoor kitchen cabinets were failing me. Water stains, warping wood, and that dull, uninviting look had me questioning my entire backyard remodel. The lightbulb moment came when I caught sight of a cabinet panel that had warped so badly it looked like it had seen better days—simply because I hadn’t taken durability into account. That day, I vowed to find a better solution, one that withstands the elements and keeps my outdoor space beautiful for years to come.
Durability Matters in Outdoor Kitchen Cabinets
In my years of DIY projects and home upgrades, I’ve learned one truth: outdoor spaces require materials that stand up to sun, rain, and humidity. The traditional plywood I used initially, while affordable and easy to work with, aged quickly when exposed to the elements. The peeling veneer and swollen edges became a pain—more maintenance than I bargained for. That’s when I discovered marine-grade plywood, a material purpose-built for harsh environments. It’s not just hype; it’s a game-changer, especially if you’re looking to create outdoor cabinets that last.
Is Marine-Grade Plywood Actually Worth the Hype?
When I first heard about marine-grade plywood, I was skeptical. Isn’t it just expensive marine plywood? Turns out, it’s worth every penny. This type of plywood is made with waterproof glue and sealed edges, resisting moisture and preventing rot. Early in my project, I made the mistake of assuming all plywood was created equal—which led to costly repairs down the line. A little mistake that many beginners make is postponing the switch, thinking that budget-friendly options will do the trick. Spoiler alert: they won’t in the long run. For an investment that truly pays off, consider upgrading your materials now.
Supporting this, a recent study pointed out that outdoor structures built with marine plywood can last twice as long as those made with standard plywood, thanks to its superior moisture resistance. This longevity isn’t just about saving money; it’s about preserving your time, effort, and peace of mind.
So, if you’re at that crossroads—considering new materials or planning a remodel—know that learning from my experience can save you headaches later. Ready to dive into the practical steps? Next, I’ll walk you through how to choose the right marine-grade plywood and incorporate it into your outdoor kitchen design seamlessly.
Thinking about your own project? Have you faced similar struggles with outdoor cabinetry? Drop a comment or contact me through my contact page. Let’s make your outdoor space a durable, beautiful retreat that lasts for years.
Select the Right Material for Long-Lasting Cabinets
Begin by choosing marine-grade plywood, which is waterproof and resistant to rot, ensuring your outdoor cabinets withstand weather conditions. I remember a summer project where I replaced standard plywood with marine-grade; the result was a cabinet that looked brand new even after a harsh winter.
Prepare Your Workspace and Materials
Clear your workspace and gather all necessary tools: circular saw, clamps, drill, waterproof glue, and finishing supplies. I laid out my materials on a sturdy table and double-checked measurements to prevent costly mistakes later.
Cut and Assemble the Cabinet Frame
Measure and mark your panels precisely, adding extra for any adjustments. Use a circular saw with a guide for straight cuts. As I cut my panels, I made sure to wear safety gear and clamped the wood firmly, avoiding slips. Assemble the frame on a flat surface, joining pieces with waterproof glue and reinforcing with screws for stability.
Reinforce Corners and Edges
Apply corner blocks at joints for added strength. Seal edges thoroughly with marine-grade sealant to prevent moisture ingress. I learned this the hard way when neglecting edge sealing, leading to swelling; applying a good sealant made a noticeable difference.
Install Shelves and Dividers
Measure shelf positions accurately, considering the height of items you plan to store. Drill evenly spaced holes for adjustable shelves or secure fixed ones with screws. I used a simple spacer block to ensure consistent shelf height, saving me from uneven surfaces later.
Finish with Protective Coatings
Sand all surfaces smoothly, then apply a water-resistant paint or sealant suitable for outdoor furniture. Multiple coats, with light sanding in between, yield the best results. I opted for a high-quality outdoor paint, which kept my cabinets looking vibrant despite exposure to sun and rain.
Attach Hardware and Final Touches
Install hinges, handles, and locks, ensuring all hardware is corrosion-resistant. Use waterproof screws to secure fixtures. In my previous project, I carefully aligned each handle for a uniform appearance, which elevated the overall look.
Seal and Protect Your Cabinets
Finally, seal all joints and surfaces with a comprehensive sealant to prevent moisture seepage. Regular maintenance, like cleaning and resealing, extends the lifespan of your outdoor cabinetry. My cabinets have dedicated maintenance days, making sure they stay resilient and attractive for years to come.
Many homeowners and designers fall into common traps when choosing storage options or planning their kitchen remodels, often based on misconceptions that hamper long-term satisfaction. One widespread myth is that standard, off-the-shelf solutions suffice for personalized spaces; in reality, custom cabinets are essential for optimizing every inch and creating a seamless look.
Why do so many overlook the importance of tailored storage?
Many assume that mass-produced solutions are cost-effective and quick, but they often lack the flexibility needed for complex layouts or unique items. This oversight leads to inefficient use of space and frequent upgrades.
Another critical nuance is neglecting the durability of materials, especially in high-use areas like kitchens and bathrooms. For example, choosing low-quality veneer or MDF might save money initially, but these materials fail faster, requiring replacements and repairs that overshadow initial savings.
Furthermore, a common mistake is failing to consider workflow and accessibility during kitchen remodels. Optimal storage should facilitate movement and access, not hinder it. For instance, installing corner cabinets without proper mechanisms can trap items, making retrieval cumbersome. A smarter approach is incorporating specialized hardware or innovative layouts—like built-ins and storage hacks that maximize space.
However, the most overlooked aspect is the hidden potential of integrated storage solutions. Built-ins that blend into architecture or utilize dead zones can dramatically enhance functionality without sacrificing aesthetics. ” alt=”Modern kitchen with seamless built-in storage” title=”Seamless built-in cabinetry in a modern kitchen”/> An advanced reader might ask:
How can I balance aesthetics with maximum storage without cluttering my space?
This is where innovative design principles come into play, such as using vertical space, narrow pull-out shelves, or concealed cabinets—techniques backed by experts in innovative storage solutions. These strategies not only declutter but also add a personalized touch that standard solutions can’t match.
Remember, flawed assumptions about pricing, materials, and layout planning often cause the greatest setbacks in remodeling projects. The key is to understand these nuanced factors and approach your space with a craftsperson’s eye. Have you ever fallen into this trap? Let me know in the comments.
Investing in Quality Tools for Long-Term Success
When working on custom cabinets, built-ins, or kitchen remodels, having the right tools can make all the difference. I swear by a high-precision plunge router for creating clean, consistent edges on cabinet doors. Its variable speed control allows me to adjust based on the material, minimizing burn marks and ensuring a professional finish. Additionally, a digital caliper is invaluable for measuring components precisely, preventing costly mistakes that arise from misaligned parts. Reliable clamps, especially bar clamps with padded jaws, help hold complex assemblies securely, ensuring glue joints set perfectly without slipping.
Streamlining Maintenance with Smart Solutions
Maintaining your custom cabinetry and built-ins over time doesn’t have to be a chore. I recommend installing a dedicated cleaning schedule and keeping essential supplies accessible behind a concealed panel—this keeps your kitchen looking pristine and prevents buildup of grease or dust. For sealing and finishing, I prefer water-based polyurethane for its durability and ease of application, especially on pieces subjected to frequent use. Regular reapplication of sealant every couple of years extends the lifespan of your cabinetry and preserves their aesthetic appeal.
Where Do You See This Trend Going?
As technology advances, I predict the integration of smart maintenance solutions such as IoT-enabled sensors in cabinetry that monitor humidity and detect early signs of deterioration. Future developments might include automated cleaning systems that communicate with your design, ensuring longevity without manual intervention. Keeping your storage solutions in top shape will increasingly involve digital monitoring—making DIY upkeep smarter and more efficient.
How do I maintain my custom storage solutions over time?
The key lies in regular inspections for loose hardware, sealing cracks before moisture infiltrates, and using the appropriate cleaning agents for your material choices. For instance, avoiding abrasive scrubbers on delicate finishes preserves their appearance and prevents damage. Additionally, involving a professional for periodic checkups can catch issues early—saving you money and preserving your investment. To get started, try applying a fresh coat of outdoor-grade sealant on your built-in cabinets, especially those exposed to fluctuating humidity. It’s a simple step that provides long-lasting benefits, and you can learn how to do this effectively by consulting trusted resources like this detailed guide. If you’re ready to elevate your maintenance routine, contact me through my contact page to discuss tailored recommendations for your space.
Lessons from My Experience with Custom Cabinets That Unexpectedly Changed My Perspective
One of the hardest lessons I learned was the importance of planning for long-term durability over initial savings, especially when choosing materials like plywood. I also realized that small details, such as sealing edges properly, can extend the life of your cabinetry significantly. Lastly, embracing customized storage solutions transformed my space beyond aesthetics—making it more functional and inspiring my creative use of every inch.
Tools and Resources That Made My Remodel Possible
I rely heavily on a high-quality plunge router for precise edge work and a digital caliper to ensure perfect measurements—these tools save me time and prevent costly mistakes. For design inspiration and step-by-step guides, I trust this comprehensive guide. When in doubt, I always check expert advice to fine-tune my approach and stay ahead of trends.
Your Journey Begins Here—Transform Your Space Today
Now is the perfect moment to reimagine your kitchen with smart storage solutions and custom cabinetry. Every project offers a chance for growth, and with the right mindset and tools, you can create a space that’s both beautiful and highly functional. Don’t wait—start taking steps toward your dream remodel now, and if you need personalized guidance, reach out to me. Your ideal kitchen is just a plan away.