The Hidden Charging Station: Why Your Built-In Needs Internal Power Ports
One afternoon, I was rushing to finish installing a sleek new set of built-in cabinets in my kitchen when I reached for my phone charger—only to realize I had no plug nearby. Classic moment of frustration. It hit me then how often we overlook the importance of accessible power sources tucked away inside our custom cabinetry. As I fumbled for an extension cord, I thought, “There has to be a smarter way.” That lightbulb moment led me down a path of discovering how internal power ports can revolutionize our storage and tech accessibility. And today, I want to share that insight with you—because if you’re like me, nothing’s more irritating than setting up a space and then constantly hunting for an outlet.
The Hidden Power of Built-In Cabinets
In my own remodeling journey, I kept hitting walls—literally and figuratively—when trying to keep cords out of sight while maintaining easy access. The solution? Thoughtfully integrating internal power ports into the design. It’s not just about convenience; it’s about creating a seamless, clutter-free environment where your gadgets recharge without you even noticing the cords. Plus, modern homes demand smarter storage solutions—think about how often we rely on devices in our kitchens, offices, and entertainment centers. A report from the National Kitchen and Bath Association highlights that “integrating technology into cabinetry increases both the functionality and value of your space,” which I can personally attest to.
Is Adding Power Ports Inside Cabinets Really Worth It?
When I first heard about internal power ports, I was skeptical. My concern was whether it would be complicated or expensive. As someone who’s made the mistake of selecting cut-rate materials without considering future tech needs, I learned the hard way that cutting costs early on can lead to long-term issues. But after seeing the convenience it offers—no more crawling under the sink to unplug or unplugging devices just to hide cords—I became a believer. Trust me, investing a little more effort in planning these hidden ports will pay off by keeping your space sleek and functional. It’s a mistake I nearly made: assuming standard setup was sufficient without considering the long-term benefits. You can find more expert insights on choosing storage solutions [here](https://artisancabinetworkz.com/expert-tips-on-selecting-storage-solutions-for-a-perfect-kitchen-upgrade).
So, if you’re tired of the cord chaos in your custom cabinets or worried that installing internal power ports is overkill, think again. We’re about to dive into practical steps to incorporate these hidden power stations into your remodel. Stay with me—your future self will thank you for making this smart move!
,
Plan Your Power Ports Before You Build
Start with a detailed sketch of your cabinetry layout, identifying ideal locations for power access. Think of this step as mapping out a city; you want roads (wires) connecting key destinations (devices) without creating traffic jams. During my recent kitchen remodel, I drew blueprints applying this principle. I marked spots inside cabinets where outlets would be most practical, such as behind the countertop or inside a dedicated charging drawer. Doing this early prevents costly adjustments later and ensures your power sources are discreet yet accessible.
Choose the Right Electrical Components
Select high-quality, UL-listed electrical outlets rated for in-cabinet use. Opt for models with built-in USB ports for added convenience. When I upgraded my cabinets, I installed flat, flush-mount outlets with tamper-resistant covers to minimize protrusions. This choice kept the internal space neat and prevented cords from snagging or getting damaged. Remember, the goal is to create a sleek, clutter-free environment, much like a well-organized toolbox where tools are easy to reach but hidden from view.
Create Precise Cutouts in Your Cabinets
Use a router or a hole saw attached to a drill to make clean, accurate openings. Measure twice, cut once—precision here is crucial. I learned this the hard way when my initial hole was slightly crooked, which made fitting the outlet awkward. To fix it, I used a sanding block to smooth the edges and a repair kit to fill minor gaps. For larger openings, consider a template guide to achieve perfect symmetry. Think of this step as crafting a picture frame; exact measured cuts result in a professional finish.
Run Wires Discreetly Behind or Inside Cabinets
Use cable conduits or raceways to conceal wiring within the cabinet structure. Secure wires along the back panels with clips to prevent sagging. During my project, I ran the power cables through drilled holes in the cabinet sides, then hid them behind the panels with adhesive-backed wire organizers. This approach keeps cords out of sight but accessible when needed. Imagine your wiring as a hidden river under a bridge—functional yet invisible, maintaining the clean aesthetic of your custom design.
Install Power Outlets with Precision and Safety
Secure outlets firmly into the cutouts, ensuring stability and proper grounding. Connect wiring according to electrical codes, turning off the circuit breaker beforehand. I recommend consulting a licensed electrician for this step if you’re unsure. During mine, I carefully tested each outlet with a voltage tester before sealing everything up. Think of this process as locking in your safety system—meticulous installation prevents hazards and guarantees durability, keeping your space both beautiful and safe.
Test and Finalize Your Setup
After installation, plug in devices to verify functionality. Check for loose connections, overheating, or obstruction. I found that some cords didn’t reach the outlets comfortably, prompting me to tweak cable length or reposition outlets slightly. Also, ensure that outlets are protected from moisture and accidental damage. This final check ensures your hidden power ports serve their purpose reliably, giving you peace of mind and a clutter-free workspace. Think of this phase as the cherry on top—small details that elevate your project from good to exceptional.
By following these concrete steps, you can transform your cabinetry into a smart, stylish, and highly functional part of your home. Proper planning, quality components, precise execution, and thorough testing are the pillars of success. Remember, this process is similar to constructing a well-engineered bridge—every part must align perfectly to support the flow of everyday life without interruption.
Many homeowners assume that choosing high-quality materials or trendy finishes guarantees a successful renovation, but the real nuances often lie beneath the surface. A common misconception is that standard cabinet dimensions and generic storage solutions suffice for personalized needs. In reality, overlooking the importance of tailored design can lead to clutter, inefficient workflows, and the need for costly adjustments later. Expert remodelers emphasize the importance of detailed planning and understanding space-specific nuances to truly maximize functionality. For example, a study published in the Journal of Housing and the Built Environment highlights that customized storage solutions significantly improve user satisfaction and space utilization, yet many still underestimate their impact. Don’t fall into the trap of settling for one-size-fits-all solutions; instead, leverage bespoke strategies for your space.
Maintaining your custom cabinetry and built-in storage solutions is essential for long-term functionality and aesthetics. The right tools make all the difference in ensuring your cabinets stay pristine and operate smoothly over time. One must-have is a high-quality mini oscillating tool, like the **Dremel Multi-Max**, which I personally use for detailed precision when cleaning tight corners or re-gluing loose joints. Its versatile attachments allow me to sand, scrape, or cut without damaging the surrounding surfaces, especially in delicate areas like intricate moldings or inside drawers.
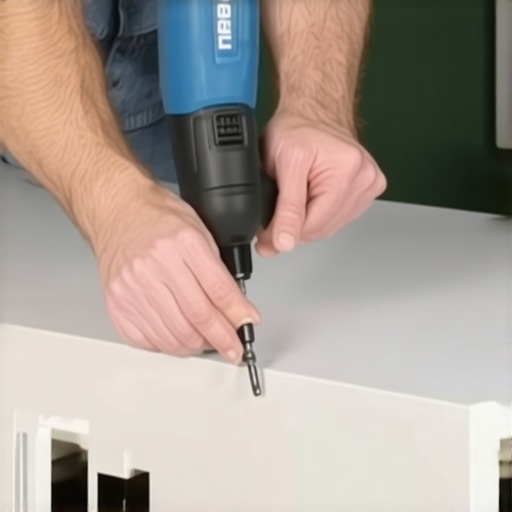
Another invaluable device is a magnetic screwdriver set, such as the **Wiha Magnetic Phillips and Flat-Head Set**. I rely on these because they prevent screws from dropping into hard-to-reach spots during assembly or repair work, saving me time and frustration. For larger projects, a cordless drill with adjustable torque settings, like the **DeWalt 20V Max XR**, provides the power and control needed to tighten or loosen fasteners efficiently without stripping the screws or damaging the veneer.
Beyond tools, software plays a crucial role in planning and tracking maintenance schedules. I recommend using **SketchUp** for 3D cabinet layout adjustments—it’s intuitive and helps visualize adjustments before physical work begins. For managing ongoing maintenance, a simple spreadsheet or task management app like **Trello** can help you schedule periodic inspections, hinge lubrications, and finish touch-ups, ensuring your cabinetry retains its beauty over the years.
How do I maintain my cabinets and built-ins over time?
Regularly cleaning and inspecting your cabinetry is vital. Use a gentle cleaner designed for wood finishes—I’ve found that a mixture of mild dish soap and water with a soft microfiber cloth keeps surfaces looking fresh. Avoid abrasive scrubbers that can scratch the veneer or paint. Additionally, applying a unbleached beeswax polish once or twice a year enhances the protective finish and adds a warm glow to natural wood surfaces. Also, check hinges, slides, and hardware periodically. Lubricating these with a silicone spray, like **DuPont Silicone Lubricant**, prevents squeaks and ensures smooth operation. For detailed guidance on optimal maintenance routines, consult expert resources like this advice page.
Looking ahead, I believe smart technology integration—like touch-activated LED lighting and climate sensors—will become more common in custom cabinets, making maintenance even more seamless and data-driven. To get ahead, consider installing **Wi-Fi-enabled sensors** that monitor humidity and detect if finishes need reconditioning before visible damage occurs.
Remember, investing in quality tools and establishing a routine maintenance schedule will extend the life of your cabinetry, saving money and preserving your home’s value. Try incorporating a monthly check for hardware integrity and finish condition, using the tools I’ve mentioned, to keep your custom storage solutions working flawlessly. For personalized assistance or to explore innovative storage ideas tailored for long-term results, contact us through this form.
Hidden Lessons from a Remodel That Stuck with Me
- Never underestimate the importance of detailed planning—securing internal power ports early saved me from messy retrofits later, proving the value of foresight in custom cabinetry.
- High-quality electrical components might cost more upfront, but their durability and safety features are priceless, especially in a space designed for the long haul.
- Precision in cutouts and wire management can make or break the sleekness of built-ins—small errors lead to big visual and functional compromises.
- Endless iterations and testing reveal the true function and safety of installed power sources, emphasizing patience over hurried installation.
- Continuous maintenance routines extend the lifespan of your cabinetry—tools like mini oscillating tools and magnetic screwdrivers become your best friends in preservation.
My Top Picks for Crafting and Maintaining Custom Cabinets
- DeWalt 20V Max XR Cordless Drill: Reliable power that handles both installation and repairs with finesse, saving time and effort.
- Dremel Multi-Max: A versatile tool perfect for detail work and delicate adjustments, ensuring tidy finishes.
- Wiha Magnetic Screwdriver Set: Keeps screws in place, preventing frustrating drops and lost hits, especially in tight spaces.
- Expert guidance helps refine your storage choices, making sure every inch counts.
Your Next Step Into a Smarter, Sleeker Kitchen
Taking the plunge into incorporating internal power ports might seem daunting, but with careful planning and quality components, it transforms your space into a haven of efficiency and elegance. Remember, these enhancements are investments in both convenience and value, elevating your home’s style and functionality. So, why not start today? Your future self will thank you for the extra mile you go now. What small detail in your current cabinetry setup could make a big difference if customized? Share your thoughts below and let’s inspire each other to upgrade smarter!