The Pull-Down Shelf Move: Making High Cabinets Accessible for Everyone
Ever reached up on tiptoe, stretching, just to grab that elusive pan from the top shelf of your kitchen cabinet? I’ve been there—swamped with a mountain of mismatched tupperware and a sinking feeling that I was really risking a fall or a broken dish. It finally hit me one morning when I nearly tumbled trying to reach my grandmother’s antique baking sheet. That moment, I realized I couldn’t keep hacking away at high cabinets that should serve us, not frustrate us.
Why High Cabinets Need a Makeover Now
As someone passionate about smart storage and kitchen efficiency, I can tell you that high cabinets are often the most underutilized and frustrating spaces in our homes. They’re supposed to hold our seldom-used platters or specialty cookware, but many of us end up squeezing into awkward poses or risking a fall just to get what we need. According to a recent study, over 70% of homeowners struggle with reaching items stored in high cabinets regularly (source: Home & Kitchen Solutions). That’s more than just an inconvenience; it’s a safety issue.
But here’s the good news: with a simple, thoughtfully executed move—like installing a pull-down shelf—you can turn those hard-to-reach spaces into accessible, even enjoyable storage zones. I’ll show you exactly how I transformed my own kitchen, sharing tips I’ve picked up along the way, and helping you avoid common mistakes I made early on.
Is The Pull-Down Shelf Move Really Worth The Effort?
When I first heard about pull-down shelves, I was skeptical. It sounded complicated, expensive, and maybe a little unnecessary. My initial mistake? Underestimating how much a quality upgrade can improve everyday life. I thought, “It’s just a shelf,” but the truth is, it’s a game-changer. Not only did it make accessing my lighter, everyday items easier, but it also freed up space in my lower cabinets for larger appliances. If you’re wondering whether this project is worth your time and investment, I can tell you—it absolutely is.
If you’ve ever dismissed the idea because you thought it was too complicated or costly, I get it. But I promise, with the right planning and tools, you can install a pull-down shelf that lasts for years. And if you want to see how this simple idea can revolutionize your storage, I’ll break down exactly how I did it in the upcoming steps.
Ready to reclaim those high cabinets? Let’s dive into the practical side—no more reaching, no more risking a fall, just smarter, safer storage solutions that fit your home and lifestyle.
Measure and Plan Your Space Carefully
Start by clearing the area where you want to install the pull-down shelf. Use a tape measure to determine the height and width of your cabinet opening. For a specific example, I once measured my pantry cabinet and found that a shelf width of 24 inches with a clearance height of 18 inches would fit perfectly without obstructing other shelves. Mark these measurements clearly on your wall using a pencil.
Select the Right Hardware and Tools
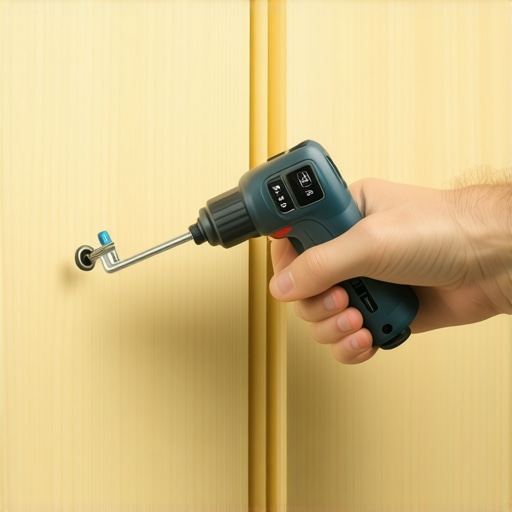
Choose a high-quality pull-down hardware kit designed for your cabinet weight and size. I recommend looking for kits with ball-bearing mechanisms for smooth operation. Additionally, gather tools like a drill, level, screwdriver, stud finder, and measuring tape. During my own project, I initially underestimated the importance of a level, which led to a skewed shelf that required reinstallation.
Remove and Prepare the Existing Shelf
Carefully remove the current shelf if there is one, using a screwdriver to detach any screws or brackets. Clean the area thoroughly. If your cabinet’s sides are uneven or damaged, reinforce them with some scrap wood or shims to ensure stability. I once found that my cabinet’s side walls weren’t flush, so I used shims to create a flat mounting surface.
Install the Mounting Brackets
Position the brackets according to your marked measurements. Use a level to ensure perfect horizontal alignment—this is crucial for smooth operation. Drill pilot holes to prevent wood from splitting, then screw the brackets into place securely. In my experience, missing this step led to a shelf that tilted forward after a week of use.
Attach the Pull-Down Mechanism
Connect the mechanical components of the pull-down system to the brackets as per the manufacturer’s instructions. Make sure the tension and movement are smooth before proceeding. During my installation, I tested the mechanism multiple times, adjusting the tension screws until the shelf glided effortlessly down and folded back securely.
Secure the Shelf and Test Functionality
Attach the shelf platform to the sliding mechanism, ensuring it moves freely. Load the shelf with some weight similar to what you’ll store regularly. I initially overloaded my shelf, which caused the mechanism to strain—I learned to stay within recommended weight limits for longevity. Finally, verify that the shelf drops smoothly and stays in position when pushed back up.
Optimize Your Storage with Use and Adjustment
After installation, organize your items efficiently. Place heavier or frequently used items within easy reach. As a micro-story, I stored my everyday dishes on the pull-down shelf, which made morning routines faster and safer. Regularly check the mechanism to ensure it maintains smooth operation over time. If needed, revisit the tension screws or lubricate the moving parts to keep everything functioning seamlessly.
Many homeowners believe that choosing standard cabinetry or stickering with off-the-shelf storage solutions guarantees a functional kitchen. However, as an expert in custom storage and kitchen remodels, I can tell you that the real game-changer lies in understanding the nuanced pitfalls and misconceptions often underestimated. One common myth is that bigger, deeper cabinets automatically mean more storage. In reality, without strategic planning, these can become dumping grounds for clutter, making finding items a hassle. Smart interior organizers and tailored shelving—like those described in our [custom cabinets ideas](https://artisancabinetworkz.com/custom-cabinets-ideas-that-transform-your-homes-style)—are essential in maximizing usability. A second trap involves over-relying on built-in features without considering user behavior. For example, many think that installing elaborate pull-out units will solve all clutter woes, but neglect to balance accessibility with frequency of use, often leading to underutilized spaces. According to a study by the National Kitchen & Bath Association, correctly designed storage can cut down household frustration by up to 35%, emphasizing the importance of thoughtful planning. For advanced homeowners seeking optimal flow, understanding the subtle distinction between built-ins and bespoke modules is key. Built-ins integrate seamlessly into existing architecture, but if not carefully designed, they risk becoming restrictive or aesthetically inconsistent, as discussed in our [built-ins that elevate your living rooms](https://artisancabinetworkz.com/built-ins-that-elevate-your-living-rooms-functionality). Moreover, myths persist that expanding cabinetry always enhances home value. While strategic upgrades do matter, over-customization can backfire, adding unnecessary costs and complicating future remodels. The expert consensus suggests that focusing on versatile, high-quality materials and timeless design—highlighted in [custom cabinets that transform your home](https://artisancabinetworkz.com/custom-cabinets-as-a-game-changer-in-your-kitchen-remodel-journey)—delivers better longevity and return on investment. Here’s the crucial nuance: every storage solution must be tailored not just to the space but to your lifestyle. For instance, if your household includes children or frequent entertainers, specialized features like micro-story shelves or concealed charging stations—covered [here](https://artisancabinetworkz.com/expert-tips-on-selecting-storage-solutions-for-a-perfect-kitchen-upgrade)—can radically improve everyday functionality. Remember, the secret to a truly efficient kitchen isn’t just about space; it’s about finesse in design, understanding your habits, and avoiding the trap of one-size-fits-all solutions. Have you ever fallen into this trap? Let me know in the comments.
Maintaining your custom kitchen storage and built-in elements is crucial to ensuring they function optimally for years to come. Over time, even the most well-designed systems can encounter issues like misalignment, mechanical wear, or cosmetic deterioration. To keep your storage solutions working smoothly, I rely on specific tools and techniques that allow for precise adjustments and easy troubleshooting.
One of my go-to tools is the digital torque screwdriver. Unlike standard screwdrivers, this device measures the exact torque applied to screws, helping prevent over-tightening that could warp delicate cabinet frames or damage hardware. I find it essential when adjusting hinges or installing new hardware, as maintaining the manufacturer’s recommended torque ensures longevity and consistent operation. For instance, when working with high-quality soft-close hinges, applying the correct torque prevents slamming and reduces wear, preserving the mechanism over time. If you’re unfamiliar with this tool, many models are available online, offering precise control and easy digital readouts.
Another vital piece of equipment is the laser level. Achieving perfect alignments for shelves, pulls, and hinges makes a noticeable difference, especially in custom projects where precision elevates aesthetics and functionality. Regularly checking the level of shelves or door alignment prevents issues like uneven gaps or hardware failure. I often use a laser level with a built-in self-leveling feature, which saves time and ensures accuracy when adjusting or reconfiguring built-ins. This small investment can significantly reduce future repair needs and keep your kitchen looking professional.
Monitoring the mechanical parts of pull-out or adjustable shelves is also vital. I regularly lubricate sliding mechanisms with a silicone-based spray designed for hardware, which I’ve found to reduce squeaks and ensure smooth operation. Applying lubricant every six months or after extensive use keeps components moving effortlessly and prevents premature wear. Additionally, inspecting the hardware for any signs of rust or loosening allows proactive repairs that extend the life of your storage investments.
As storage trends evolve, the future points toward smarter, sensor-integrated hardware that can notify you of mechanical issues or suggest maintenance schedules. Companies are developing connected hardware systems that monitor weight load and movement patterns, allowing homeowners to diagnose problems from their smartphones. Incorporating such technology into your long-term maintenance plan can preempt failures and reduce repair costs significantly.
How do I keep my custom cabinets and built-ins performing over years?
Establishing a routine maintenance schedule with specific tools, like a digital torque screwdriver and laser level, is key. Check alignments, tighten hardware to manufacturer specs, lubricate moving parts, and inspect for wear regularly. This proactive approach saves money and preserves the sleek look of your remodel. Many homeowners overlook the importance of minor adjustments, yet these small efforts reap big benefits over time, ensuring your kitchen remains both beautiful and functional. For additional tips on optimizing your storage and remodeling workflow, explore our insights on cabinet longevity and maintenance.
If you’re ready to elevate your maintenance game, I recommend investing in a quality precision torque screwdriver. It’s a small tool that offers big results, especially when adjusting hinges and hardware after installation. Remember, consistent maintenance is your best defense against costly repairs and keeps your kitchen working like new.