How to Plan a Kitchen Island That Doesn’t Block the Dishwasher Path
I remember the first time I designed a kitchen island. I was so excited about the gorgeous countertop and the storage options I had picked out that I didn’t stop to think about the practical flow—especially the dishwasher. Soon enough, I found myself frequently crawling under the island just to load or unload dishes, muttering to myself about how little space there was to move around. That lightbulb moment hit hard: even the most beautiful kitchen isn’t functional if it doesn’t consider everyday usability.
Transform Your Kitchen into a Seamless Space
If you’re embarking on a kitchen remodel or just dreaming about upgrades, understanding how to plan your kitchen island is crucial. A well-designed island should boost your space, not turn it into a obstacle course. Today, we’re tackling a common but overlooked mistake: blocking your dishwasher path with your island. I promise this isn’t just theory—I’ve learned from my own missteps, and I’ll share practical tips to help you avoid them.
Is it Really Possible to Have a Functional Kitchen Island?
Let’s be honest—I’ve seen kitchens where the island felt more like an obstacle than a feature. The biggest mistake I made early on was not considering the *clearance* needed around appliances. According to industry standards, a minimum of 42 inches of clearance is recommended for main walkways, especially around major appliances like dishwashers. Failing to account for this can turn your beautiful new kitchen into a frustrating maze. It’s a mistake I was guilty of, and I don’t want you to make it too. A good rule of thumb is to think about how you use your space daily and plan for smooth, unhindered access—because a kitchen that works for you is truly a joy, not a hassle. Discover more about {built-in storage and sleek design solutions} to optimize your space without blocking essential pathways. Ready to learn exactly how to position your island for maximum function? Let’s dive into the details.
Plan Your Pathway Early
Start by measuring the space where you envision your kitchen island. Use painter’s tape to outline its footprint, ensuring you leave at least 42 inches of clearance around all sides. I once laid out the island with masking tape and realized I had inadvertently blocked the dishwasher’s access, which led to redesigning the layout before any materials were purchased. This simple step saves hours of correction later.
Prioritize Appliance Access
Identify locations of major appliances—dishwasher, refrigerator, oven—and ensure the island placement doesn’t impede their use. Visualize opening cabinet doors and drawers without bumping into the island. For instance, I had mistakenly placed my island too close to the dishwasher, causing constant bumping and strain. Adjusting its position to allow a full 24-inch clearance in front of the dishwasher made loading effortless and prevented damage.
Utilize Built-ins and Custom Storage
Integrate built-in features like appliance garages or under-counter drawers to optimize space while maintaining flow. During my project, installing a custom cabinet as a pull-out trash and recycling station made chores more convenient and kept the countertop clutter-free. These built-ins act as invisible assistants that enhance functionality without sacrificing style. To learn more about effective storage options, check out this guide on storage solutions.
Incorporate Scribing and Filler Pieces
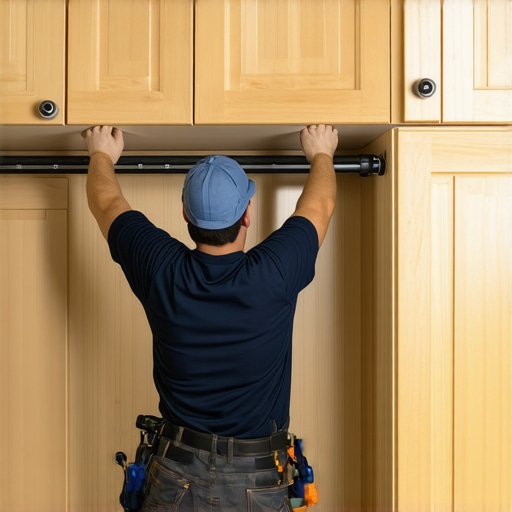
Use filler strips to scribe the island seamlessly into existing cabinetry or wall lines. Precision here prevents gaps or uneven edges. I once spent hours sanding and adjusting, but applying a strategic filler strip saved me from future denting issues and gave the island a professional look. This technique is particularly valuable when working with non-standard ceiling heights or uneven walls.
Set Realistic Expectations for Overhangs
Overhangs add comfort but must be supported properly. For quartz or granite, support brackets hidden inside the cabinetry are ideal. When I built my island, I used adjustable support brackets beneath the overhang, which balanced aesthetics with safety. Remember, standard support hardware is often hidden within the Toe Kick, so plan your overhang and support system simultaneously. Check out this article on overhang reinforcement for detailed techniques.
Finalize with Functional Details
Round out your design by incorporating internal electrical outlets, charging stations, or task lighting. During my remodel, installing a hidden outlet inside the island’s side panel allowed quick access for small appliances without cluttering the counter. These details make the space truly usable and prevent cords from tangling or trailing on the floor. Explore this insight on concealed power solutions for inspiration.
While the basics of kitchen remodeling often get the spotlight, mastering the nuances can elevate your space to a whole new level of functionality and style. Many homeowners fall prey to misconceptions—believing that all built-in solutions are universally optimal or that standard cabinetry fits every need. However, the truth is more complex, and understanding these subtleties is key to avoiding costly mistakes. For instance, a common myth is that bespoke cabinets automatically solve storage issues, yet without proper planning and understanding of your usage patterns, they can become rigid or underutilized. According to industry expert Charlotte Hartwell, many homeowners overlook customizing internal configurations, leading to wasted space and reduced accessibility. Do you know the biggest trap in custom cabinetry design? It’s assuming one-size-fits-all solutions work equally well for every lifestyle. Instead, tailored internal storage and smart integration are crucial, as detailed in our guide on innovative storage solutions.
One advanced mistake that many miss is underestimating the importance of scribing and filler pieces when installing built-ins. Skipping these steps may seem minor but can cause uneven gaps and gaps, diminishing both aesthetics and durability. Precise scribing ensures seamless integration with existing walls and countertops, something I’ve learned from experience. It’s also worth noting that reliance solely on stock hardware or standard materials can compromise long-term performance, especially with high-heat or moisture-prone environments. For example, choosing the wrong hinges or support brackets can lead to squeaks or sagging, which is why investing in quality hardware and proper reinforcement is essential.
Another sneaky pitfall involves storage depth and accessibility. Homeowners often opt for deep shelves or large drawers without considering reachability, especially for seniors or those with limited mobility. A study from the National Kitchen & Bath Association highlights how ergonomics influence user satisfaction. Integrating adjustable pull-out shelves or tiered drawers not only maximizes space but also enhances usability—an area I personally refined through trial, error, and expert advice.
Here’s a question for the advanced remodeler: How can you balance aesthetic seamlessness with practical functionality, especially when working with non-standard wall heights or unusual room dimensions? The solution often involves custom filler strips, meticulous measuring, and employing advanced scribing techniques—details elaborated in articles like how to scribe cabinetry. Failing to do so might result in gaps that trap dust or compromise the kitchen’s visual flow.
Remember, the devil is in the details, and careful planning can prevent the common yet costly oversights that mar an otherwise impeccable kitchen. Do you ever feel trapped by standard solutions that don’t quite fit your space? Let me know in the comments! For further insights into perfecting your layout, explore our comprehensive post on using built-ins and creative storage to transform your kitchen style and functionality.
Maintaining the intricate details of your kitchen’s built-ins, custom cabinets, and storage solutions requires dedicated tools and disciplined routines. Over time, even the most durable hardware can wear out or become misaligned, leading to reduced functionality and visual appeal. Personally, I rely on a few specialized tools that have become indispensable for keeping my kitchen components in top shape. For example, a high-quality Allen wrench set is essential for adjusting soft-close hinges, preventing irritating squeaks or looseness. Additionally, a digital level ensures your cabinets stay perfectly aligned after seasonal shifts or minor settling, thus preserving your seamless aesthetic. To degunk and lubricate hinges and slides, I recommend a silicone spray lubricant like 3-IN-ONE Professional Silicone Spray—it’s resistant to high heat and won’t attract dust, extending the lifespan of your hardware.
For delicate touch-ups or cleaning, a microfiber cloth combined with mineral oil can rejuvenate wood surfaces, maintaining their rich grain and preventing drying or cracking. Regularly inspecting your storage solutions—such as checking pull-out shelves or corner cabinets—prevents small issues from escalating into costly repairs. In the future, I believe smart maintenance tools with IoT integration could revolutionize how homeowners monitor their cabinet health, offering alerts when hinges need adjustment or if humidity levels threaten wood integrity. This trend is evident in advancements like cabinet sensors connected via apps, which can proactively notify you of potential issues before they compromise your investments.
Question: How do I maintain my custom cabinets and built-ins over time?
Establish a routine inspection schedule—monthly or quarterly—to catch loose screws, misaligned doors, or sticky slides early. Use appropriate tools, such as a power drill with a Phillips head bit to tighten cabinet hardware securely, and ensure you use hardware designed for cabinetry to avoid stripping. Also, avoid harsh chemical cleaners; instead, opt for mild soap solutions and avoid excessive moisture, which can warp wood or delaminate surfaces. Incorporate gentle cleaning practices regularly to prevent dust buildup and ensure your storage compartments glide smoothly with minimal effort.
Think about gradually upgrading your routine with smart monitoring systems that track humidity and temperature, especially if you live in climate-sensitive areas. These devices can help preserve the integrity of materials and prolong the life of your investments. Remember, consistency in maintenance not only preserves the beauty but also maximizes the functionality of your kitchen space for years to come. If you’re curious how to implement some of these ideas, check out this comprehensive guide on storage maintenance.
What the Hidden Pitfalls Taught Me About Kitchen Design
One of the most valuable lessons I learned is that aesthetics can’t trump function. A stunning kitchen island looks impressive, but if it obstructs your workflow—like blocking the dishwasher—it becomes a source of frustration rather than joy. Another insight is that every space demands bespoke solutions; relying solely on standard cabinetry or hardware often leads to compromise. And finally, I discovered that paying attention to minor details—like filler strips or proper overhang supports—can dramatically elevate your kitchen’s look and usability. These lessons underscore that a thoughtful approach, combined with personal experience, is essential to creating a truly functional kitchen.
Tools and Resources That Transformed My Approach
For anyone looking to elevate their kitchen remodeling game, I recommend investing in a quality digital level and a precise measuring tape—these are indispensable for ensuring perfect alignments. The storage solutions guide expanded my understanding of maximizing space without sacrificing accessibility. I also trust the comprehensive custom cabinet ideas articles, which opened my eyes to possibilities I hadn’t considered. Finally, connecting with industry experts through forums and articles helped me make informed decisions, avoiding common pitfalls.
The Joy of Crafting a Personalized Kitchen Experience
Your kitchen is more than just a place to cook; it’s a hub for family, creativity, and comfort. Embracing the lessons learned about built-ins, storage, and layout ensures your space will serve your needs beautifully for years to come. Don’t wait for the perfect moment—start sketching, measuring, and dreaming today. Remember, every improvement, no matter how small, brings you closer to a space that reflects your style and supports your daily life.
What’s the one feature you’ve always dreamed of having in your kitchen? Let me know below—I’d love to hear your ideas and help you make them a reality!
New paragraph.