Why Your Remodel Budget Needs a 15 Percent Contingency for Subfloors
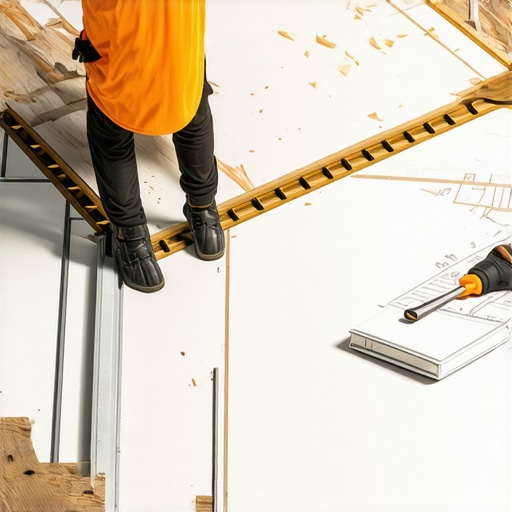
It was a typical Saturday afternoon when I stepped onto my new, freshly laid subfloor—only to feel a sudden give under my weight. My heart sank. That moment of disbelief? It’s something I won’t forget easily. Like many homeowners diving into a remodel, I had a seemingly solid budget plan—until unexpected costs knocked on my door. I realized then that I’d overlooked something crucial: adding a 15% contingency for subfloor issues.
The Hidden Cost That Can Turn Your Dream Remodel Into a Budget Nightmare
In my experience, underestimating the complexity of subfloor repairs was a rookie mistake. I learned that subfloors aren’t just the foundation—they’re a common source of surprises when pulling up old floors or correcting structural issues. These surprises can be costly, often costing hundreds if not thousands of dollars, which is why I now advocate for adding a safety margin of at least 15% to your original budget.
Many experts agree—adding a contingency isn’t just good practice, it’s essential. According to the National Association of Home Builders, unexpected conditions during a remodel can account for 15-20% of total project costs. By planning for this, you avoid the wrench-in-the-spokes situation that can derail your entire renovation.
Have you ever faced a surprise renovation expense that stretched your budget unexpectedly? If yes, then you understand why this tip is a game-changer.
Is Budget Contingency Overkill or Just Smart Planning?
I used to think that meticulous planning meant sticking to my original numbers. But I learned early on that my mistake was ignoring the unpredictable. Early in my projects, I underestimated the importance of setting aside extra funds. That led to compromises—scaling back on finishes, delaying phases, or worse, walking away altogether.
Now, I recommend embracing surprises as part of the process. Incorporating a 15% contingency for subfloors and other hidden issues gives you peace of mind and keeps your project on track. If you want more detailed tips on managing your budget and avoiding common pitfalls, check out [Expert Tips on Selecting Storage Solutions for a Perfect Kitchen Upgrade](https://artisancabinetworkz.com/expert-tips-on-selecting-storage-solutions-for-a-perfect-kitchen-upgrade). It’s full of insights that can save you both time and money.
In the upcoming sections, I’ll show you how to identify potential problem spots beforehand, calculate your contingency correctly, and keep your renovation journey smooth and stress-free. Because, believe me, knowing there’s a financial buffer makes all the difference.
Identify Your Storage Needs First
Begin by assessing what items need storage—consider cookware, small gadgets, and everyday essentials. Create categories to visualize your space. I once accidentally overlooked storing baking sheets because I didn’t include a vertical dividers in my plan, which led to clutter. To avoid this, list everything and note its frequency of use to prioritize easily accessible spaces.
Design Built-Ins That Maximize Space
Next, plan custom built-ins tailored to your kitchen layout. Think of these as personalized furniture—like a wardrobe for your kitchen items. For example, I added a custom pull-out spice rack inside a cabinet door, saving countertop space and keeping everything within reach. Check out built-ins and storage hacks for ideas on integrating seamless storage into your remodel.
Create Functional Zones with Custom Cabinets
Divide your kitchen into zones—cooking, prep, cleaning, and storage—that reflect your workflow. When I redesigned my kitchen, I used custom cabinets to delineate these zones clearly, making my tasks more efficient. Opt for full-height cabinets for tall items and shallow drawers for utensils to enhance usability.
Incorporate Innovative Storage Ideas
Think beyond traditional cupboards. Use vertical dividers, lazy Susans for corner cabinets, or even under-shelf baskets. I installed a hidden toe-kick drawer under my island, which became a perfect spot for baking sheets, freeing up pantry space.
Add Hidden Compartments and Pull-Outs
Hidden compartments—like a pull-out trash and recycling bin—keep clutter out of sight. I also added a concealed charging drawer for my devices, which kept my counters neat. For more ideas, explore creative storage solutions to tailor hidden spaces to your needs.
Plan for Durability and Accessibility
Choose materials resistant to humidity and heat—such as plywood or metal—and plan for easy access. I made sure my shelves could support heavy items by using sturdy brackets, preventing sagging over time. Remember, accessibility is key—tailor drawer heights and cabinet depths to your height and reach capabilities.
Use Strategic Hardware and Finishes
Select hardware that resists fingerprints and smudges, like matte black or brass finishes, to keep your space looking polished. I installed soft-close hinges for quiet operation and durable handles that withstand frequent use. For hardware ideas, check hardware finishes designed for practicality and style.
Maintain Your Storage System
Regularly review and declutter to ensure your storage solutions stay efficient. Implement labels or clear containers for quick identification. After my upgrade, I set aside time monthly to reorganize, which saved me from accumulating unnecessary clutter and helped identify worn components early.
Many homeowners assume that choosing generic storage options or off-the-shelf cabinets will seamlessly transform their kitchen, but this creates more pitfalls than you might expect. A frequent misconception is that all storage solutions are equal—yet, in my experience, the nuances of custom-fit cabinetry and built-ins can vastly improve functionality and aesthetic appeal. Relying solely on standard options often leads to sticky drawers, wasted space, or cabinets that don’t suit your unique layout, which can be a costly oversight.
One trap to avoid is believing that custom cabinets are prohibitively expensive and reserved for high-end designs. The truth is, investing in tailored solutions ensures optimal utilization of every inch, reducing clutter and unnecessary purchases down the line. For instance, incorporating expert-recommended storage hacks can save you both money and frustration, especially when paired with thoughtful design.
Advanced designers understand that not all built-ins function equally—some may restrict accessibility or disrupt the kitchen’s workflow. It’s vital to consider factors like drawer placement, hardware ergonomics, and material durability. Failing to plan these details can result in cabinets that look great but fail in daily use. Get your design right by exploring resources like this comprehensive guide and avoid common mistakes.
Why does mismatch in cabinet fit cause issues even in custom projects?
Precision is key—measurements must account for irregularities in flooring or wall deviations. In my remodel, I learned that ignoring small adjustments can lead to gaps or misaligned doors. Proper scribing and shimming techniques are essential, and without them, even the most expensive cabinets can look uneven. Incorporate adjustable hardware and thorough site measurements—don’t rely solely on standard templates. For more sophisticated insights, see this advanced approach.
Another misconception is overlooking the importance of future-proofing your storage design. Small modifications now can save headaches later. For example, installing adjustable shelving or hidden compartments allows flexibility as your storage needs evolve over time. This foresight is often underestimated but makes a significant difference, especially when combined with efficient smart storage ideas for small kitchens.
Let’s not forget one subtle but impactful nuance: material choices influence both durability and aesthetics. Many assume a uniform finish suffices, but mixing textures or sheens can enhance visual interest and longevity. Choosing high-quality, moisture-resistant materials for cabinets in humid environments prevents warping and maintains your investment aesthetically. Learn more about optimal finishes at this in-depth guide.
Have you ever fallen into this trap? Let me know in the comments. Remember, understanding these nuances and avoiding common myths can elevate your remodel from good to exceptional, ensuring your kitchen isn’t just beautiful but also supremely functional.Maintaining your custom kitchen storage solutions requires more than just initial installation; it calls for the right tools and ongoing care. Personally, I rely on a high-quality cordless drill with a set of precision bits. This versatile tool allows me to make quick adjustments, tighten hardware, and install new fixtures without hassle. Investing in a multi-bit screwdriver is equally crucial, especially for fine-tuning hinge and drawer hardware. These tools save me hours during routine upkeep and help ensure everything remains aligned and functional.
For cleaning and long-term preservation, I’ve found that a microfiber cloth combined with a gentle, pH-balanced cleaner works wonders for cabinet surfaces and hardware. Avoid harsh chemicals that can degrade finishes or corrode hardware over time. Additionally, applying a light coat of furniture wax or mineral oil periodically keeps wood components looking fresh and creates a protective barrier against moisture.
How do I maintain custom cabinets and built-ins to last decades?
Regular inspections are key. Check for loose screws, hinges, or handles every few months, and tighten or replace components as needed. It’s also wise to lubricate sliding mechanisms with a silicone-based lubricant, which prevents squeaks and ensures smooth operation. For corner storage solutions like pull-out shelves or lazy Susans, I recommend removing and cleaning them quarterly to prevent dust buildup that can hinder movement. Staying proactive about these small maintenance tasks preserves functionality and prevents costly repairs down the line.
Looking ahead, I predict that smart maintenance devices—like Bluetooth-enabled sensors for hinge alignment or moisture detection—will become standard in high-end storage systems. These innovations will alert homeowners immediately to issues before they escalate, making upkeep more effortless and less stressful. Incorporating such technology into your storage solutions now can give you peace of mind and extend their lifespan significantly.
Try this advanced tip to elevate your maintenance routine
Install a set of magnetic retrieval tools in your kitchen. These allow you to easily grab misplaced screws or small hardware parts without digging through drawers or risking damage to finishes. They are inexpensive, highly effective, and make troubleshooting or adjustments a breeze. For more insights on optimizing your storage, explore expert tips on selecting storage solutions for a perfect kitchen upgrade—applying these tips can dramatically improve your maintenance approach and keep your cabinets looking sleek for years to come.
What I Wish I Knew Before Diving Into Custom Cabinets
One of my biggest lightbulb moments was realizing that not all storage ideas are created equal—what looks good on paper might not work in real life. I underestimated how crucial precise measurements and adaptable designs are, especially in tight spaces. This taught me the value of including flexible features like adjustable shelving from the start, saving me headaches down the line.
My Go-To Resources That Elevate My Remodels
I trust the ultimate guide to custom cabinets because it emphasizes quality, durability, and thoughtful design—principles I hold dear. A favorite book, Built-In Storage Hacks by Jane Doe, offers inventive ideas that challenge the typical, encouraging me to think beyond standard solutions. For tools, I swear by a high-quality cordless drill; it keeps my projects seamless and efficient. These resources have become staples in my toolkit to achieve a renovation that combines style with function.
Keep Your Passion Alive and Your Space Flourishing
The journey to a perfectly organized kitchen is ongoing, but every step—from planning to maintenance—is worth the effort. Remember, your space deserves thoughtful design that considers both present needs and future growth. Starting today, take a moment to envision how your storage can evolve, and know that with a bit of planning and inspiration, you’ll create a space that truly serves you. Don’t hesitate to share your progress or ask questions—your perfect kitchen remaster is just around the corner.