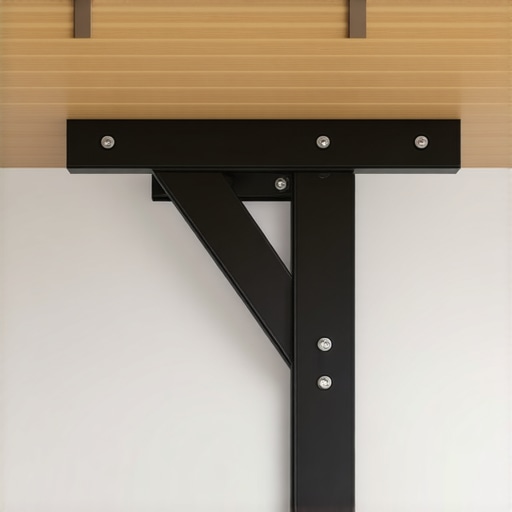
Why We Use Steel Brackets Instead of Wood Corbels for Island Overhangs
I’ll never forget the moment I installed my first kitchen island overhang. Excited and eager, I chose decorative wood corbels because they looked charming in the catalog. But when I stepped back to admire my handiwork a few weeks later, disappointment hit—those corbels sagged under weight, and the overhang wobbled every time someone leaned on it. It was a lightbulb moment that changed my entire approach to supporting overhangs.
Confronting the Overhang Dilemma: The Real Solution You Need
Choosing the right support isn’t just about aesthetics. It’s about ensuring safety, durability, and ease of maintenance. In this post, I’ll share why steel brackets are often the smarter choice over traditional wood corbels, especially for kitchen islands that see daily use. This isn’t just my opinion—it’s backed by practical experience and expert insights.
Is the Hype About Steel Brackets Just Marketing? Here’s the Truth
I made a common mistake early on—trusting the decorative appeal of wood corbels without considering their load-bearing capacity. As I learned, many DIYers overlook the importance of sturdy support, risking structural issues down the line. According to the Forest Service, steel supports can handle significantly more weight and last much longer than wood, making them ideal for active kitchen environments. So, why do so many still lean on wood corbels despite these facts?
Well, aesthetics play a role, but understanding the structural requirements is crucial. If you’ve faced similar frustrations or curiosity about a more reliable support system, you’re in the right place. Next, we’ll explore how steel brackets can transform your kitchen’s functionality and style, ensuring your island overhang stays firm for years to come.
,
Select the Right Steel Brackets for Your Kitchen Overhang
Start by measuring your overhang length and weight load. I once ordered generic brackets online without checking their weight capacity, leading to sagging after a few months. Instead, opt for heavy-duty steel brackets designed specifically for countertop support, such as angle brackets rated for at least 100 pounds per support point. Use a level to ensure precise measurement before marking your installation points.
Prepare the Wall and Overhang Surface
Before mounting, clear the wall surface and reinforce it if necessary. I once discovered behind the drywall that the studs were spaced too far apart, which compromised my support. Use a stud finder to locate existing studs, and mark their positions. For additional support, consider installing blocking between studs if necessary, especially in areas with drywall-only walls. This creates a solid backing for your brackets and prevents wobbling over time. For the overhang surface, ensure it’s clean and free of debris to allow solid attachment of the support brackets.
Mark and Drill Mounting Holes
Position the brackets according to your measurements, aligning them with wall studs whenever possible. Use a pencil to mark the hole locations on the wall. Drill pilot holes using a masonry bit if you’re anchoring into masonry or a drill bit suitable for your wall type. For drywall, toggle bolts or longer lag screws into studs are recommended to maximize support. Remember, proper placement ensures load distribution across multiple points, reducing the risk of sagging or failure.
Secure Brackets Firmly to the Wall and Countertop
Attach the brackets to the wall using appropriate fasteners—preferably lag screws into wall studs for maximum hold. Once mounted, position your countertop over the brackets, then drill through pre-existing holes in the brackets into the underside of the overhang. Use long, appropriate screws to fasten the support securely. I learned this step the hard way when my overhang shifted slightly after a few days; careful, multiple fastenings prevent movement and wobble. Tighten all screws firmly, but avoid over-tightening which could damage materials.
Check for Stability and Make Adjustments
After installation, test the overhang by applying pressure and loading it lightly. If any wobble persists, verify all fasteners and reinforce with additional brackets if necessary. During my first attempt, I noticed a slight wobble after load testing, so I added an extra bracket, which eliminated the movement entirely. For aesthetics, you can paint or finish the brackets to match your cabinetry, combining function and style effectively.
For more on enhancing your kitchen with durable, support-ready solutions, see our detailed guide on built-ins and storage hacks. Incorporate these steps into your remodel to ensure your overhang remains sturdy and reliable for years to come, without the worry of sagging or wobbling, especially under regular use.
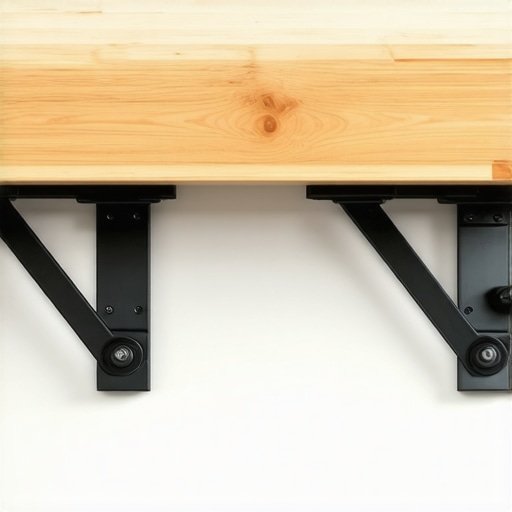 Many homeowners assume that installing built-in cabinetry and storage solutions is simply about choosing trendy finishes or maximizing space, but this misconception often leads to costly mistakes. In my experience, one of the most overlooked nuances is the importance of designing for long-term functionality rather than just immediate aesthetic appeal. For example, a common myth is that deeper or larger cabinets automatically translate into better storage; however, without considering the pantry depth standards or user accessibility, these choices can create clutter and frustration rather than convenience. Advanced considerations such as the placement of power outlets for concealed charging stations or the integration of adjustable shelving can significantly improve usability and longevity. Studies from experts like Marie Kondo emphasize that well-planned storage enhances not only order but also mental clarity, showing how superior design supports overall home harmony. An often-ignored mistake is neglecting the specific needs of the household—like incorporating custom compartments for bulky appliances or hidden pull-outs for trash and recycling—to prevent clutter accumulation. Designing built-ins with adjustable components from the start can save time and money during future remodels, giving your kitchen a timeless update. For those seeking detailed strategies, exploring our guide on built-in storage hacks can be eye-opening. Ultimately, understanding these nuanced choices helps avoid common pitfalls and ensures your kitchen remains functional for years to come. Have you ever fallen into this trap? Let me know in the comments.
Tools and Techniques for Reliable Maintenance
To keep your built-ins and custom cabinetry in prime condition over the years, investing in the right tools is essential. I personally rely on a high-quality cordless drill with a set of precision screwdriver bits. This allows me to periodically tighten hinges and handles without damaging the material. A soft-bristled brush and a microfiber cloth are also invaluable for regular dusting, preventing buildup that can lead to scratches or warping.
For deeper cleaning, I use a mild wood cleaner compatible with the finish—avoiding harsh chemicals that can strip or discolor the surface. Applying a furniture wax or polish every few months restores luster and adds a protective layer against moisture and wear. Remember, routine upkeep not only extends the life of your cabinets but also preserves their aesthetic appeal.
Smart Maintenance Methods for Enduring Beauty
One method I swear by is setting a seasonal maintenance schedule. For example, inspecting seals and weatherstripping around any integrated appliances or concealed compartments helps prevent drafts and moisture intrusion. Additionally, periodically checking the fasteners and hinges, especially in high-traffic areas, ensures door alignment and prevents sagging. Using a specialized hinge adjustment tool makes this task straightforward, saving time and frustration.
Scaling Up Storage and Customization Over Time
As your needs evolve, so should your storage solutions. Installing adjustable shelving or modular inserts into existing built-ins allows for easy expansion or reorganization without costly rebuilds. For instance, adjustable dividers in pantry cabinets can adapt to different item sizes, enhancing overall functionality. Investing in smart storage upgrades, such as pull-out trays or hidden compartments, maximizes space and keeps everything accessible.
Future Trends in Built-in Design and Maintenance
Looking ahead, technology integration will play a bigger role. Voice-activated lighting, touchless cabinet openers, and app-controlled climate control for sensitive items are emerging. These systems will require periodic software updates and electrical inspections, emphasizing the importance of working with professionals during installation and maintenance.
How do I keep my built-ins working perfectly over time?
Focus on routine inspections, lubrication, and using the right cleaning products. Regularly tightening hardware and adjusting hinges prevents misalignment. Consider upgrading to modular and adjustable components so your cabinetry can adapt to changing storage needs. For high-tech updates, consult a professional to ensure compatibility and safety. To explore more about customizing your storage solutions, check out our latest storage innovations, and start implementing one maintenance habit today to keep your built-ins pristine.
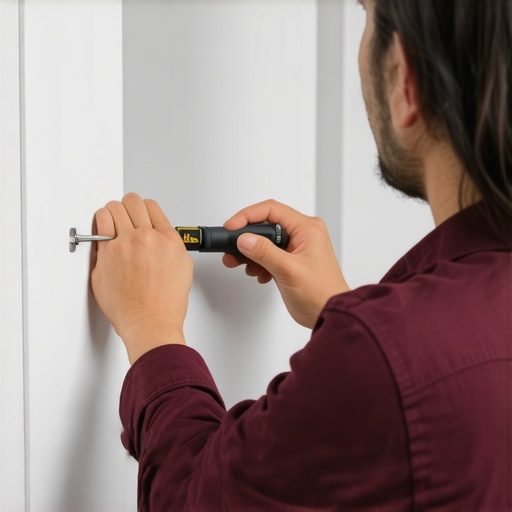
Image Description: A close-up of a homeowner using a precision screwdriver to tighten hinge screws on a modern, custom cabinet, demonstrating routine maintenance for longevity. Alt text: Person maintaining cabinet hinges with screwdriver. Title: Proper Cabinet Maintenance Tools and Techniques.
What I Wish I Knew About Overhang Support Early On
- I underestimated the importance of load capacity in support brackets, believing aesthetics alone could carry the design. A harsh lesson taught me that choosing supports without considering weight limits leads to wobbling and potential failure, especially under constant kitchen use.
- The tension between style and function often pushes homeowners towards decorative options, but durability should come first. That realization prompted me to prioritize heavy-duty steel brackets, which proved essential for long-term stability.
- I learned that precise wall reinforcement and stud placement are critical. Simply trusting drywall or surface anchors isn’t enough—proper backing ensures your support system endures years of daily activity.
- Routine maintenance is more than just tightening screws; it’s about proactively inspecting and upgrading your supports as needed. Small adjustments made over time can prevent costly repairs or replacements down the road.
- Finally, integrating support planning into your remodel from the start saves time, money, and stress later. Embracing these lessons transformed my approach, making my kitchen both beautiful and dependable.
Tools and Resources That Became My Kitchen Remodeling Allies
- Milwaukee Cordless Drill: Its power and precision make it my go-to for mounting heavy brackets and tightening fasteners, ensuring a secure fit every time.
- FlexiSlope Level: Staying perfectly level is key—this tool helps me align brackets accurately, avoiding wobbles and uneven surfaces.
- Stud Finder with Deep Scan: Locating studs behind drywall guarantees that my brackets anchor into solid support, not just drywall alone.
- Online Guides and Forums: Websites like [artisancabinetworkz](https://artisancabinetworkz.com/built-ins-and-storage-hacks-for-a-sleek-functional-kitchen) offer invaluable tips and real-world experiences that help me troubleshoot and refine my support strategy.
- Expert Consultation: Sometimes, investing in professional advice prevents costly mistakes, especially when reinforcing old or complex wall structures.
Time to Reinvent How You Support Your Kitchen Overhangs
Stepping into the world of kitchen remodels reveals that the secret to a lasting kitchen isn’t just in sleek cabinets or trendy finishes—it’s in the details like the support system. Embracing the lessons learned from real experience can help you avoid pitfalls and create a space that’s both beautiful and resilient. So, why not start planning your support setup with confidence today? When you prioritize quality and structural integrity, your kitchen overhang will stand the test of time, keeping both your workspace and your style intact.
Have you ever realized mid-project that your support system wasn’t enough? Share your story below—I’d love to hear about your experience with kitchen overhangs and how you solved it!
,