Why Your Kitchen Remodel Needs a Designated Baking Zone
I remember the moment exactly. I had just finished a months-long kitchen renovation, eagerly unpacking my baking supplies, only to find my countertop cluttered with stray flour bags, mixing bowls, and a scattered collection of measuring spoons. It hit me then—despite the beautiful cabinets and state-of-the-art appliances, my baking chaos was still there. That’s when I realized: a dedicated baking zone isn’t just a luxury; it’s a necessity. If you’ve ever felt overwhelmed every time you try to whip up cookies or bread, you’re not alone. Today, I want to share how creating a designated baking area transformed my kitchen—and can do the same for you.
Why Your Kitchen Upgrade Deserves a Baking Niche
In my experience, a well-planned baking zone is the secret ingredient to a functional and stress-free kitchen. It’s easy to overlook how vital this space is until you’re elbow-deep in dough, searching for that elusive rolling pin or misplaced parchment paper. Without a specific area, your countertop becomes the catch-all, leading to clutter, wasted time, and frustrating interruptions during your favorite baking moments. Not to mention, it can be a real safety hazard when hot trays and sharp tools are strewn about. Recognizing this gap was my lightbulb moment—especially considering how much more enjoyable baking becomes when everything is organized and within arm’s reach. If you’re questioning whether a baking zone is worth the effort, consider this: According to a study by the National Kitchen and Bath Association, personalized storage solutions significantly improve kitchen efficiency and user satisfaction. When you dedicate space specifically for baking, you’re essentially customizing your kitchen to serve your culinary passions better.
Is a Baking Zone Really Essential—Or Just a Trend?
Honestly, I was skeptical at first. I thought, “How much difference can a small corner make?” But early on, I made the mistake of trying to stuff all my baking tools into generic cabinets, only to find myself rummaging through piles of stuff every time I baked. It was a disaster waiting to happen. Over time, I learned that smarter storage—like custom cabinets tailored for baking essentials—could be a game-changer. When I finally invested in a nook specifically for my mixer, measuring cups, and baking trays, everything became instantaneously easier. Plus, it kept my countertops clear, allowing me to enjoy the process without the usual chaos. If you’re doubtful, trust me—this upgrade is a small change with a big impact, turning baking from a stressful chore into a joyful routine. Curious about how to implement this? You might find some innovative ideas worth considering in articles about [custom cabinets](https://artisancabinetworkz.com/custom-cabinets-as-a-game-changer-in-your-kitchen-remodel-journey) and [storage hacks](https://artisancabinetworkz.com/built-ins-and-storage-hacks-for-a-sleek-functional-kitchen). This way, your kitchen works with you, not against you.
Select the Perfect Location for Your Baking Area
Think of your kitchen as a living organism; each part has a role. To create an effective baking zone, choose a corner near your main countertop but away from high-traffic areas to avoid interruptions. During my remodel, I repurposed a less-used nook next to the pantry, which initially looked cluttered but proved ideal for a dedicated station. Clear space is crucial—measure carefully and ensure the spot can accommodate your essential tools and ingredients without crowding.
Design Custom Cabinets for Baking Essentials
Custom cabinets act like tailored suits for your kitchen—fitting perfectly and maximizing function. I opted for shallow pull-out shelves for measuring cups and spice jars, and deeper drawers for mixing bowls and baking sheets. To optimize space, incorporate pull-out trays for heavy appliances like mixers and food processors—this makes accessing bulky items effortless and prevents damage. Consider the grain matching secret to give your cabinetry a high-end look by aligning the wood patterns, which you can explore further in this guide.
Optimize Storage with Innovative Solutions
Miniature pantry drawers for baking powders and cocoa, vertical storage for rolling pins, and spice rack compartments keep everything in place. Think of your storage as a puzzle—each piece must fit seamlessly. I applied magnetic latches to keep cabinet doors closed when not in use, preventing accidental spills, and installed shallow counters’ drawers to hide away less-used items. For more space-saving tips, check out this article.
Set Up Accessibility and Labeling
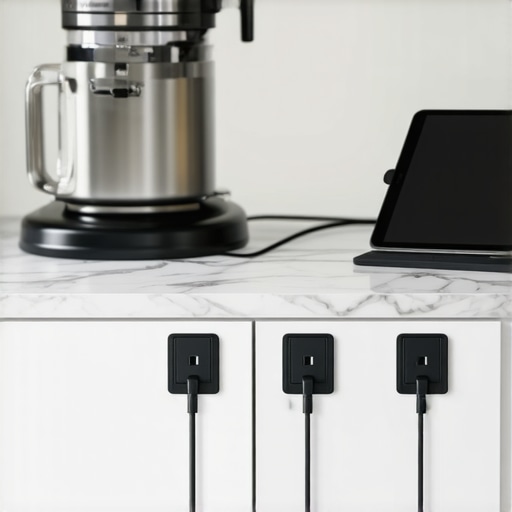
Organization is half the battle. Use clear labeling on drawers and containers—this speeds up your workflow. Position frequently used tools at waist level for easy access, and place less-used items higher or lower. When I designed my nook, I installed a pull-out tray for parchment paper and a dedicated spot for my rolling pin, reducing clutter and making baking more enjoyable. Additionally, incorporating built-in charging hubs can keep your appliances powered without cords cluttering the workspace, as detailed in this post.
Incorporate Lighting and Visual Cues
Lighting enhances focus and safety. Under-cabinet lights directly above your workspace ensure visibility, especially during detailed tasks. I installed LED strip lighting with adjustable brightness to simulate daylight, making vibrant colors of ingredients pop. Visual cues like color-coded labels or contrasting cabinet finishes help your eyes quickly find what you need, much like a well-organized toolbelt. Proper lighting also decreases eye strain and adds a professional touch to your baking zone.
Test and Refine Your Setup
Once assembled, spend time baking in your new zone to identify any shortcomings or clutter points. During my first trial bake, I realized that my spice jars were too deep for quick retrieval, prompting me to swap them for shallower containers. Continuous adjustments ensure your setup evolves with your habits. Remember, a well-structured baking zone isn’t static; it adapts to make your culinary adventures smoother and more enjoyable. Use insights from this expert guide for ongoing improvements.When embarking on a kitchen remodel, many homeowners fall prey to misconceptions that can lead to costly mistakes and less-than-satisfactory results. One widespread myth is that opting for shallow or standard cabinetry suffices for all storage needs. In reality, customizing cabinet depths and incorporating innovative storage solutions often yields a much more functional space, especially for baking and cooking essentials. Relying solely on off-the-shelf options can cause frustration and limit your kitchen’s potential, so consider exploring tailored configurations at https://artisancabinetworkz.com/custom-cabinets-as-a-game-changer-in-your-kitchen-remodel-journey.
A common mistake many overlook is neglecting the importance of proper lighting and accessibility. Installing upper cabinets without adequate task lighting can create shadows and hinder detailed work, while poorly placed storage hampers workflow. Upgrading to built-in lighting and strategic placement can dramatically improve your kitchen’s usability. For advanced insights, check out https://artisancabinetworkz.com/built-ins-that-elevate-your-living-rooms-functionality.
Many assume that all storage solutions are equal, but the reality is quite different. Standard lazy Susans and blind corner cabinets often hide more than they reveal, leading to wasted space and difficulty in access. Instead, incorporating corner drawers or pull-out trays can maximize corner usage and simplify retrieval—discover more at https://artisancabinetworkz.com/why-you-should-skip-the-lazy-susan-and-use-corner-drawers-instead.
Why is it that so many high-end kitchen remodels still struggle with clutter? The answer often lies in overlooking the nuanced details of storage integration. Deep drawers for baking sheets or specially designed spice drawers prevent clutter from piling up and streamline your process. Remember, thoughtful organization isn’t an afterthought but an integral part of mastery in kitchen design. For an example of hidden storage opportunities, see https://artisancabinetworkz.com/the-hidden-storage-spots-you-are-missing-in-your-kitchen-layout.
A mistake that trips many is underestimating the complexity of installing custom cabinetry into existing structures. Walls and floors may not be perfectly level, leading to gaps and misalignments if not addressed properly. Using advanced techniques like scribing or shimming ensures your custom features fit precisely, creating a seamless look. For professional tips on this process, refer to https://artisancabinetworkz.com/how-to-scribe-a-pantry-cabinet-to-a-slanting-ceiling-without-gaps.
Have you ever fallen into this trap? Let me know in the comments! Mastering these nuanced aspects of kitchen remodeling can secure a space that’s not only beautiful but also supremely functional, saving you time and stress every day.
Maintaining your kitchen’s built-in storage solutions and custom cabinets is crucial for preserving their functionality and appearance. I rely heavily on dedicated tools and methods to ensure my kitchen remains organized and efficient as years go by. First, I swear by a high-quality, magnetic screwdriver set because it allows me to tighten hinges or replace hardware quickly without hunting for the right bit. Regularly inspecting and tightening screws prevents loose doors or drawers from becoming major issues. For cleaning, I prefer a gentle, non-abrasive wood cleaner and a soft microfiber cloth to maintain the finish of my custom cabinets, especially when using high-end finishes like lacquer or UV-resistant paints. A consistent cleaning schedule—monthly, at minimum—keeps surfaces looking fresh and prevents buildup of grease or dust that can mar the cabinetry over time. When it comes to hinges and slides, I use a silicone-based lubricant, which I apply biannually, to keep everything operating smoothly without squeaks or sticking. This simple step extends the lifespan of your hardware significantly and maintains ease of access. Predicting the future, smart maintenance tools, such as app-enabled levelers or moisture detectors, will become more popular, helping DIYers and professionals alike stay ahead of potential problems before they escalate.
How do I keep my cabinet hardware and storage solutions working seamlessly?
I recommend creating a maintenance checklist tailored to your specific cabinetry and storage systems. For example, when installing new built-ins, I track hinge alignment, drawer glide smoothness, and sealant integrity. Incorporating adjustable shelving or modular storage can also ease future updates, making it simple to swap out components or add new features without major overhauls. Plus, consulting detailed product guides—like the one from Expert Cabinetry Maintenance—can provide specific tips for your hardware types. I personally tweak my cabinetry settings seasonally since humidity and temperature fluctuations can cause wood to expand or contract, affecting alignment. For those seeking to maximize their space with innovative storage solutions, I highly recommend exploring smart storage ideas that are designed to adapt to long-term use. Remember, a little proactive upkeep now saves major headaches later, and investing in quality tools ensures your kitchen remains as stunning and functional as day one.
What I Wish I Knew Before Crafting My Baking Niche
- Sometimes, the most complicated problems have simple solutions if you listen closely to your workflow. I initially thought that investing in more storage was enough, but I realized that optimizing the layout for movement and accessibility was the real game-changer.
- My biggest lightbulb moment came when I understood that personalization in cabinetry—like shallow pull-out shelves—could dramatically reduce clutter and theft of baking tools. It taught me that tailor-made solutions beat off-the-shelf options every time.
- Organizing around your habits prevents frustration. I used to store heavy mixers in hard-to-reach spots, but I learned that placing frequently used items at waist level minimizes bending and hunting, leading to happier baking sessions.
- Lighting can make or break your focus. Installing LED strips under cabinets transformed my workspace into a bright, inviting zone that mimics daylight, inspiring me to bake more often and explore new recipes.
- Lastly, testing and refining elevate your baking zone’s functionality. What feels perfect today might need adjustments tomorrow; staying flexible and observant keeps your space efficient and enjoyable.
Tools and Reads That Shaped My Approach
- Custom Cabinets and Tailored Storage Ideas: This resource opened my eyes to the impact of perfect fit solutions for baking tools and ingredients.
- Smart Storage Hacks: These suggestions helped me optimize every inch, turning my cluttered corner into a baking paradise.
- Innovative Storage Solutions: A treasure trove for discovering novel ways to keep my baking essentials tidy and accessible.
- Built-in Features for Functionality: Perfect for integrating lighting and hidden compartments into my custom cabinetry.
Seize the Moment and Shape Your Kitchen Future
Designing your dedicated baking zone is more than a project—it’s an investment in daily joy and culinary mastery. With thoughtful planning, personalized cabinetry, and ongoing refinement, you can transform your kitchen into a space that inspires you every day. Don’t wait for perfection—start mapping out your ideal baking spot today and watch how it elevates your entire cooking experience.
What’s the biggest challenge you’ve faced when organizing your kitchen for baking? Share your story below and let’s learn together!
,