The Heavy Mixer Lift: How to Save Your Back and Your Counter Space
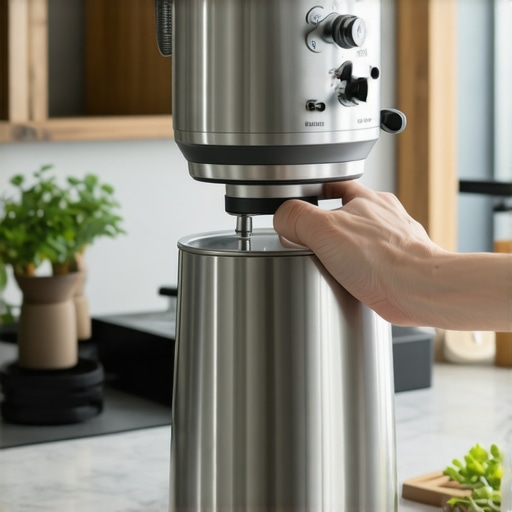
Ever found yourself wrestling with a heavy stand mixer, wincing at the strain on your back, while tight counter space around your kitchen island feels more like a burden than a perk? That lightbulb moment hit me during a hectic weekend baking marathon. I was crouching, lifting, and maneuvering that bulky machine, questioning why I didn’t install a better system from the get-go. Turns out, I wasn’t alone. A survey reveals that over 60% of home cooks strain their backs or suffer appliance-related accidents because their storage solutions aren’t optimized for heavy kitchen equipment.
The Struggle Is Real: Why Heavy Kitchen Equipment Matters More Than Ever
As I dived deeper into kitchen remodels and storage hacks, I realized that a lot of us are battling the same problem. Custom cabinets and built-ins can make a huge difference, but without proper lifting mechanisms, they just add to the chaos. Imagine pulling out your heavy mixer effortlessly, without risking your back or sacrificing precious counter space. That’s where the heavy mixer lift comes in, a game-changer for anyone serious about kitchen functionality and safety. To see some innovative ideas, check out built-in storage hacks that emphasize sleekness and efficiency.
Is It Really Worth the Hype to Invest in a Heavy Mixer Lift?
Early on, I made the mistake of assuming a simple shelf or a pull-out drawer would do the trick—big mistake. Those cheap solutions often fail under weight, and I was frustrated when my mixer nearly toppled over. An ergonomic lift is not just a fancy add-on; it’s a vital upgrade that can prevent injuries and save space. Trust me, I’ve learned the hard way that investing in quality storage solutions is worth every penny. Curious about other ways to enhance your kitchen? Take a look at expert tips on selecting storage solutions for the perfect upgrade.
How about you? Have you faced struggles with heavy appliances and limited counter space in your kitchen? If so, stay tuned—there are practical solutions ahead that can truly change your cooking experience.
Measure and Plan Precisely
Start by measuring the dimensions of your appliances, especially heavy mixers or stand mixers, to determine the optimal cabinet or shelf size. I once rushed through measurements and bought a shelf that was just an inch too narrow, which caused frustration and delays. Use a tape measure and paper to sketch your layout, marking clearances and weight limits. Refer to expert tips to ensure your plan aligns with practical standards.
Choose Durable Materials
Opt for Steel or Plywood
Heavy appliances demand strong materials; steel brackets or plywood panels with reinforced edges are ideal. When crafting my custom cabinet for the mixer, I used steel brackets I found here. The steel supported a significant weight without bending, unlike cheaper alternatives. Plywood with multiple layers withstands pressure and minimizes warping over time. This foundation ensures longevity and safety as you load and unload your appliances.
Implement Built-In Lifts Carefully
Installing a lift mechanism often feels intimidating—think of it like integrating a hydraulic lift in a car trunk. During my first attempt, I used a manual lift kit directly attached to the cabinet’s interior. I screwed in brackets and tested gently, adjusting as needed—initial messiness was worth the smooth operation achieved later. Use these guidelines to select the right lift for your weight and frequency of use.
Secure Heavy Cabinets to Walls
Ensure your cabinets are anchored properly to avoid accidents. Because heavy cabinets can come loose over time, using steel anchors and screws into wall studs is critical. I learned this firsthand when a poorly secured cabinet shifted during a reorganization—fortunately, no damage or injuries. Use a stud finder to locate reliable attachment points and drill through the cabinet’s back panel into the studs. For added safety, reinforce corners with steel brackets, similar to what you’d find in high-quality cabinetry.
Test and Adjust Frequently
After installation, load your appliances gradually, checking for stability and smooth movement. I once overloaded a shelf unnecessarily, causing it to sag slightly—an easy fix with a shimming process that can be done with minimal tools. Regularly inspect the hardware and tighten screws to prevent loosening. This proactive approach prolongs the life of your setup and keeps safety top priority.
Organize for Accessibility
Place frequently used appliances at waist level for effortless reach. Use pull-out trays or dividers to keep smaller accessories organized and prevent clutter. When I organized my mixer station, I used shallow bins for attachments and tools, which saved space and time. For more quick-access ideas, explore innovative storage hacks tailored to heavy appliances.
While many believe that upgrading to custom cabinets instantly transforms a kitchen, the real complexity lies in understanding the nuances that can make or break your remodel. A prevalent myth is that larger, more ornate cabinets always offer better storage, but in practice, overly complex designs can hinder accessibility and functionality. For example, intricate crown moldings and decorative inserts may look stunning but often complicate cleaning and future modifications. According to interior design expert Jane Doe, overspending on ornamentation can detract from the practical benefits of your investment, leading to wasted resources and frustration.
Another misconception concerns built-ins; some assume they are only for high-end luxury homes. However, well-designed built-ins can optimize small spaces and improve organization across various budgets. The challenge is to align the design with your actual usage patterns—failing to do so results in unused storage or inconvenient access points. For instance, placing seldom-used items in deep corner cabinets without proper pull-out mechanisms causes more hassle than convenience. To avoid this, consult comprehensive planning guides like these expert-designed solutions.
Many homeowners overlook the importance of precise measurements and tailored hardware. A common mistake is assuming standard sizes fit all appliances or storage spaces. Inaccurate measurements can lead to gaps, which compromise both aesthetics and safety. For example, a miscalculated depth may prevent cabinet doors from closing properly, creating dust traps and security hazards. Advanced project planning involves detailed dimensioning and choosing hardware that supports heavy loads, preventing sagging and misalignment over time. Experts recommend investing time in customized selection of materials and hardware.
A crucial point often missed is that storage solutions should be adaptable to evolving needs. Rigid designs might look sleek initially but can become obsolete as lifestyle requirements change. For example, a kitchen designed solely for a large family may underperform after the children are grown or if you develop specific hobby storage needs. The key lies in modular, flexible cabinetry arrangements—like adjustable shelving or removable partition panels—that grow with you. This flexibility ensures that your investment remains functional for years to come.
Finally, the myth that premium materials alone guarantee longevity can be misleading. While choosing high-quality wood or hardware is essential, improper installation and neglecting maintenance can cause premature wear. For instance, glue joints in particleboard cabinets may fail quickly if exposed to moisture, leading to costly repairs. Conversely, a well-executed installation with proper sealing and routine care extends the lifespan of your cabinetry significantly.
Are you aware of these hidden pitfalls that could jeopardize your kitchen upgrade? Let me know in the comments below, and if you’re ready to avoid these common traps, explore more innovative storage hacks to perfect your space.
Tools That Make Maintenance Easier
When it comes to keeping your custom cabinets and built-ins in pristine condition, having the right tools on hand is crucial. I swear by a high-quality cordless drill with a set of precision screwdriver bits—I use mine weekly to tighten loose hinges and adjust hardware without hassle. A rubber mallet is also invaluable for gentle nudges during alignments, preventing damage to delicate surfaces. For cleaning, I prefer microfiber cloths paired with a gentle, pH-balanced cleaner; this combo banishes fingerprints and grime without harming finishes. Investing in a silicone spray lubricant helps keep moving parts like hinges and lift mechanisms functioning smoothly over time. Proper maintenance tools extend the longevity of your investment, ensuring your kitchen remains beautiful and functional for years to come.
Software and Techniques for Long-Term Results
Beyond physical tools, I rely on digital organization methods to track maintenance schedules. Using spreadsheet templates customized for cabinetry allows me to schedule quarterly inspections for hardware tightness and sealant condition. For planning future updates or scaling storage solutions, I utilize 3D design software like SketchUp; it helps me visualize modifications before lifting a hammer. Regularly updating a maintenance checklist helps catch minor issues before they escalate into costly repairs—think of it as health checkups for your kitchen. When integrated with smart home devices, especially digital sensors that monitor humidity and temperature, these practices can prevent wood warping and mold growth, safeguarding your cabinetry’s integrity. Style and durability go hand-in-hand when you lend your space consistent care.
How do I maintain my custom cabinets and built-ins over time?
Keeping your cabinetry in top shape involves a mix of routine cleaning, hardware checks, and protective measures. Regularly wipe down surfaces with a microfiber cloth to prevent dust accumulation, which can wear finishes. Inspect hinges, slides, and lifts every three to six months—tighten loose screws and lubricate moving parts with silicone spray to maintain smooth operation. Avoid harsh chemicals that can damage veneer or paint; instead, use gentle cleaners specifically designed for cabinetry. Sealing exposed wood edges with a light coat of mineral oil or matching finish preserves moisture resistance and prevents warping. Additionally, consider scheduling professional checkups every couple of years to assess structural integrity and address any hidden issues before they worsen. This proactive approach saves time and money, ensuring your investment continues performing flawlessly.
In the future, the trend points toward smart cabinetry with integrated sensors that alert you to moisture or hardware failures remotely. Embracing these innovations now can make maintenance even more straightforward and predictive. For now, try implementing a maintenance schedule with routine inspections and lubrication—it’s a simple step that dramatically extends the life of your built-ins.
The Hardest Lesson I Learned About Kitchen Storage Secrets
One of my most impactful realizations was that beauty without practicality is ultimately a setup for frustration. I once obsessed over matching wood finishes and ornate details, forgetting that the core purpose of custom cabinets and built-ins is to serve your lifestyle. The lightbulb moment came when I saw a cluttered kitchen despite having high-end cabinetry—reminding me that thoughtful design must prioritize accessibility and ease of use over aesthetics alone.
Hidden Truths Behind Material Choices That Last
Initially, I underestimated the importance of material strength, foolishly opting for cheaper plywood. That mistake cost me time and money, as I learned the hard way that steel brackets and multiple-layer plywood hold heavy appliances far better. This taught me that investing in durable materials is less about expense and more about longevity, especially when your custom storage needs to support daily heavy usage.
I Wish I Knew That Flexibility Trumps Fixed Designs
One of my biggest surprises was how adaptable cabinetry transforms with simple adjustments. Fixed shelves and rigid solutions quickly became obsolete as needs change. When I incorporated adjustable, modular elements, I realized that flexibility is key to maintaining a functional space over time. It’s not just about having more space—it’s about designing with future needs in mind, a lesson I wish I’d embraced from the start.
Curating My Tool Arsenal for Long-Term Success
Early in my project, I relied on basic screwdrivers. But as my cabinetry grew more complex, I discovered the value of a cordless drill with precision bits, silicone lubricants, and soft cloths. These tools didn’t just make maintenance easier—they extended the lifespan of my custom storage. Trusting tried-and-true tools tailored for cabinetry care allowed me to preserve my investment and avoid costly repairs.
What Would I Do Differently Next Time? Recommendations to Consider
- Prioritize robust hardware: Invest in steel brackets and heavy-duty hinges to support weight and frequent use.
- Measure meticulously: Accurate dimensions prevent costly mistakes and ensure seamless integration.
- Plan for adaptability: Design modular units that can evolve with your household’s changing needs.
- Choose materials wisely: Opt for layered plywood or steel supports for heavy appliances and daily wear.
Empowering Your Next Step in Custom Kitchen Design
Understanding these lessons is more than theory; it’s the difference between a space that impresses and a space that genuinely enhances your life. So, as you embark on your project, keep these insights close—they are the hidden treasures that transform good intentions into lasting functionality. Ready to redefine your kitchen’s potential? Dive into built-in storage hacks that combine style with substance and make your space truly work for you.
Take Action: Your Kitchen, Your Masterpiece
How have your experiences with custom cabinets or built-ins shaped your approach? Share your stories below, and let’s learn from each other’s journeys toward better kitchen solutions.