The Strategic Way to Light Glass-Front Cabinets Without Glare
I stood there for five minutes, squinting like I was looking directly into the sun. I had just finished my dream modern kitchen remodel, and the glass-front cabinets were supposed to be the crown jewel. Instead, they were a mess of hot spots and blinding reflections. Every time I tried to show off my collection of vintage glassware, the glare was so aggressive you couldn’t even see what was behind the door. It’s a classic “expectation vs. reality” fail that happens more often than you’d think. If you’re tired of your display lighting looking like a cheap flashlight beam, you’re in the right place. Today, I’m going to show you exactly how to position your LEDs so you get that soft, museum-quality glow without the headache.
Why Most Display Lighting Fails the Eyeball Test
I’ll be the first to admit it: I made the amateur mistake of slapping puck lights right in the center of the cabinet ceiling. I thought, “Hey, it’s the middle, it’ll cover everything.” Wrong. That’s the quickest way to create a giant “X” of glare right at eye level. Most people think the problem with open shelving is the dust, but when you switch to glass, the new enemy is physics. According to the Illuminating Engineering Society, the angle of incidence equals the angle of reflection, which means if you do not account for the bounce-back, you’re essentially aiming a mirror at your own face. To get that high-end look, you have to treat the glass like a teammate, not an obstacle. It is about shifting the focus from the light source to the objects being lit. Using the under-cabinet lighting trick for interior displays involves recessing the strips or hiding them behind the face frame so the light washes down the back rather than bouncing off the front. Have you ever flipped your kitchen lights on and immediately regretted the placement? Trust me, I’ve been there, and it’s a fixable disaster.
Is fancy interior lighting actually worth the extra effort?
It is easy to wonder if you should just skip the lights altogether and stick to a simple overhead bulb. You might worry that wiring is too complex or that you’ll end up with a kitchen that looks like a sterile laboratory. But when done right, lighting does more than just show off your plates; it adds depth to the entire room. The goal isn’t to make the cabinets “bright”—it’s to create an inviting warmth that makes the kitchen feel larger and more intentional. We aren’t just putting bulbs in a box; we are designing an atmosphere that works for you, not against you.
Move Your Light Strips to the Front Edge
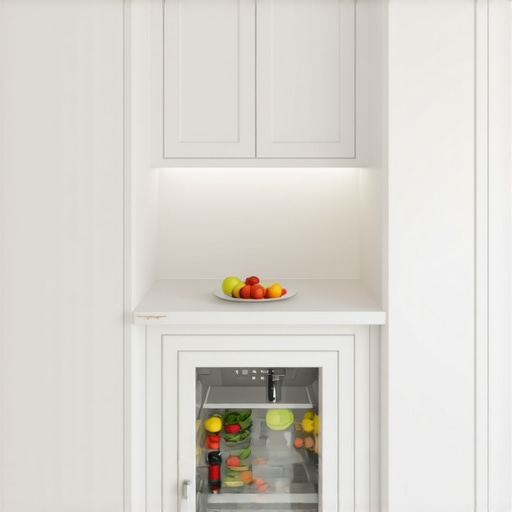
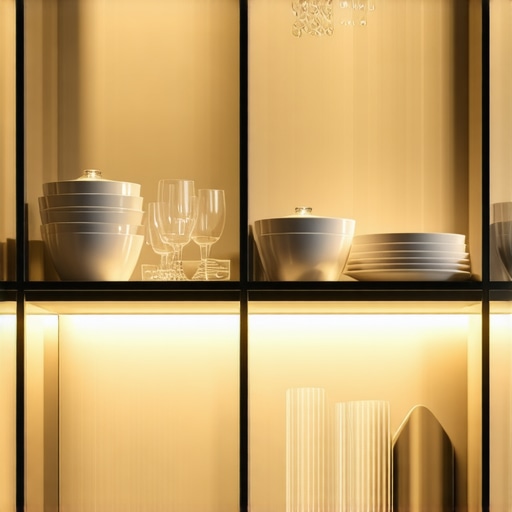
The biggest secret to professional display lighting is simple: get the light as close to the glass door as possible, aimed back toward the items. When you center a light, you’re basically asking for a reflection. By mounting your LED strips just behind the face frame of your modern kitchen remodels featuring custom cabinets and built-ins, you’re casting light onto the front of your dishes rather than the top of them. This is the same principle behind the under-cabinet lighting trick for a high-end kitchen look—you want the source of the light to be invisible to the person standing in the room.
The Diffuser Trick That Kills Tiny LED Dots
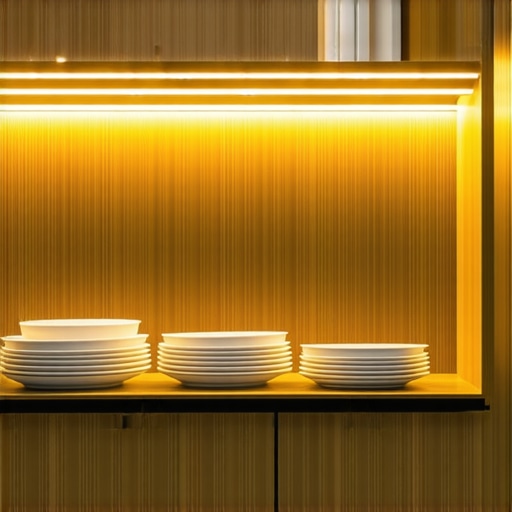
Nothing screams “cheap DIY” faster than seeing those tiny individual LED dots reflected in your polished plates or the cabinet glass itself. To fix this, you must use an aluminum channel with a frosted lens. I learned this the hard way during a project where I was testing innovative storage solutions for modern kitchen remodels. I skipped the diffusers and the result looked like a row of runway lights inside the cupboard. It was distracting and messy. Once I snapped on a frosted cover, the light transformed from a series of harsh pinpricks into a soft, even wash. It’s a small investment that makes a five-figure cabinet package look like six figures.
How Glass Shelves Change the Lighting Strategy
If you have glass shelves, you’re in luck. Light travels through glass like water through a pipe. One single strip at the very top can often illuminate three or four levels of shelving. However, if your shelves are wood, you have to get creative. In my own kitchen, I once tried to light a deep corner unit with wood shelves by only putting a light at the top. It was a disaster; the top shelf was bright as day, and the bottom was a black hole. Because I hadn’t switched to glass-front cabinets with glass inserts, I had to run a vertical LED strip down the side of the cabinet behind the face frame. This “side-wash” technique is a game-changer for deep storage or built-ins where horizontal light gets blocked by the items themselves.
Recess Everything for a Flush Finish
If you really want to elevate the look, don’t just stick the light to the surface. You should router a shallow groove into the cabinet side or top so the lighting channel sits perfectly flush. This is exactly why under cabinet lighting should always be recessed—any protruding hardware becomes an eyesore. I remember a specific client who insisted on surface-mounting their strips; every time they opened the cabinet, the bulky plastic clip caught their eye instead of the heirloom china. When we finally switched to a recessed track, the hardware disappeared, and only the light remained. It makes the lighting feel like it’s a part of the architecture, not an afterthought.
Everyone tells you to maximize every square inch, but in my experience, maximalist storage is often a recipe for losing your favorite slow cooker for three years. We’ve been conditioned to think that deeper cabinets are always better, but this is one of the most common myths in modern kitchen remodels featuring custom cabinets and built-ins. When you have 24 inches of depth without a plan, the back half of that cabinet becomes a ‘dead zone.’ It’s where the expired cans of soup go to die. According to the National Kitchen & Bath Association (NKBA), accessibility is the true metric of a successful kitchen, not just raw volume. If you can’t see it or reach it without moving three other things, it’s not storage; it’s a hiding spot. This is why I always push for innovative storage solutions for modern kitchen remodels that prioritize visibility over sheer square footage.
Why deep cabinets are actually your biggest storage enemy
The trap most homeowners fall into is thinking they need more space, when what they actually need is more ‘edge’ space. I once worked on a project where the client insisted on massive 30-inch deep pantry shelves. Within six months, they called me back because they were buying duplicates of everything. They couldn’t see what they had. This is the ‘Oops’ factor of custom cabinetry: over-building without functional hardware. I’ve found that why a pull-out pantry beats deep walk-in shelves for visibility isn’t just about the movement; it’s about bringing the back of the cabinet to your face. If you aren’t using pull-outs or tiered internals, you are essentially paying for a dark hole in your wall.
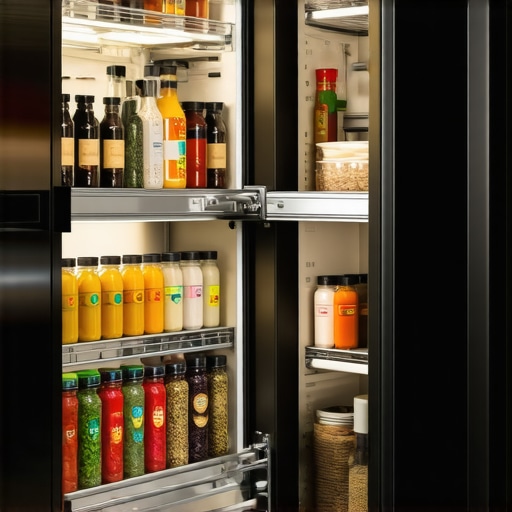
Can your custom shelves handle the pressure?
Another nuance that novices overlook is the physics of weight distribution across long spans. People see a beautiful, wide open shelf and think it’s the perfect place for a 50-pound collection of cast iron. But without a mid-point brace, you’re on a fast track to a sagging disaster. This is exactly why every tall pantry needs a fixed middle support shelf to maintain structural integrity. I have seen high-end builds literally pull away from the wall because the designer focused on the aesthetic of a continuous line rather than the load-bearing reality of the materials. It is a subtle mistake that doesn’t show up on day one, but it will definitely show up on year three.
The seasonal trap that jams your cabinet doors
If you are opting for high-end inset doors, you have to account for the environment. Many people believe that once a cabinet is installed, it stays exactly that way forever. That is a myth. Wood is a living material that reacts to the humidity in your home. I’ve had clients panic because their perfectly aligned doors suddenly started rubbing in July. This happens because why solid wood door panels still need room to breathe in summer is a fundamental law of carpentry. If your cabinet maker didn’t leave a ‘nickel gap’ or used the wrong materials for the climate, you’re going to have a maintenance nightmare. Have you ever fallen into this trap where your beautiful kitchen started fighting back as the seasons changed? Let me know in the comments. If you’re ready to avoid these pitfalls and build something that actually works, feel free to contact us for a consultation.
I’ve spent thousands of dollars on hardware that promised ‘forever’ durability, only to realize that ‘forever’ requires a bit of elbow grease. If your drawers have started to resist you, it’s usually not because the metal is failing; it’s because of debris and lack of lubrication. The real reason your cabinet drawer slides are grinding is almost always a buildup of dust mixing with factory grease. I personally use a dry PTFE spray—never WD-40, which just attracts more gunk—to keep things gliding. It’s a five-minute fix that prevents a five-hundred-dollar replacement. I also keep a #2 PoziDriv screwdriver in my junk drawer specifically for my hinges. Most people use a standard Phillips, but that’s how you strip the heads on high-end European hardware.
How do I stop my cabinets from aging faster than they should?
The secret isn’t a special cleaner; it’s climate control. I’ve seen $50,000 kitchens warp because the homeowner turned off the AC during a two-week summer vacation. The USDA Forest Products Laboratory notes that wood is hygroscopic, meaning it constantly exchanges moisture with the air. To manage the inset cabinet gap and re-aligning doors after seasonal humidity changes, you need to understand your hinges’ adjustment screws. Most modern clips have three-way adjustability: height, depth, and side-to-side. If your doors are hitting each other, don’t sand the wood; just give that side-screw a quarter turn.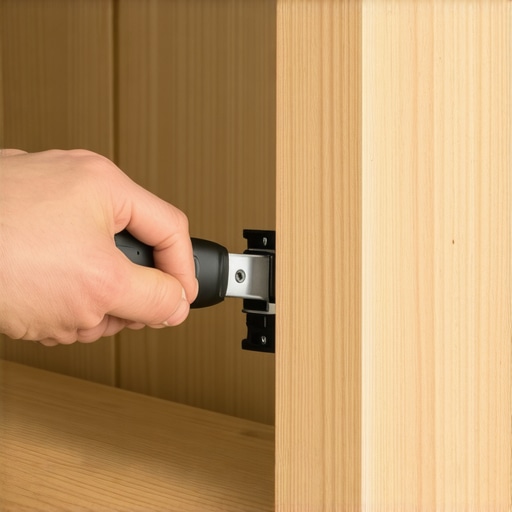
The shift toward active storage systems
As we look toward the future of modern kitchen remodels featuring custom cabinets and built-ins, I’m seeing a massive shift toward integrated tech. I’m not just talking about iPads on the fridge. I mean built-in sensors that alert your phone if the humidity inside your spice cabinet exceeds 60%, or if a slow leak starts under the sink. We are moving away from passive boxes to active storage systems. Innovative storage solutions for modern kitchen remodels are becoming more about data and longevity than just looks. If you’ve noticed your hardware acting up, don’t wait for it to seize. Grab a PoziDriv and a can of dry lube this weekend and give your custom cabinets as a game-changer in your kitchen remodel journey the tune-up they deserve. Why soft close hinges fail and the simple tension adjustment is usually just a matter of a few clicks. Try adjusting just one door today—you’ll be surprised how much better the whole room feels when the lines are finally straight again.
High-End Kitchen Lessons I Had to Learn the Hard Way
Over the years, I’ve realized that the difference between a kitchen that looks good and one that feels great is almost entirely in the unseen details. For instance, never underestimate the power of lighting the front of your objects rather than the center of the shelf. If you are looking for custom cabinets ideas that transform your homes style, remember that the smallest details—the ones you can’t see from across the room—are the ones that matter most for daily use.
- The ‘Hand-Fit’ Test: I once designed a gorgeous kitchen where the client couldn’t fit their hand into the handles comfortably while wearing oven mitts. Always test your hardware ergonomics before the final install.
- Weight Matters: Heavy pantry items need more than just a pretty shelf. This is why we recommend plywood cases over particle board for heavy pantry shelves; over time, particle board will inevitably bow under the pressure of canned goods and appliances.
- Maintenance is Mandatory: Treat your cabinets like a high-performance car. A quick five-minute tune-up every six months will prevent sagging doors and grinding drawers.
The Secret Weapons in My Professional Toolbag
I don’t leave for a job site without these specific items, and you shouldn’t tackle a DIY adjustment without them either. First, a PoziDriv #2 screwdriver is non-negotiable for high-end European hinges; using a standard Phillips is the fastest way to ruin your hardware. Second, I swear by dry PTFE lubricant spray. Unlike oily sprays, it won’t attract the flour and dust that typically plague a kitchen. Finally, I always use low-tack blue painter’s tape to visualize smart storage ideas to maximize your kitchen space this year before we ever cut a single piece of wood. It allows you to feel the flow of the room without any permanent commitment.
Build a Kitchen That Works as Hard as You Do
At the end of the day, your home should serve your lifestyle, not the other way around. Combining built-ins and storage hacks for a sleek functional kitchen isn’t just about saving space; it’s about saving your sanity during the morning rush. Don’t be afraid to customize. Whether it is adjusting a hinge or rethinking a corner cabinet, these small wins lead to a space you’ll love for decades. If you ever feel overwhelmed by the technical side of your project, feel free to contact us and we can help you navigate the tricky parts of your modern kitchen remodel. Have you noticed your drawer slides starting to grind or your doors shifting as the seasons change? Let me know in the comments below!