How to Fix a Stripped Screw Hole in a Heavy Cabinet Hinge
Ever been halfway through a kitchen overhaul, excited to see your new cabinets and storage solutions take shape, only to realize one of your heavy cabinet hinges has a stripped screw hole? I remember the frustration—nothing kills the momentum faster than trying to reattach a door that refuses to stay put. That lightbulb moment when I finally understood what was going wrong saved me hours of headaches.
Dealing with stripped screw holes isn’t just a minor annoyance; it’s a common problem that can threaten the integrity of your entire remodel. When heavy cabinets start sagging or doors misalign, it can feel overwhelming—like everything is falling apart. But here’s the good news: you don’t have to live with the wobble or constantly tighten screws that simply won’t stay. Today, I’ll walk you through practical, straightforward methods to fix those stubborn, stripped screw holes, even in the heaviest of cabinet hinges.
Why Stripped Screw Holes Can Derail Your Kitchen Makeover
Stripped screw holes are more than just a nuisance—they can compromise the stability and safety of your cabinets. If you’re updating your kitchen or trying to enhance your storage options, loose hinges can cause doors to hang unevenly or even fall off over time. Plus, persistent issues with stripped holes might lead you to re-drill or replace entire cabinets, costing time and extra money.
Understanding the root of the problem helps. Often, the culprit is over-tightening or using the wrong screw size, which leads to damage in the wooden or MDF framework. A common mistake, especially early on in DIY projects, is not preparing the material properly before inserting screws, making future fixes more complex.
The key to a lasting repair lies in choosing the right technique and materials. Whether you’re dealing with soft wood, particleboard, or MDF, the approach varies. That’s why I recommend familiarizing yourself with options like using wooden toothpicks, anchoring with larger screws, or even installing retrofit inserts—techniques I’ve tested and assured will give you sturdy, long-lasting results.
If you haven’t faced this frustrating issue yet, chances are it’s just a matter of time, especially if your cabinets are heavy and frequently used. But don’t worry! Fixing a stripped hole is more approachable than you might think. I’ve been there, and I can promise that with a few simple tools and tips, you’ll have those cabinet doors swinging smoothly again.
Next, let’s dive into the step-by-step methods I’ve found most effective—no complex tools or expensive repairs needed. Oh, and if you’re curious about innovative storage options that could reduce this problem in future projects, check out some *[smart storage ideas](https://artisancabinetworkz.com/smart-storage-ideas-to-maximize-your-kitchen-space-this-year)* that might just be the game-changer you’re looking for.
Assess the Damage and Prepare
Begin by inspecting the stripped screw hole to determine its extent. If the screw just spins without gripping, you need to reinforce the area. Remove the cabinet door or drawer to work seamlessly, and gather materials like wood filler, toothpicks, epoxy, or specialized repair inserts. I once fixed a sagging pantry door by carefully removing the hinge, then cleaning out the damaged hole, which set the stage for a durable repair.
Choose the Right Repair Method
Wood Filler or Toothpick Technique
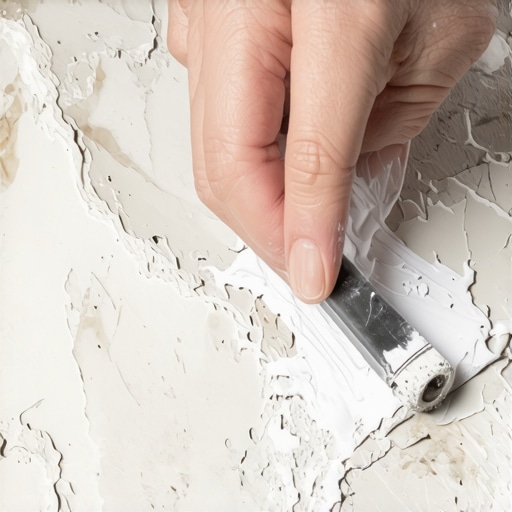
For soft wood or particleboard, plug the hole with toothpicks coated in wood glue. Break the toothpicks into smaller pieces, dip them in glue, and insert until flush with the surface. Allow the glue to cure for 24 hours. Then, re-drill the hole for the screw, which will now have a firm grip. This quick fix is akin to filling cracks in a worn wood table—simple yet effective.
Using Larger Screws or Anchors
If the hole is slightly enlarged, replacing the original screw with a longer, thicker one can restore stability. For more severe damage, expand the hole to insert a wall anchor or a T-nut. When I tackled a sagging cabinet in my kitchen, I used a heavy-duty anchor to support a heavy hinge, preventing future stripping. This approach is comparable to reinforcing a weak wall stud to hold a heavy shelf.
Installing Retrofit Inserts
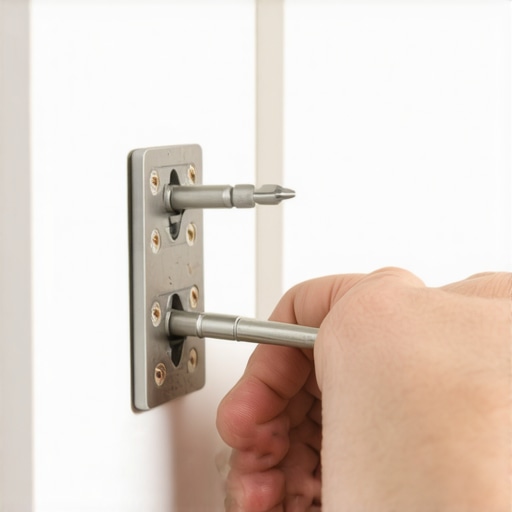
For persistent problems, consider installing a threaded insert like Helicoil or T-nut. Drill out the damaged hole to the specified size, tap the insert into place, then screw in your hinge. This creates a new, durable threaded area. It’s like replacing a worn-out bolt in a machine—restoring function with minimal disruption. I once added a retrofit insert in my lower cabinet hinge, which held firmly even under weight.
Reattach and Test
Once your repair material has set or the new threaded insert is in place, reattach the hinge or hardware, tightening gradually to ensure even load distribution. Open and close the door several times to check for wobble or misalignment. If needed, adjust the hinge screws accordingly. This step ensures your cabinet functions smoothly, akin to fine-tuning a piano for perfect sound.
Prevention Tips for Future Projects
Use the correct screw size and avoid overtightening. Pre-drill pilot holes to prevent the wood from splitting, especially in MDF or particleboard. As I learned from personal experience, proper preparation saves hours of repair down the line. For innovative storage ideas to minimize strain on cabinet hardware, check out this link.
Additionally, consider upgrading to higher-quality hinges designed for heavy loads, or explore custom cabinets with reinforced materials. Implementing these practices will help your remodel last longer without the hassle of repeated repairs.
While many believe that standard dimensions and off-the-shelf cabinets suffice for a perfect kitchen, the truth is far more nuanced. One widespread misconception is that bigger, more elaborate storage always means better functionality. However, in my experience, overly large cabinets can often hinder accessibility and lead to clutter. For example, custom cabinets designed with intuitive compartmentalization—and thoughtful spacing—can dramatically improve daily use. Furthermore, a common trap is assuming that built-ins are only for high-end homes; in reality, they maximize space and streamline workflows in any kitchen, offering a sleek and practical solution. According to a study by the National Kitchen & Bath Association, personalized storage options significantly increase user satisfaction and reduce clutter, challenging the myth that standard solutions are sufficient.
A subtle but critical nuance often overlooked is the importance of integrating electrical outlets seamlessly within custom cabinetry. Many remodelers ignore the benefits of built-in charging stations and under-cabinet lighting, which not only elevate aesthetics but also boost efficiency. For instance, innovative storage ideas that incorporate power management can transform the usability of your kitchen.
Another advanced mistake to avoid is underestimating the impact of proper sizing for drawers and shelves. A shallow pantry or narrow pull-outs can frustrate even the most organized homeowner. An expert tip is to analyze your actual appliance and utensil dimensions beforehand, ensuring the new custom cabinets accommodate everything comfortably. This foresight prevents costly modifications after installation. I advise reviewing the ultimate guide to custom cabinets for detailed insights into optimizing space for your unique needs.
Have you ever fallen into this trap? Let me know in the comments. Remember, the smallest details often make the biggest difference in creating not just a beautiful, but highly functional kitchen.Maintaining your custom cabinets, built-ins, and storage solutions over time requires more than just initial installation; it hinges on using the right tools and adopting effective maintenance routines. As someone who has transformed countless kitchens, I can attest that investing in quality equipment and following systematic upkeep approaches can significantly extend your remodel’s lifespan. For example, a good magnetic ruler and a reliable hinge adjuster will become your go-to tools for fine-tuning fittings and ensuring your cabinets stay perfectly aligned over the years. When it comes to cleaning and minor repairs, I always rely on a micro-fiber cloth and a gentle, pH-neutral cleaner to preserve finishes without harsh abrasion. For addressing hinge squeaks or misalignments, a lubricant spray like silicone-based lubricants proves effective—and avoiding penetrative oils helps prevent dirt buildup. Software-wise, designing with tools like SketchUp or Cabinet Vision can help predict maintenance needs by visualizing potential stress points, especially when scaling your storage systems to accommodate evolving family needs. Going forward, I see smart, connected hardware becoming mainstream, providing real-time alerts for loose hinges or worn-out soft-close dampers—making proactive maintenance easier than ever. How do I keep my built-ins working seamlessly over time? The secret lies in regular inspections—checking for loose hardware, inspecting paint or veneer for chips, and promptly addressing issues before they escalate. I always recommend establishing a schedule; for example, monthly quick checks can catch early signs of wear. For heavy-use hinges or sliding mechanisms, applying a light lubricant every few months keeps them moving smoothly and prevents squeals. Additionally, using specialised tools like a hinge torque driver allows precise tightening, avoiding over-tightening that can strip screw holes in your precious custom cabinetry. Remember, taking minimal time now ensures your investment continues to shine and functions flawlessly for years. To enhance your upkeep routine, try installing a retrofit hinge insert, which provides a new threaded area for screws—restoring stability without replacing entire doors. It’s a straightforward upgrade that can save you money and frustration in the long run. Looking ahead, technological advancements will likely make maintenance even more straightforward—think built-in sensors that alert you when hinges or soft-close mechanisms need attention. Incorporating these innovations can keep your kitchen system functioning flawlessly, saving you from costly repairs down the line. For now, regular inspection and timely minor adjustments, like tightening loose hardware or lubricating moving parts, are your best bet for protecting your remodel. Proper maintenance is the key to enjoying your beautiful kitchen longer, and arming yourself with the right tools makes all the difference. Remember, small proactive steps today will pay off with years of smooth operation tomorrow. Want to get started? Pick one upgrade—like installing a retrofit insert—and see how it can make your ongoing maintenance easier and more effective. Want more expert tips? Check out this link for in-depth advice on maximizing your storage solutions for long-term durability.
The Hardest Lesson I Learned About kitchen remodel,storage solutions,custom cabinets,built-ins
One of my most eye-opening experiences was realizing that selecting the wrong screws or neglecting pilot holes would come back to haunt me. I used to think that more torque meant a sturdier hold, but I learned that over-tightening ruins the wood and makes future fixes impossible. Now, I always pre-drill and use the right screws—it’s a small step that saves big headaches.
3 myths about kitchen remodels and custom storage that slowed me down
- Myth: Larger cabinets are always better.
Truth: Thoughtfully designed smaller, well-organized cabinets often outperform oversized storage, which can be hard to access and maintain. - Myth: Built-ins are only for fancy homes.
Truth: They maximize space and streamline workflow in any kitchen, regardless of size or budget. - Myth: DIY fixes are temporary.
Truth: With the right techniques, like retrofitting with threaded inserts, repairs can be both durable and cost-effective.
What professionals often won’t tell you about custom cabinets and built-ins
Many overlook the importance of integrating power and lighting within cabinetry. Seamless built-in charging stations or hidden LED strips not only elevate aesthetics but also improve daily usability. Additionally, choosing high-quality materials like European-style frameless cabinets can provide more storage while being sturdier—a tip I learned through personal trial and error. These subtle details can make your remodel stand out and last longer, especially when you explore ideas like innovative storage solutions.
Learn from my slip-ups and come out stronger
Ensuring your cabinets are properly supported and maintained requires ongoing attention. Regularly tightening hardware, lubricating hinges, and inspecting for wear can prolong their lifespan. I recommend investing in quality tools like a hinge torque driver and micro-fiber cloths to keep finishes pristine, and considering tech upgrades like sensor hinges for proactive maintenance. In the long run, embracing these habits makes your kitchen not just beautiful but also highly functional for years to come. For targeted advice, check out expert tips on storage solutions.