The Secret to Scribing End Panels Against Uneven Stone Walls
Have you ever spent hours aligning a beautiful custom cabinet only to realize that the wall behind it is anything but straight? I remember the moment vividly—standing there, staring at a gap that seemed to grow with each attempt to fit that seemingly perfect end panel. It was frustrating, exhausting, and honestly a bit demoralizing. That lightbulb moment hit me hard: how do I get those end panels to sit flush against uneven, rustic stone walls without sacrificing style or integrity?
This is a common dilemma in kitchen remodels and built-in installations where natural, textured stone walls add character but wreak havoc on precise cabinet fitting. What I learned early on is that scribing, a technique often overlooked or misunderstood, makes all the difference. Today, I promise we’ll unlock this secret so that your custom end panels will sit perfectly—regardless of how crooked your stone wall might be.
Why Precision Matters When Installing End Panels
The challenge with uneven stone walls is more than just aesthetics; it affects the durability and overall finish of your cabinetry. Ill-fitting panels can lead to gaps that collect dirt, moisture, and dust, ultimately compromising the look and longevity of your installation. Achieving a tight, seamless fit isn’t just about good looks—it’s about building a sturdy, professional finish that lasts.
Scribing allows you to follow the wall’s natural irregularities, creating a perfect edge that matches the wall’s contour. It might sound technical, but with a few simple tools and techniques, you can do it yourself and avoid those pesky gaps. Plus, it saves you from costly adjustments down the line.
Have you faced this sneaky problem of uneven walls messing up your cabinetry? If so, don’t worry—you’re not alone. Many homeowners and remodelers stumble on this step, but the good news is, it’s fixable.
For more ideas about maximizing your space and upgrading your kitchen with built-ins, check out this guide. It’s packed with expert tips that will elevate your remodel experience.
Ready to learn how to scribe like a pro and achieve that flawlessly fitted look? Let’s dive into the practical steps that will transform your project from a frustrating trial to a satisfying success.
Mark Your Wall Irregularities Accurately
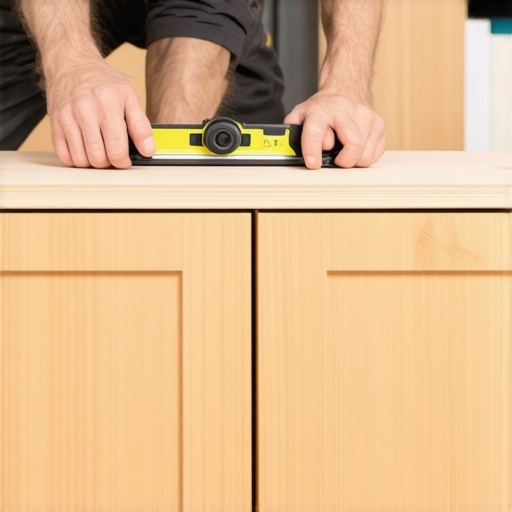
Start by placing your cabinet end panel against the wall, ensuring it’s flush at the reference point, typically the top or bottom. Use a pencil to trace along the wall’s contour directly onto the panel’s edge. I once neglected this step and ended up sanding down a dozen times, which consumed hours. Precision begins with careful tracing that captures every bump and dip.
Set Up Your Scribing Tools Properly
Use a compass or a flexible curve ruler to transfer your wall’s contours onto your panel. For irregular surfaces, a flexible contour gauge works best—press it against the wall to record its shape, then trace that shape onto your panel, ensuring your marks match every twist and turn.
Cut Slightly Inside Your Markings
Using a jigsaw or fine-tooth saw, cut just inside the traced line. Cutting outside can lead to gaps, which are harder to disguise. I once made the mistake of cutting on the outside line—resulting in a too-tight fit that required extensive filling and sanding. Remember, it’s easier to remove material than to add it back.
Sanding and Refining the Fit
After initial cuts, test-fit the panel against the wall. Use a sander or sanding block to gently refine the profile, following the wall’s contours. Take small, incremental passes; rushing here can ruin your shape. I often preferred 80-grit sandpaper for quick material removal, then finish with finer grit for smoothness.
Secure the Panel with Clamps During Final Adjustment
Once you achieve a close fit, clamp the panel in place and check for gaps. This hold allows you to see how it settles naturally and make minor adjustments before sealing. I once skipped this step and found my panel shifted overnight, ruining my alignment.
Seal and Finish for Seamless Look
Final sanding followed by primer and paint ensures the scribed edge blends with your surrounding surfaces. For added precision, feather the paint into the contours, making the transition invisible. This detail elevates the overall craftsmanship of your installation.
Experiment and Iterate for Best Results
Every wall is different; don’t be discouraged if your first attempt isn’t perfect. I recommend practicing on scrap pieces to develop a steady hand and confidence. Remember, patience and attention to detail turn a challenging task into a professional finish.
Implementing these steps with care transforms uneven, rustic stone walls from a headache into an opportunity for craftsmanship mastery. When done correctly, your end panels will sit flush, making your built-ins look refined and custom. For additional tips on elevating your entire kitchen, explore built-ins that elevate your living room or transform your kitchen with custom cabinets. Stay patient, and let your attention to detail do the heavy lifting.When it comes to designing storage in kitchens and homes, many assume that a simple, off-the-shelf approach suffices. However, seasoned professionals know that most people are actually misled by common myths and overlook nuanced details that can make or break a project. Let’s debunk some of these misconceptions and explore the hidden complexities behind effective storage solutions.
Myth of the One-Size-Fits-All Storage—Everyone says you need a large pantry or massive cabinets to maximize space, but in my experience, tailored solutions often outperform generic ones. The real secret lies in understanding the unique flow and usage patterns of your space. Custom cabinets that consider your specific needs—like a spice rack immediately accessible near the stove or shallow drawers for utensils—can dramatically improve functionality. Learn more about designing smart storage that works for your lifestyle.
Overconfidence in Built-In Installations—Built-ins are popular for their sleek look, but many forget that installation nuances can cause future headaches. For example, uneven wall surfaces or misaligned cabinetry can lead to gaps, which might seem minor but ultimately trap dirt and moisture. The common mistake here is ignoring wall irregularities during the planning stage. This is why meticulous wall measurements and flexible shimming techniques are crucial—elevating your built-in game requires attention to such details.
Why Do Custom Cabinets Cost More Than You Expect and Is It Worth It?
—Many believe that opting for stock solutions saves money, but this is often a false economy. Stock cabinets might seem cheaper upfront, yet they lack the adaptability of custom or semi-custom options. Without proper customization, you risk inefficient storage and frequent adjustments down the line. According to expert insights, investing in quality custom cabinets can increase your property’s value and save costs associated with later modifications. Explore this comprehensive guide to understand when it pays to go custom.
Common Mistake of Ignoring Airflow and Moisture Management—A subtle but critical detail in kitchen design involves ensuring proper airflow, especially around appliances like refrigerators and dishwashers. Blocking vents or lacking adequate ventilation can cause moisture buildup, leading to warping or mold. This often unnoticed error can significantly impact the longevity of your cabinetry. Installing dedicated ventilation or designing spaces with moisture-resistant materials mitigates this risk—check out ventilation tips for kitchens.
Have you ever fallen into this trap? Let me know in the comments. Remember, mastering these nuances isn’t just about aesthetics—it’s about creating durable, functional, and beautiful spaces that stand the test of time.Maintaining your custom kitchen and built-in storage solutions over time requires more than just good initial installation—it demands the right tools, ongoing care, and strategic planning. From specialized equipment to smart software, knowing what to use ensures your investments look pristine and function flawlessly for years to come.
Invest in the Right Equipment for Durable Installations
Proper maintenance begins with selection. I personally swear by a cordless oscillating multi-tool for minor adjustments and refinishing tasks—it’s versatile enough to handle sanding, cutting, and scraping without the hassle of cords. For more precise refinishing, I prefer a high-quality detail sander with variable speed control; it allows me to finesse edges and maintain smooth surfaces, especially on delicate veneer or painted finishes.
How do I maintain my cabinetry’s hardware and finishes over time?
Regular cleaning with water-based, pH-neutral cleaners combined with a soft cloth preserves both hardware and paint or stain. For hardware prone to tarnishing, I recommend applying a light coat of silicone-based lubricant once a year—this keeps hinges, slides, and knobs operating smoothly. An often-overlooked maintenance step is to check and tighten hardware screws periodically; this prevents misalignment or wobbling, which can accelerate wear. Additionally, inspecting sealants around countertops and backsplashes once a year prevents moisture ingress that could compromise cabinetry joints.
Tools I Recommend for the Serious DIYer
Beyond basic tools, integrating software like cabinet design programs that sync with your project plan can help visualize long-term impacts. I use 3D design software to simulate wear and tear, ensuring plans account for future needs like additional storage or appliance upgrades. For instance, programs like SketchUp or Cabinet Vision facilitate virtual walkthroughs that help identify potential issues before they manifest physically. Moreover, quality measuring tapes with locking mechanisms and digital calipers allow for precise adjustments during ongoing maintenance or future remodeling.
Where does maintenance go wrong and how can you fix it?
Many homeowners neglect routine inspections, leading to small issues becoming costly repairs. Sanding out scratches or reapplying touch-up paint on cabinet edges every 2-3 years keeps surfaces looking new. Upgrading hardware with durable finishes like brushed nickel or matte black resonantly extends their lifespan and maintains aesthetic appeal. For moisture-prone areas, installing inline fans or venting systems reduces humidity, preventing warping or mold. Wildly about the future of kitchen maintenance, experts predict the rise of smart cabinetry that alerts homeowners to wear or humidity levels, further simplifying upkeep—more on that trend can be found in this resource. Don’t wait; start with one upgrade today, such as installing a high-quality silicone-based lubricant on your hinges.
Three Lessons My Walls Taught Me About Perfect Fit
One of the biggest insights I gained was realizing that wall irregularities aren’t just nuisances—they’re opportunities to elevate craftsmanship. The first time I tried scribing a cabinet, I underestimated how tiny imperfections could cascade into larger gaps. Now, I see every bump or dip as an invitation to get creative with contouring techniques. Another lesson was understanding that preparing my tools—like flexible contour gauges and fine-tooth saws—made the entire process smoother and more predictable. Lastly, I learned patience is everything—taking incremental adjustments yields furniture that seamlessly follows uneven surfaces, creating a polished, professional appearance.
Tools and Resources That Have Transformed My Approach
For anyone serious about tackling unseen irregularities, I recommend investing in a high-quality contour gauge—it’s a game-changer for accurate transfers. Software like SketchUp allows me to visualize space and design elements in 3D, catching potential fitting issues before cutting. When it comes to material selection, trusting brands that specialize in moisture-resistant veneers has saved me countless headaches. Additionally, browsing dedicated forums and tutorials, such as those linked to this resource, keeps me inspired and informed about latest techniques and solutions in the custom cabinetry world.
Embrace the Journey, Not Just the Finish Line
Designing storage that accommodates irregular walls can feel daunting at first, but the key is to see it as an art form—an opportunity to craft uniquely tailored solutions. Every scratch, adjustment, or tweak adds character and skill to your project. Remember, the goal isn’t perfection in a traditional sense but harmony with your space’s natural contours. Starting with a mindset that celebrates these irregularities transforms a potential frustration into a rewarding creative process. If you’re ready to take on your next kitchen project, why not begin by perfecting your scribing skills and turning challenges into showcases of craftsmanship? And tell me—have you ever tried to fit cabinetry against a wall that just wouldn’t cooperate? Share your stories below and let’s learn together.