How to Reinforce a Sink Base Cabinet After Water Damage
I remember the moment clearly—water had seeped beneath my kitchen sink, and suddenly, I felt that sinking feeling. The cabinet beneath my sink felt soft and unstable, like I was standing on quicksand. It was a rude awakening that something as simple as a leaky faucet could threaten the backbone of my kitchen’s storage and functionality. That realization sparked a lightbulb moment for me: water damage isn’t just about wet walls or stained baseboards; it can quietly compromise the very foundation of your cabinetry.
Why Reinforcing Your Sink Base Cabinet Is Crucial
Water infiltration can weaken the cabinet’s framework, leading to sagging doors, misalignments, or even complete failure. Not only does this affect the aesthetics, but it also poses safety risks and reduces your storage space. Early on, I made the mistake of ignoring minor signs of water leaks, thinking they were insignificant. That oversight led to more extensive repairs later—costly and time-consuming. Trust me, preventing this damage or repairing it promptly is vital for maintaining a safe, functional kitchen.
In this post, I’ll share effective techniques to reinforce your sink base cabinet, restoring its strength and durability. Whether you’re dealing with recent water issues or want to prepare your cabinetry against future problems, these tips will help you rebuild with confidence.
Is Reinforcement Overkill for Minor Water Damage?
Some skeptics wonder if reinforcing is necessary at all, especially for minor leaks. I’ll admit, early on, I thought a quick patch would suffice. However, I learned that neglecting proper reinforcement can accelerate deterioration, leading to more severe damage. A mistake I made was underestimating the importance of sturdy backing and waterproofing measures, which are essential for long-term durability. For reliable solutions tailored to your situation, check out detailed guides on professional reinforcement techniques to ensure your cabinetry stands the test of time.
Assess and Prepare the Damaged Area
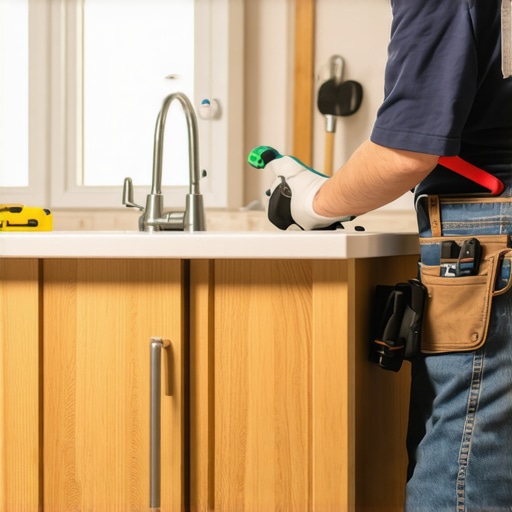
Begin by removing everything from beneath your sink to inspect the extent of water damage. Use a utility knife to cut away any sagging or warped panels, exposing the framework. I once had a sink cabinet with a soft, visibly rotten back panel; I carefully pried out the damaged sections and cleaned the surfaces with a moisture-deterring solution. Clear the area of debris and mold, then dry thoroughly, preferably with a heat gun or fan. This ensures a solid foundation for your reinforcement work.
Strengthen the Framework with a Reinforced Backing
Think of your cabinet as a bridge—the framework needs to bear weight and resist stresses. Attach a sturdy plywood panel (3/4 inch thick), cut precisely to fit the back of your cabinet, using screws or nails. When installing, drill pilot holes to prevent splitting, especially around the edges. I used pressure-treated plywood because of its resistance to moisture, which proved invaluable in prolonging the cabinet’s lifespan. Secure the panel to the existing frame, ensuring it’s flush and stable. This creates a rigid backbone, much like giving your cabinet a spinal cord that can support the weight of appliances or storage items.
Add Vertical Supports for Extra Stability
To prevent future sagging, install vertical braces at critical points, such as corners or where water inflow was highest. Use 2×2-inch lumber or metal brackets, securing them with corrosion-resistant screws. Position supports beneath shelves or along side walls if they show signs of weakness. I recall fixing a similar cabinet where adding a single brace dramatically reduced wobble, transforming its durability. This step mimics strengthening a tent post with additional stakes—simple but effective.
Weatherproof and Seal to Prevent Future Damage
Proper waterproofing is essential—think of it as giving your cabinet a raincoat. Apply waterproof paint or sealer along all exposed wood surfaces, especially the new backing and supports. Seal gaps around the panels with silicone or polyurethanecaulk to prevent moisture infiltration. Remember, water always finds its way; sealing is your best defense. In my own project, I realized that neglecting this step led to persistent dampness, reminding me that prevention is cheaper than repair.
Upgrade Drainage and Leak Prevention Measures
To stop water from damaging the reinforcement again, install a waterproof tray or mat beneath the sink’s plumbing to catch any leaks. Inspect and replace old rusty hoses or fittings. Consider adding a water alarm sensor—an inexpensive device that sounds early warnings for leaks, much like a smoke detector does for fire. I installed one after a minor leak, and it saved me from a catastrophe. Proper drainage and leak mitigation are your frontline defenses against recurring water damage.
Secure and Reassemble the Cabinet
Once all reinforcements and waterproofing are in place, reattach any removed panels, shelves, or hardware. Tighten all screws and check for wobbliness or instability. Replace the contents of the cabinet, organizing carefully to avoid overloading weak points. This process is like tuning a musical instrument—you want everything aligned, snug, and ready for prolonged use. Test the cabinet by gently applying pressure—if it holds firm, your reinforcement is successful.
Regular Maintenance for Longevity
After reinforcements, schedule periodic inspections—look for signs of new leaks, warping, or mold. Keep the area dry and dry out any spills promptly. Investing a few minutes every month can prevent major repairs down the line. My experience with this routine helped me extend my cabinet’s life by years, avoiding costly replacements. Think of it as planting a garden—consistent care yields the best results, ensuring your reinforced cabinet continues to serve reliably.Many DIY enthusiasts and even seasoned homeowners often believe that designing built-ins and choosing storage solutions is mostly about aesthetics or fitting in the latest trends. But in my experience, there’s a hidden nuance that many overlook, leading to costly mistakes or underwhelming results.
Why Your Expectations Might Be Setting You Up for Disappointment
A common myth is that all custom cabinets or built-ins are created equal. While aesthetics matter, the real differentiator is in the details—like proper ventilation, tailored storage for your specific habits, and understanding material longevity. For example, some people underestimate the importance of moisture-resistant finishes in humid environments, which can lead to warping or peeling over time. This is where expert insights, such as those found in custom cabinet ideas that truly last, become invaluable.
Are Built-Ins Always the Best Choice for Small Spaces?
Not necessarily. Many assume built-ins maximize space without creating clutter, but if not designed thoughtfully, they can actually *shrink* the feeling of a room or complicate access. A better approach is to analyze your specific needs and consider versatile storage options that adapt over time, like adjustable shelves or pull-out units. Too often, I see homeowners opt for ornate or overly complex built-ins, forgetting that simplicity and flexibility often yield better long-term satisfaction. Remember, effective storage is about function as much as form. Check out innovative storage solutions to see how small tweaks can make a big difference.
The Pitfall of Ignoring Future-Proofing During Remodels
One trap I commonly warn about is neglecting future needs. Many rush into design choices based on current habits, but structures like cabinetry or built-ins should be adaptable. For example, installing upper cabinets that aren’t deep enough for today’s larger appliances or not leaving room for easy reconfiguration can turn into headaches later. Experts recommend scrutinizing every inch of your plan to ensure longevity and flexibility, as discussed in modern kitchen remodel strategies. Think ahead, and your investment will be better protected.
Is Hidden Storage Really Worth the Extra Effort?
Absolutely. Hidden storage options, like toe-kick drawers or concealed spice racks, can dramatically improve your kitchen’s efficiency and aesthetics. But here’s the catch: installing them requires precise measurements and high-quality hardware. If overlooked, such features can become frustrating or unusable over time, diminishing their benefits. As always, proper planning, quality materials, and expert assembly make the difference. Don’t fall into the trap of fancy ideas that aren’t backed by solid execution. Visit expert tips on hidden storage for detailed guidance. Getting these nuances right can elevate your remodel from good to exceptional.
Have you ever fallen into this trap? Let me know in the comments.Maintaining your built-in cabinets and storage solutions over time requires the right combination of tools, techniques, and a proactive approach. Personally, I rely on a few specialized tools that ensure any upkeep or minor repair is efficient and lasting. For example, a cordless impact driver is invaluable—it allows me to tighten or loosen screws quickly without stripping, especially on stubborn hinges or support brackets. I also recommend investing in a digital moisture meter; this helps monitor hidden humidity levels in cabinetry, alerting you to potential water infiltration before visible signs emerge. This proactive tactic can save you from costly repairs down the line.
When it comes to long-term results, integrating maintenance into your routine can markedly extend the lifespan of your custom cabinets. Regularly inspecting seals, hinges, and support structures ensures everything stays aligned and functional. For tighter spaces or intricate details, I use small, precise hand tools like a countersink bit or a fine-tip screwdriver to address delicate adjustments without damaging finishes.
Looking ahead, the future of kitchen maintenance seems to be leaning toward smart technology. Imagine sensors embedded in cabinetry that alert you via an app when leaks or structural issues are detected. Such innovations are already emerging, as shown in industry previews of sensor-integrated materials, promising to make upkeep more intuitive.
How do I maintain my built-ins and storage solutions over time?
Regular cleaning with non-abrasive cleaners, reapplying sealants around doors and joints, and adjusting hinges or supports as needed will keep your cabinets functioning perfectly. For instance, a quick check of the hinges using a magnetic torpedo level can reveal misalignments early. Additionally, periodic organization and retrieval prevent wear at high-traffic points, maintaining the aesthetic and structural integrity.
To further enhance your cabinetry’s longevity, consider exploring built-in upgrades that improve functionality. These improvements not only streamline your space but also reduce strain on components, making ongoing maintenance much simpler.
If you’re ready to upgrade your upkeep routine, try calibrating your hinges and supports with a digital angle gauge—precision ensures smoother operation and longer-lasting parts. Keep proactive, and your kitchen will serve you reliably for years to come.
What I Wish I Knew About Water and Built-Ins from Day One
One of the biggest revelations for me was understanding how moisture sneaks into seemingly secure cabinetry, causing long-term damage before signs are visible. Early mistakes, like ignoring subtle water stains or not sealing new reinforcements properly, led to unnecessary repairs. Now I realize that proactive waterproofing and vigilant inspections are key to preserving the integrity of custom cabinets. If you’re planning to reinforce your kitchen, remember that embedding moisture sensors or adding water-resistant coatings can be game-changers—details that aren’t always obvious at first glance but make all the difference over years.