How to Reinforce Floating Shelves to Hold Your Entire Plate Collection
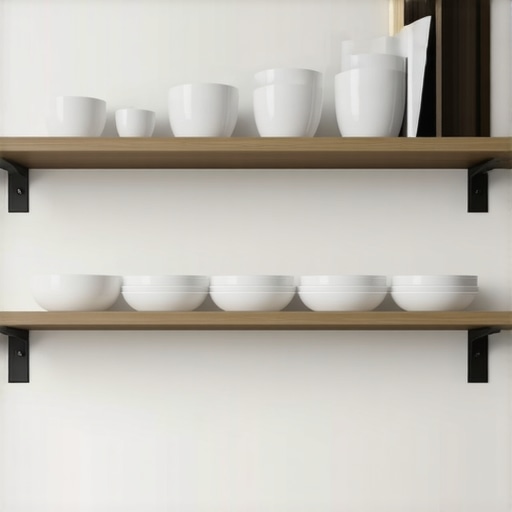
I’ll never forget the moment I stacked my prized porcelain plates on a floating shelf only to see it sag under the weight the very first week. It was a real eye-opener—despite installing what I thought was a sturdy setup, my beautiful collection was at risk of crashing down. That lightbulb moment led me down a rabbit hole of research and trial-and-error, and I learned the hard way how crucial proper reinforcement is when it comes to floating shelves supporting heavy or numerous items.
The Hidden Challenge in Displaying Your Collection
Most of us dream of creating a stylish, functional kitchen where our cherished dishware gets the spotlight. But as I quickly discovered, these floating shelves often aren’t designed to hold entire plate collections without proper reinforcement. The problem isn’t just about aesthetics; it’s about safety and longevity. An unsupported shelf can warp, bend, or worse, collapse—leading to broken dishes and costly repairs.
What made this even trickier was the typical advice that emphasized the thickness of the shelf material or the weight capacity printed on packaging. While those factors matter, they don’t tell the full story. The real issue lies in how well the shelf is anchored into the wall and whether the mounting hardware can bear the load over time. It’s like hanging a picture—use weak hooks, and it falls. Use heavy-duty anchors, and it stays put. The same logic applies, but on a larger, more structurally demanding scale.
Luckily, with some insight and proper reinforcement techniques, you can transform those delicate-looking floating shelves into robust displays supporting your entire plate collection. In this post, I’ll share the exact methods I’ve used—methods that have kept my dishes safe and my shelves looking sleek. Whether you’re a seasoned DIYer or just starting to upgrade your storage, these tips will empower you to hang with confidence.
Ever Faced Shelves That Bow or Collapse Under Load?
You’re not alone. Early in my journey, I made the mistake of relying solely on standard wall anchors, which failed miserably when supporting heavy plates. That experience taught me the importance of verifying your wall type (drywall, plaster, or brick) and choosing the right reinforcement accordingly. For example, installing on drywall with regular anchors is almost guaranteed to struggle unless supplemented with other hardware. Trusted sources, like Family Handyman, emphasize using wall studs or specialized wall anchors for heavy loads, which I now swear by.
So, are you ready to discover how to reinforce your floating shelves effectively? Stay tuned—next, we’ll dive into the practical steps to ensure your display is not only beautiful but also rock-solid. If you’ve ever wrestled with the fear of shelves giving way under your prized collection, these tips will definitely change the game.
Select the Right Wall Anchors
Use your wall type to decide the appropriate hardware. For drywall, opt for heavy-duty toggles or molly bolts, similar to how I upgraded my own shelves by replacing standard plastic anchors with steel toggle bolts, which drastically increased my weight capacity and prevented sagging at the first sign of load.
Identify and Secure Wall Studs
Locate wall studs with a stud finder and mark their positions carefully. In my project, I made a template to ensure the shelf brackets aligned perfectly with the studs, preventing any accidental attachment to drywall alone. This step is crucial—imagine the shelf as a highway, where studs are the reinforced lanes able to support heavy traffic without cracking.
Use Reinforced Mounting Brackets
Choose brackets designed for heavy loads, such as steel L-brackets or cleats. When I installed my new shelves, I used heavy-gauge steel brackets attached directly into the studs, which felt as sturdy as a custom-built cabinet. For added strength, I pre-drilled pilot holes and used high-quality screws, avoiding the temptation of shortcuts that weaken the support.
Create a Custom Support System
If your shelves are particularly heavy or long, supplement brackets with a solid wooden cleat. For my project, I cut a 1×4-inch timber to length, attached it securely to the studs, and then mounted the shelf onto it. This distributes the weight evenly and mimics the support behind built-in cabinetry, dramatically reducing bending or bowing.
Distribute Weight Evenly
Don’t cluster all items on one side. When I displayed my porcelain collection, I arranged plates symmetrically, using multiple brackets spaced evenly to prevent overloading any single point. Think of this as anchoring a tent — the more points of contact, the more stable the setup.
Regularly Check and Maintain Support Hardware
Over time, anchors can loosen. I make it a habit to inspect my shelves monthly, tightening screws as needed. This preventative measure is like tuning a musical instrument — small adjustments keep everything sounding (and looking) right.
By following these concrete steps, reinforced floating shelves can confidently support your treasured collections without worry. Proper hardware selection, strategic placement, and ongoing maintenance are the keys to turning delicate-looking shelves into sturdy displays—much like transforming a basic kitchen into a custom showstopper with well-executed built-ins. For more ideas on smart integration, check out built-ins that elevate your living room.
When it comes to transforming a kitchen or any living space, many assume that opting for custom cabinets and built-ins is a surefire way to achieve perfection. However, what most people get wrong is that they focus solely on appearance and overlook the intricate nuances that truly determine longevity and functionality. Contrary to popular belief, custom doesn’t mean flawless or maintenance-free; it requires a deep understanding of material behavior, installation techniques, and environmental influences.
One common misconception is that choosing high-end materials guarantees durability. While premium wood or finishes certainly help, they are not immune to issues like warping, especially if not properly acclimated before installation. For instance, solid hardwoods such as white oak or walnut are popular choices, but without considering humidity levels and proper sealing, they can warp or crack over time. An advanced mistake I’ve seen is selecting poorly matched grain patterns or inconsistent staining, which results in a visually appealing but structurally weak product. This highlights that craftsmanship and attention to detail are crucial, and cutting corners often lead to costly repairs.
Another overlooked aspect is the mounting and anchoring process. It’s not enough to frame a cabinet or build a shelving unit; understanding load distribution, wall structure, and hardware placement is essential. For example, many underestimate the importance of additional reinforcement when installing heavy built-ins or appliances, which can cause sagging or detachment. A simple mistake like attaching a heavy pantry to drywall alone can spell disaster—stud finders and proper bracketing are your best friends here. For insight into these advanced reinforcement techniques, check out innovative storage solutions.
Small details can also make a significant difference. Drawer slides, hinges, and seals—often overlooked—are critical components that prevent failures over time. Heavy-duty slides and soft-close dampers, for example, are not just luxury features but essential for high-use areas. An oops many make is choosing cheaper hardware to save costs, which inevitably leads to frequent repairs and frustration.
Finally, embracing the idea that customization goes beyond aesthetics is vital. Proper planning for future needs—like built-in charging stations, hidden compartments, or adjustable shelves—can elevate your project from good to exceptional. Consulting with experts who understand these nuances ensures your investment lasts. For comprehensive guidance, explore custom ideas that transform your home.
Making mistakes in the realm of custom cabinets and built-ins isn’t just about visual missteps but encompasses structural, material, and environmental oversights. Understanding these hidden nuances helps you avoid costly errors and creates a space that’s both beautiful and enduring. Have you ever fallen into this trap? Let me know in the comments.
Maintaining your custom cabinetry and built-ins isn’t just about regular cleanup; it requires a keen understanding of the tools and techniques that ensure long-term performance. Choosing the right equipment and adopting specific methods can dramatically extend the lifespan of your investments. Among the essential tools I rely on is a high-quality electric drill with adjustable torque settings—this allows me to tighten fasteners without risking overdriving screws or damaging delicate surfaces, especially in intricate cabinetry details.
How do I maintain my custom cabinets and built-ins over time?
One key to sustained functionality is consistent, careful inspection combined with using specialized maintenance tools. For example, a soft-bristled brush or compressed air can clear dust and debris from hinges, slides, and joints. I highly recommend a lubricating silicone spray designed for cabinetry hardware—this keeps moving parts smooth and prevents squeaks or sticking that can worsen if left untreated.
To ensure the structural integrity of your built-ins, especially when supporting heavier loads, I strain to keep a digital stud finder like the Walabot HOME in my toolkit. It provides more precise wall mapping, which is crucial when anchoring shelves or cabinets into structural elements. Remember, even high-quality hardware benefits from regular tightening; a simple torque driver set at manufacturer-recommended settings is ideal for preventing over-tightening or loosening over time.
Looking ahead, I believe this trend of meticulous maintenance will only grow, especially as smart tools become more integrated into home renovation routines. Future innovations may include IoT-enabled hardware that alerts you to hardware fatigue or misalignments, reducing the risk of failure before it happens.
Scaling your care to larger or more complex projects
For extensive remodeling or commercial-grade cabinetry, investing in advanced tools like a heavy-duty hinge alignment system can pay dividends. These tools allow for precise adjustments that prevent sagging or misalignment, common issues in high-use environments. Furthermore, implementing a routine maintenance checklist—covering hardware inspection, surface cleaning, and environmental control—can help you sustain the beauty and functionality much longer.
Don’t forget that adopting a regular maintenance schedule is the real secret to long-lasting cabinetry. For more innovative storage ideas that complement your upkeep efforts, explore these smart storage solutions.
For your next project, try integrating a professional-grade torque screwdriver into your toolkit. It ensures optimal fastener tension, preserving the cabinet’s integrity while avoiding damage. Armed with the right tools and a diligent approach, your custom cabinets can remain stunning and functional for years to come.
What I Wish I Knew When Starting My Remodel Journey
The most profound lesson I learned was the importance of patience and attention to detail. Rushing through the selection of materials or neglecting to verify wall structures can lead to costly setbacks. My lightbulb moment was realizing that integration of reinforcement techniques isn’t just an upgrade—it’s a necessity for long-lasting quality and safety.
Another insight was understanding the power of collaboration. Having trusted experts for different aspects—be it material selection or hardware installation—significantly improved the outcome. It made me appreciate that building customized storage solutions isn’t just DIY; it’s a blend of craftsmanship and strategic planning.
Lastly, I discovered that regular maintenance and inspections are often overlooked but essential. Small tweaks and tightening hardware, done periodically, keep cabinets and built-ins functioning smoothly. This proactive approach has saved me from future headaches, reinforcing that quality isn’t a one-and-done effort but an ongoing commitment.
Gear Up With Tools and Resources That Elevate Your Projects
My go-to toolkit for custom cabinets and built-ins includes a **high-precision stud finder** like the Walabot HOME, which ensures perfect attachment points. A **torque screwdriver** is invaluable for maintaining optimal fastener tension, preventing over-tightening or loosening over time. For project planning, I rely on books such as The Ultimate Guide to Custom Cabinets, which offers both inspiration and technical guidance. Additionally, consulting trusted sources like Built-ins That Elevate Your Living Space keeps me updated on innovative ideas and best practices for enduring results.
Elevate Your Space, Elevate Your Confidence
The journey of designing and installing custom cabinets and built-ins is deeply rewarding when approached with the right knowledge and tools. Don’t hesitate to embrace the learning curve—every challenge is an opportunity to refine your skills and create something truly tailored to your lifestyle. With each project, you’re not just building furniture; you’re crafting a home that reflects your vision and dedication.
What’s one aspect of your cabinet or storage project you’re most excited to improve? Share your thoughts below—let’s inspire each other to achieve extraordinary results!