How to Scribe a Pantry End Panel to a Stone Backsplash
I remember standing in my kitchen three years ago, staring at a two-thousand-dollar slab of Carrara marble that looked absolutely stunning—until I pushed my pantry end panel against it. There it was. A gaping, uneven, three-eighths-inch canyon that screamed “amateur hour.” I thought I could just slap some silicone in there and call it a day. Spoiler alert: that was a massive mistake. Caulking a massive gap against a textured stone surface makes your high-end custom cabinets look like they were installed by a runaway lawnmower. If you are tired of looking at that ugly seam where your woodwork meets your backsplash, you are in the right place. Today, I am going to show you exactly how to marry wood to stone so perfectly that it looks like they grew together.
The Day My Backsplash Laughed at My Tape Measure
When I first started doing my own kitchen remodel journey, I assumed walls were straight. I was wrong. Stone backsplashes are even worse; they have bumps, dips, and textures that no tape measure can accurately map. My biggest early mistake was trying to “freehand” the cut with a jigsaw. I thought I had a steady hand. I didn’t. The blade wandered, I chipped the finished veneer, and I ended up having to buy an entirely new panel. It was a humiliating and expensive lesson in why you must never guess when it comes to stone. Precision is the difference between a kitchen that looks like a million bucks and one that looks like a weekend project gone wrong. Learning how to conceal the seam where the cabinet end panel meets the wall is a fundamental skill, but when that wall is stone, the difficulty level spikes.
Is a perfect fit actually worth the frustration?
You might be tempted to just cover the gap with a piece of trim or a thick bead of caulk, but let me tell you: don’t do it. A clean scribe is the hallmark of professional craftsmanship. According to the National Kitchen & Bath Association (NKBA), professional installation standards dictate that visible gaps in high-end joinery should not exceed 1/8 inch to maintain both aesthetic flow and structural hygiene. When you have a gap, dust and moisture find a home there, and in a kitchen, that’s a recipe for a mess. Getting this right means your stylish kitchen overhaul actually lives up to the photos you see on Pinterest. Have you ever looked at a crooked gap in your cabinetry and felt like the whole room just felt ‘off’? That is exactly the problem we are going to fix today.
Stop Reaching for the Caulk Gun Immediately
Before you even touch your saw, you need to understand that we aren’t cutting to a measurement; we are cutting to a shape. Scribing is essentially tracing the “personality” of your stone onto your wood. It’s much like how I’ve discussed scribing a bookshelf to a crooked stone wall; the principles are the same, but the stakes are higher with a pantry panel because it is right at eye level. If you rush this, you’ll see the error every time you go to grab a box of cereal. We are going to use a simple compass tool and a bit of patience to transfer those jagged stone lines onto our panel. It sounds intimidating, but once you see the line appear, it feels like a magic trick.
Level the Panel Before You Trace a Single Line
Before you even pick up your pencil, your cabinet panel must be perfectly plumb. If the panel is leaning even a fraction of a degree away from the wall, your scribe line will be mathematically incorrect. I learned this the hard way during a kitchen remodel journey where I spent two hours sanding a panel only to realize the entire piece was tilted. Use a long level and shim the base of the panel until it is dead-on. You are aiming for the panel to overlap the stone by about half an inch. This overlap gives you enough ‘meat’ to work with once you start removing material. Much like when we discuss why plywood box construction still beats particle board for kitchens, the stability of your setup determines the quality of the final result. If the panel moves while you are scribing, you are toast.
Mask the Edge to Save Your Finish
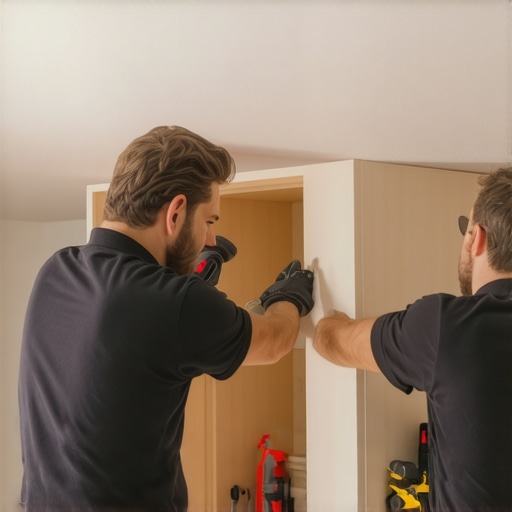
Apply a strip of blue painter’s tape along the edge of the wood where you’ll be drawing your line. This does two things: it makes your pencil mark highly visible, and it protects the finish from the metal tip of your compass. I once skipped this step on a dark walnut panel and the compass point left a jagged silver scratch that haunted me for years. Stone is abrasive; it will chew up wood and metal alike. Tape is your best friend here. If you are handling large panels alone, remember the trick to installing heavy upper cabinets without a second pair of hands—use a temporary cleat to hold the panel’s weight so you can focus entirely on the scribe tool.
The Compass Technique That Never Fails
Set your compass to the widest point of the gap between the panel and the stone. This tool acts like a bridge, carrying the texture of the rock over to the flat surface of the wood. Keep the compass perfectly horizontal as you drag it down. If you tilt the compass up or down, the distance changes and your line will be ‘fat’ in some spots and ‘thin’ in others. It’s a lot like how to scribe a bookshelf to a wonky plaster wall; the goal is a 1:1 carbon copy of the wall’s imperfections. 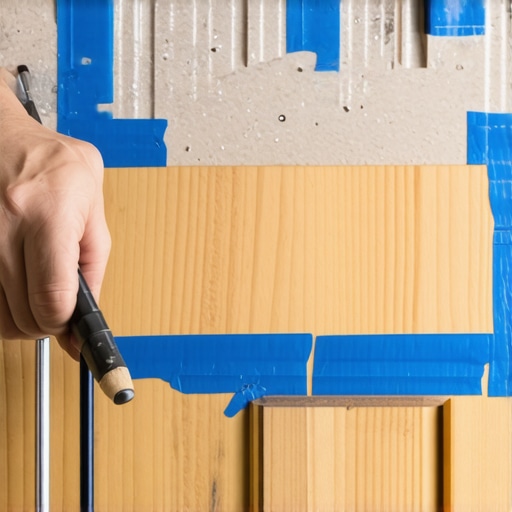
Cut a Back-Bevel to Ensure a Tight Seam
When it’s time to cut, do not cut straight through the wood. Set your jigsaw or track saw to a 5-degree or 10-degree angle, cutting away from the visible face. This creates a ‘point’ on the front edge of the panel. By removing more material from the back of the wood than the front, you ensure that only the very tip of the wood touches the stone. This makes the fitting process ten times easier because you aren’t fighting the thickness of the entire panel. If the fit is tight in one spot, you only have to sand down that tiny leading edge rather than the whole three-quarter-inch thickness. This is the difference between a gap you can see from across the room and a seam that looks like it was fused in a lab.But even with a perfect cut, there’s a hidden physics at play that most people ignore until it’s too late.
Your Level Might Be Lying to You
Everyone tells you to get the panel level, but in my experience, a ‘perfectly level’ panel is often a secondary goal to matching the visual lines of the room. If your ceiling or floor has a significant pitch—common in older homes—making a pantry end panel perfectly plumb can actually make the whole kitchen remodel journey look crooked to the naked eye. Sometimes, you have to ‘split the difference’ by slightly tilting the panel to follow the dominant line of the room. This is a nuance most DIYers miss: precision is math, but craftsmanship is optics. If the panel looks straight relative to the nearest door frame, it is straight, regardless of what the bubble in your level says.
Can your cabinets actually breathe against a stone wall?
This is the technical hurdle that separates the pros from the weekend warriors. Most people believe that the tighter the scribe, the better the job. I’m going to challenge that belief. While we want that zero-gap look for our modern kitchen remodels featuring custom cabinets and built-ins, wood is a living material that never stops moving. According to the Architectural Woodwork Institute (AWI), wood panels can expand or contract significantly with seasonal humidity changes. If you wedge a massive pantry panel into a stone alcove with zero room for expansion, something has to give. Usually, it is the wood buckling or the stone grout cracking.
Avoid the Force Fit Trap
The biggest mistake I see in high-end installs is the ‘Force Fit.’ You’ve spent hours sanding that back-bevel, and it’s about a hair’s breadth too wide, so you grab a rubber mallet and whack it into place. Stop immediately. If you have to force it, you are building permanent tension into your custom cabinets ideas that transform your homes style. That tension will eventually lead to why solid wood doors warp and gable panels split down the middle. Always aim for a ‘slip fit’ where the panel slides in with the pressure of a single finger. If you’re worried about a hairline gap, that’s where a color-matched, high-quality flexible sealant comes in—not to hide a bad cut, but to allow for that necessary 1/32-inch of movement. 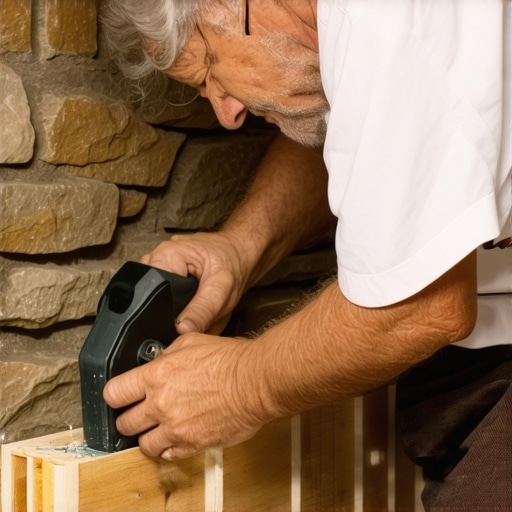
Stone Walls Breathe Too—Even If You Think They Don’t
Another nuance is the thermal bridge effect. Stone stays cool, while your kitchen heats up during a Sunday roast. This temperature differential creates localized humidity spikes right at the seam where the wood meets the stone. This is why I always recommend using a moisture-resistant shellac or primer on the ‘invisible’ scribed edge of your panel before final installation. Even if you can’t see it, that raw wood edge is acting like a sponge for any condensation forming on the cold stone. If you ignore this, you’ll eventually face the inset cabinet gap issues that plague so many expensive installs after their first winter. When we discuss why plywood box construction still beats particle board for kitchens, this is exactly the kind of environmental stress we are talking about. Plywood handles these micro-movements much better than a composite material that might swell and crumble at the scribe line. Have you ever fallen into this trap where a ‘perfect’ summer install failed by mid-February? Let me know in the comments.To keep that summer install from failing, I swear by the FastCap AccuScribe. It is a fifteen-dollar tool that saves five hundred dollars in ruined gable panels because it holds its position better than the generic school compasses I used in the beginning. When you are looking for expert tips on selecting storage solutions for a perfect kitchen upgrade, having a tool that locks its offset is the difference between a wavy line and a laser-straight fit. If you are serious about your built-ins and storage hacks for a sleek functional kitchen, stop trying to use a pencil and a block of wood. It works in a pinch, but for textured stone, you need that mechanical consistency. I also keep a block plane nearby for those final, micro-shaves. A jigsaw gets you close, but a sharp hand plane gets you perfect.
How do I maintain my custom scribe lines over time?
Maintenance starts with the environment, not the wood. According to the USDA Forest Service’s Wood Handbook, wood is hygroscopic, meaning it will always adjust its moisture content to match the relative humidity of the room. To prevent your scribed seams from opening or buckling, you must maintain a consistent humidity level between 30% and 50% in your home. Every six months, I do a ‘touch test’ along the seam. If you feel a sharp edge, it means the wood has moved. A tiny dab of clear, flexible silicone—never hard caulk—can bridge these micro-movements without cracking. While you are at it, check your hardware; it is often the first thing to show wear. If you notice your doors aren’t sitting right against the panel, check why your slow-close hinges are suddenly sluggish and how to clean them to keep the alignment crisp. Using a low-quality filler or ignoring a shifting hinge is the hardware mistake that makes expensive cabinets look cheap and ruins the custom illusion. 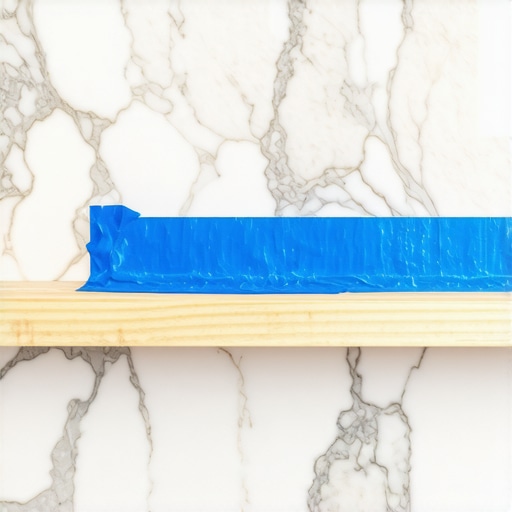
Laser Precision is Coming for Your Tape Measure
I predict that in the next five years, we will see consumer-grade LIDAR apps on our phones that generate 3D cut files for our panels. No more manual scribing; you will eventually just upload a scan of your stone wall to a CNC service and have the panel delivered pre-cut. We are already seeing this in high-end stone fabrication for countertops, and it is only a matter of time before it reaches the cabinetry world. However, until that is standard, your eyes and hands are the most reliable tools you have. My challenge for you: On your next project, even if it is just a small bathroom cabinet, try the ten-degree back-bevel I mentioned earlier. It is the single most impactful pro secret that will take your work from looking like a DIY weekend project to a high-end custom installation.
Why Your First Scribe Will Be Your Most Expensive Lesson
If there is one thing I’ve learned from countless hours in dusty kitchens, it is that you cannot rush a stone scribe. I’ve seen seasoned pros get cocky and ruin a seven-hundred-dollar gable because they thought they could ‘eyeball’ the last eighth of an inch. The lightbulb moment for me was realizing that scribing isn’t about the wood at all; it’s about respecting the stone’s irregularities. If you find yourself getting frustrated, walk away for ten minutes. A clear head is just as important as a sharp blade when you are executing built-ins and creative storage solutions that need to look seamless. Remember, once the wood is gone, it’s gone forever.
Gear That Makes You Look Like a Master Craftsman
You don’t need a shop full of industrial machinery to get these results, but a few specific items are non-negotiable. I never start a scribe without a fresh roll of high-adhesion painter’s tape; it’s the only way to see your pencil line on dark veneers. For the actual tracing, the FastCap AccuScribe is my go-to because it locks your measurement in place, preventing that dreaded ‘pencil wiggle’ that ruins a cut. Finally, invest in a small block plane with a sharp iron. It allows for the micro-shaves that a jigsaw simply can’t handle. These tools turn a stressful kitchen remodel task into a controlled, predictable process.
The Moment the Wood and Stone Finally Become One
There is a specific kind of magic that happens when you slide a perfectly scribed panel into place and that ugly gap disappears. It transforms the entire feel of the room, elevating your custom cabinets from mere boxes to architectural features. Don’t be intimidated by the rough texture of your backsplash. If you follow the steps, take your time with the back-bevel, and trust your scribe line, you will achieve a fit that most people think is impossible. You’ve got the knowledge; now it’s time to pick up the tools and make it happen. Have you ever tried to scribe wood to a rough surface like stone or brick, or did you stick with the caulk gun? Let me know about your experience in the comments below!