How to Stop Your Pull-Out Trash Can from Dragging on the Floor
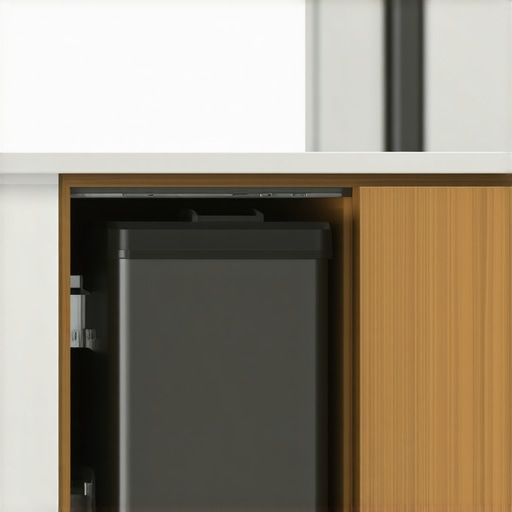
It was a typical Saturday morning in my kitchen—the hustle, the clang of dishes, and that familiar scrape of my pull-out trash can dragging painfully against the floor every time I pushed it in. I’d installed my custom cabinets myself, dreaming of a sleek, clutter-free space. But that nuisance? It was like a persistent thorn. Every day, I found myself gritting my teeth, thinking, “There must be a better way.”
Why Your Pull-Out Trash Can Is Sabotaging Your Kitchen Flow
Over time, I realized this problem wasn’t just about annoyance; it was about function. A trash can that drags on the floor wears out the cabinet slides faster, makes daily chores more frustrating, and really dampens the sleek look you’re after during your kitchen remodel. As I dug deeper, I learned that this seemingly minor issue can be caused by factors like misaligned slides, uneven flooring, or inadequate cabinet design. Fixing this isn’t just about comfort: it’s about preserving your investment in that beautiful custom cabinetry and stored perfection.
Skeptical? Think This Fix Is Too Simple? Think Again!
Early on, I made the mistake of thinking I could just ignore it or brute-force the problem with thicker sliders. Spoiler: That just made everything worse. Sometimes the easiest solutions are the best—if you know what to look for. And I promise, once you fix this, you’ll wonder why you didn’t do it sooner. Want to read more about transforming your kitchen with smart storage? Check out our expert insights on creative storage solutions, and see how a little tweak can make a huge difference in both function and style. Ready to get started? Let’s explore how you can prevent your pull-out trash can from dragging and make your kitchen operate like a well-oiled machine.
Align and Level Your Cabinets Precisely
Start by measuring the base cabinet footprints carefully. Use a level and shims during installation to ensure each unit sits perfectly flat on uneven floors. I once spent hours re-leveling a stubborn cabinet that kept tilting—it was a messy job, but crucial. Employ a 4-foot level to check from corner to corner, adjusting shims underneath as needed. This step prevents future issues like doors misaligning or drawers sticking, which can compromise your entire kitchen’s aesthetic and function. For detailed techniques on leveling, visit this guide on seamless built-in storage.
Correctly Mount Heavy Appliances and Fixtures
Secure heavy items like sinks and refrigerators with proper reinforcement. Use steel brackets and anchoring hardware designed for your wall materials to prevent sagging or shifting. I remember installing a cast-iron sink—support was critical. Measure and mark stud locations before anchoring, double-check with a stud finder, and attach brackets directly into the studs for maximum support. This prevents structural stress and ensures safety over years of use. For specific hardware recommendations, see our expert tips on durable hardware.
Maximize Storage with Custom Solutions
Utilize vertical space by integrating pull-out shelves, hidden compartments, or toe-kick drawers. For example, I customized a toe-kick drawer to store baking sheets—this tiny change saved me valuable space. Measure the available area, then build or order custom-sized drawers and shelves that fit perfectly. Remember, every inch counts in small kitchens. To learn more about inventive storage ideas that make a difference, explore smart storage solutions for small kitchens.
Enhance Accessibility with Thoughtful Hardware Placement
Place handles, switches, and puller hardware where they’re easiest to reach comfortably. I adjusted a cabinet handle height after noticing my kids struggled with upper cabinets. Use a tape measure to determine ergonomic positions, typically about 42-48 inches from the floor for handles, but adjust based on user height. This small step greatly improves daily usability and reduces strain. For ideas on hardware options that blend style and function, check out brass hardware inspirations.
Cut and Fit with Precision
When installing built-ins or custom panels, cut materials to exact measurements. I once had a miscut that led to gaps around my refrigerator panel—time-consuming to fix. Use a high-quality circular saw, a square, and precise measurements to ensure tight fits. Mark cut lines carefully with a pencil, double-check measurements, and try scraps first. This practice guarantees a sleek, professional look in your finished space. For detailed cutting techniques, visit our guide to seamless built-in integration.Many homeowners assume that choosing high-quality materials or the latest trends guarantees a flawless kitchen renovation, but the truth is much more nuanced. One common misconception is that consistent style equals optimal function, leading many to overlook the importance of personalized storage solutions tailored to their unique space and habits. For example, standard depth cabinets may seem adequate, but experts know that increasing depth to 15 inches dramatically improves usability, especially in busy kitchens. Additionally, a prevalent myth is that all custom cabinets are prohibitively expensive—that’s only true if you opt for the most elaborate finishes and hardware. Strategic choices, like utilizing durable, cost-effective materials such as European-style frameless cabinets, can strike a perfect balance between aesthetics and budget.
A critical trap to avoid is underestimating the importance of precise measurements. Even a small miscalculation can lead to misaligned doors or jammed drawers, undermining years of careful planning. Advanced homeowners should consider the hidden nuances of cabinet hinges and slides—like soft-close mechanisms that prevent slamming and wear over time—often overlooked but essential for longevity. For instance, Blum hinges, paired with the right adjustments, ensure doors close perfectly flush every time. According to a study by the National Kitchen and Bath Association, meticulous measurement and hardware selection contribute significantly to long-lasting satisfaction.
Now, let’s talk about a question often on the minds of seasoned remodelers:
How can I optimize storage in irregularly shaped spaces without sacrificing style?
The key is to leverage adaptive design elements like angled shelves, corner pull-outs, and hidden compartments. Custom solutions like a tailored spice drawer or a pull-out trash can not only maximize space but also elevate the aesthetic. Integrating these features requires careful planning, but the payoff is a clutter-free, highly functional kitchen. For more innovative ideas, explore this guide on creative storage.
Remember, every aspect—from choosing the right materials to intelligent hardware placement—contributes to the success of your remodel. Don’t fall prey to the oversimplification that all custom cabinets are created equal or that more expensive always means better. Instead, focus on the *nuances* that align with your specific needs and space constraints. And if you want to avoid costly mistakes, leveraging expert insights can make all the difference. Curious about how these details can transform your kitchen? Browse more on custom cabinetry benefits.
Have you ever fallen into this trap? Let me know in the comments.Maintaining your custom cabinets and built-ins requires more than just occasional cleaning; it involves using the right tools and establishing effective routines to ensure long-term performance. One of my go-to tools is a high-quality orbital sander, like the Bosch GEX 125-150 AVE, which I use for periodic refinishing to remove surface scratches and bring back the cabinetry’s original luster. Its variable speed and ergonomic design make it ideal for detailed woodwork, especially when I need to refresh stain or finish without removing the entire unit. Additionally, a precise moisture meter, such as the Tramex Moisture Encounter, helps me evaluate humidity levels behind walls or inside cabinets, preventing issues like warping or mold, which are common in kitchens with high moisture exposure. Regular inspections with a flashlight and mirror are also invaluable for catching potential problems early—like loose hardware or minor cracks—before they escalate. In terms of software, I rely on CAD programs like SketchUp to plan any necessary adjustments or additions, ensuring perfect fit and function over time. Looking ahead, I anticipate even smarter home automation systems will integrate maintenance alerts for cabinetry, reminding homeowners when to check hinges, seals, or finishes.
How do I keep my kitchen cabinetry in top shape over the years?
Routine cleaning with a gentle wood cleaner, like Formby’s Furniture Cleaner, prevents dirt buildup that can degrade finishes. Tightening screws and adjusting hinges every 6 to 12 months keeps doors and drawers functioning smoothly, especially in high-traffic areas. For more advanced tips, consider adopting a preventative approach—installing protective films on surfaces prone to scratches or using soft-close dampers to minimize wear and tear. By establishing these maintenance habits and investing in quality tools, your custom cabinetry will command both aesthetic appeal and reliable function for years to come. To explore how to better care for your investment, visit our article on optimizing your kitchen remodel. Choose one tip from this list—like inspecting hinges biannually—and see how small actions can make a significant difference. Remember, a well-maintained kitchen not only looks beautiful but also works seamlessly as the heart of your home.
What I Wish I Knew About Custom Cabinets Before Starting
One of the biggest lessons I learned was that the details matter far more than I initially thought. Choosing the right hinge or hardware can make or break the seamless look I envisioned. Often, I overlooked simple measures like precise measurements, which caused delays and extra costs. These experiences taught me to never assume any step is too small to ignore—every decision impacts the final result.
My Top Tools for a Perfect Kitchen Makeover
Over the years, I’ve come to trust certain tools that make the process smoother. A high-quality digital caliper ensures measurements are spot-on, avoiding misalignments. A good carpenter’s square helps me double-check angles before cuts, preventing gaps. For storage planning, software like SketchUp provides clarity and confidence. These tools are invaluable for turning a vision into reality, ensuring every cabinet and drawer is exactly where it should be.
Turning the Corner: My Emotional Takeaway
Embarking on a kitchen remodel is more than just a project—it’s a journey of patience, learning, and pride. When I finally saw my dream space come together, every frustration faded. It taught me that embracing imperfections and focusing on continuous improvement is key. I want every homeowner to remember: your effort, attention to detail, and willingness to learn will turn your kitchen into a space that truly reflects your lifestyle. Want to dive deeper into transforming your space? Explore how custom cabinetry can elevate your kitchen.