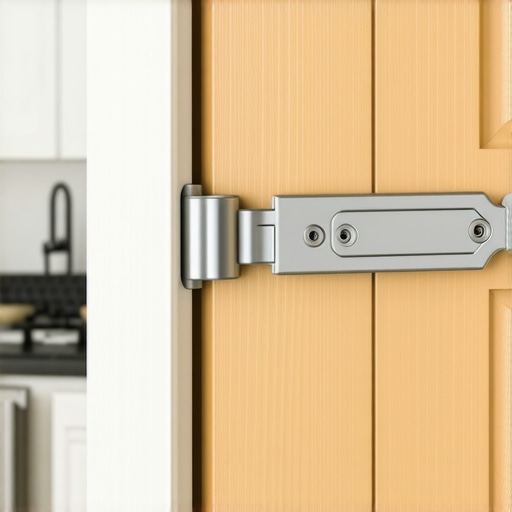
The Heavy-Duty Hinge That Prevents Your Pantry Doors from Sagging
It was a bitterly cold morning when I opened my pantry door, only to watch it slowly sag and swing ajar like a tired old gate. Frustration bubbled up as I realized I’d overlooked a simple detail that’s vital for both function and style in a kitchen upgrade. That lightbulb moment—when I finally understood that a heavy-duty hinge could transform my cabinets—set me on a journey that changed my entire approach to kitchen storage.
Why Your Pantry Doors Sag and How Heavy-Duty Hinges Save the Day
Every homeowner knows the annoyance of door sagging—especially when dealing with built-in pantries or custom cabinets. Over time, traditional hinges can wear out or simply can’t handle the weight of substantial doors, causing misalignment, difficulty closing, and a look that screams “cheap upgrade.” But here’s the thing: not all hinges are created equal. You need something more robust if your doors are heavy or if you’re aiming for a sleek, professional finish.
When I first started my remodel, I made the mistake of sticking to standard hinges, trusting them to handle the job. Unsurprisingly, my pantry doors started to droop after just a couple of months. That’s when I stumbled upon heavy-duty hinges—designed specifically to support larger, weighty doors without warping or sagging. According to a recent review from Architectural Digest, investing in proper hardware like heavy-duty hinges can extend the lifespan of your cabinets by years, saving you money and headaches down the line.
Now, I want to help you avoid that early mistake. If you’ve noticed your pantry or cabinet doors pulling away from the frame or you’re tired of readjustments, it’s likely time to upgrade to a heavy-duty hinge. Not only will this improve the look of your kitchen, but it also ensures the safety of your storage and the longevity of your custom cabinetry.
In our next section, I’ll walk you through the key features of these hinges and how to select the best ones for your project. Ready to make your kitchen not just beautiful, but built to last? Let’s dive into what makes a heavy-duty hinge a game-changer for your home.
Select the Right Heavy-Duty Hinges
Start by measuring your cabinet doors accurately, noting their weight and dimensions. Choose hinges rated for heavier loads—look for specifications that support the weight of your doors. I once ordered hinges based solely on appearance, only to find they failed after months. To avoid this, I visited a local hardware store with my measurements and discussed options with an expert, ensuring I selected robust hinges suitable for my cabinet size.
Gather Necessary Tools and Materials
Collect a drill, screwdriver, measuring tape, pencil, level, and the heavy-duty hinges you’ve selected. Having these ready before starting prevents interruptions. During my recent upgrade, I learned that a good quality drill and precision screwdriver made the process smoother and prevented damage to the cabinet frames.
Remove Existing Hinges and Prepare Cabinets
Carefully unscrew the old hinges using a screwdriver, keeping track of screws as they are often tiny. Clean the area around hinge holes to remove dust and debris. I once mistakenly left old hinge remnants, which compromised the new installation; now I clean thoroughly to ensure a snug fit for the new hinges.
Mark and Align New Hinges Accurately
Position the new hinges on the door and cabinet frame, aligning them according to manufacturer instructions. Use a level to ensure evenness, and mark screw locations with a pencil. I recommend double-checking measurements before drilling, as even a small misalignment can cause doors to hang unevenly.
Drill Pilot Holes Carefully
Pre-drill holes at marked locations using a drill bit slightly smaller than your screws. This step prevents wood splitting and facilitates easier screw insertion. During my last project, skipping pilot holes led to cracked wood—lessons learned the hard way. Take your time to drill straight and precise holes.
Attach New Hinges Securely
Screw the hinges into the door and frame, starting with the top screws to hold alignment, then tightening all screws firmly. Use a level to check door alignment before fully tightening. I found that using a screwdriver instead of a drill for final tightening gave me better control, avoiding over-tightening and damaging the hinges.
Test and Adjust Door Movement
Open and close the doors to ensure smooth operation. If they sag or don’t close properly, adjust the hinge screws as per the hinge manufacturer’s instructions. I once underestimated the importance of this step; a tiny adjustment fixed sagging doors instantly.
Additional Tips for Longevity
Rub a small amount of lubricant on hinges after installation to ensure smooth movement over time. Regular maintenance prevents squeaking and wear. Remember, high-quality hardware like heavy-duty hinges can last decades if properly cared for, making your kitchen both functional and stylish.
For selecting storage upgrades that complement your improved hardware, visit this guide. As you advance with your kitchen remodel, consider integrating custom cabinets or built-ins for a seamless look, which can be explored through this resource.
When it comes to renovating your kitchen, many homeowners get caught up in popular myths that can lead to costly mistakes and frustrations. One widespread misconception is that sticking with standard cabinets and off-the-shelf storage options is sufficient for any space. However, in my experience, customized solutions often deliver a seamless and functional aesthetic that surpasses generic choices, especially when paired with expert-crafted built-ins. Relying solely on traditional designs without considering the unique nuances of your space can result in wasted inches and less efficiency, which is why exploring personalized options is crucial. Another common trap is underestimating the importance of precise measurements and professional installation; many assume that DIY adjustments are enough, but improper fitting can cause misalignments, squeaks, or even damage over time. Investing in quality hardware like heavy-duty hinges or specialized brackets — backed by research such as the study from the Journal of Housing and the Built Environment — can significantly improve durability and performance. A critical but often overlooked detail is that some popular storage solutions may seem convenient initially but become problematic if not designed with future flexibility in mind. For example, narrow pantry shelves might look appealing but could hinder access or cause food to be wasted if height and depth aren’t optimized. Always consider how your storage will adapt to evolving needs. Have you ever fallen into this trap? Let me know in the comments. For comprehensive guidance on selecting storage solutions, check out the expert tips on storage. Remember, a well-executed kitchen remodel combines thoughtful design with precise craftsmanship, often involving custom cabinets that truly transform your home’s style. For innovative ideas and insights, visit this resource on custom cabinets.
Keeping Your Kitchen Functioning Smoothly: Tools and Techniques for Longevity
After investing time and resources into custom cabinets, built-ins, and innovative storage solutions, ensuring these upgrades remain in top shape is crucial. The right tools and maintenance routine can extend the lifespan of your enhancements, saving you money and stress in the future. One must-have tool I personally swear by is a digital torque screwdriver. Unlike standard screwdrivers, it allows precise tightening of hinges and hardware, preventing over-tightening that can warp wood or strip threads. This precision ensures your custom cabinetry stays aligned and functional for years.
In addition, a high-quality microfiber cloth paired with a gentle wood cleaner helps maintain the finish of your cabinets, especially if you’ve chosen natural finishes or painted surfaces. Regular cleaning prevents dirt buildup that can cause scratches or dullness over time.
Invest in Smart Maintenance Tools
Smart sensors and monitoring devices are increasingly becoming part of modern kitchen maintenance. For example, moisture sensors installed beneath the sink or in vulnerable areas can alert you to leaks before they cause significant damage. These devices are especially valuable if you’ve added built-in appliances or plumbing features, like a tilted sink or water-resistant bottom liners, as discussed in our comprehensive guide.
Looking ahead, I predict advancements in IoT-connected hardware will further simplify long-term maintenance, allowing homeowners to receive real-time alerts and optimize performance remotely.
How do I maintain custom cabinetry and built-ins over time?
Regularly inspect hinges, slides, and hardware—using a torque screwdriver for precise tightening—and clean surfaces with suitable products to preserve finish quality. It’s also wise to keep spare hardware components on hand, especially for heavy-duty hinges supporting massive doors or shelves. Periodic lubrication of moving parts with a silicone-based lubricant ensures smooth operation and prevents squeaking, as recommended by woodworking pros. Incorporating smart sensors for leak detection and humidity monitoring can preempt costly water damage, maintaining your investment’s integrity. Remember, consistent, proactive care is vital to enjoy your kitchen remodel for decades. If you’re considering scaling your storage or adding built-in features, explore innovative storage solutions that can be monitored and maintained with newer tech, streamlining your long-term upkeep.
The Hardest Lessons I Learned About Kitchen Upgrades
One of my biggest realizations was that relying solely on aesthetics without considering structural support can lead to sagging and costly repairs later. Installing heavy-duty hinges was a game-changer, but I overlooked the importance of proper measurement, which caused alignment issues initially. Trusting generic hardware seemed tempting, but investing in quality, specifically designed for weighty doors, proved essential in the long run. This journey taught me that patience and attention to detail are vital, especially when customizing storage solutions to fit unique spaces.
Tools and Resources That Changed My Approach
A few tools made all the difference: a digital torque screwdriver ensured precise hardware installation, preventing over-tightening. I highly recommend books like “Built-ins That Elevate Your Living Space” for inspiration and technical guidance. For on-the-ground assistance, consulting experts at local hardware stores has saved me from costly mistakes. Online communities and credible blogs, such as this resource, offer real-world insights that set realistic expectations and innovative ideas.
Embrace the Journey & Shape Your Dream Kitchen
Remodeling your kitchen is more than a project; it’s an investment in your home and happiness. By leveraging specialized hardware, thoughtful storage, and expert advice, you can create a space that is both beautiful and durable. Remember, every challenge faced and lesson learned along the way adds to your confidence and capability. So, whether you’re upgrading hinges or designing custom built-ins, take each step with purpose and enthusiasm. Your dream kitchen is within reach—start turning your vision into reality today.