How to Tell if Your Cabinet Maker Is Using Low-Grade Plywood
I remember the moment clearly. After pouring months of savings and countless hours into transforming my kitchen, I finally excitedly opened a cabinet to stash away some dishes. My heart sank. The shelves felt flimsy, and I noticed some strange warping not long after installation. It was then I realized I had overlooked a crucial detail—was this high-quality plywood or low-grade material cutting corners?
This experience was a wake-up call. Many homeowners trust their cabinet makers without knowing how to tell if low-grade plywood is sneaking into their dream kitchen. The sad truth is, not everyone is honest about the quality of materials they use, and this can lead to costly repairs and frustrating replacements down the line.
Today, I’m committed to helping you avoid falling into the same trap. We’ll explore how to identify low-grade plywood, so you can make informed decisions and ensure your custom cabinets stand the test of time. Because knowledge is power when it comes to safeguarding your investment.
Why Low-Grade Plywood Can Ruin Your Kitchen Experience
Choosing the right materials is the foundation of durable, beautiful cabinetry. Yet, some unscrupulous builders opt for inferior plywood to cut costs, which often results in warped shelves, sagging doors, and even mold growth caused by moisture infiltration. According to the Forest Products Laboratory, low-quality plywood often contains fewer plies and uses inferior adhesives, making it less resistant to environmental stress (https://www.fpl.fs.fed.us/). This short-sighted approach might save a buck initially but costs much more in repairs and replacements.
In my early days of working with custom cabinets, I made the mistake of trusting a supplier based solely on their price. I didn’t scrutinize the plywood quality, assuming all plywood was created equal. That mistake cost me dearly when warped shelves and creaking doors started appearing just a few years later. The lesson was clear: even a small corner cut can lead to big problems.
If you’ve wondered whether your cabinet maker is cutting corners, you’re not alone. Many homeowners face this dilemma, often feeling powerless because they lack the know-how to tell quality from cheap substitutes. But fear not—there are straightforward ways to spot the telltale signs of low-grade plywood before your cabinets are built. Next, we’ll dive into the practical steps that will arm you with the confidence to differentiate quality materials and avoid your own costly surprises.
Inspect the Plywood Core Material
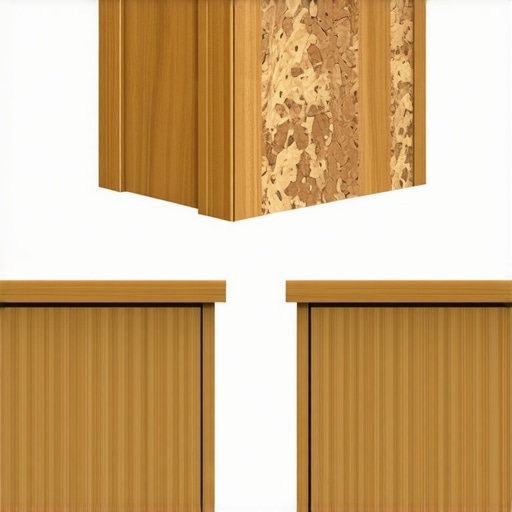
First, examine the edges of your cabinets or shelves for the layer pattern. Good-quality plywood reveals multiple plies—thin, consistent layers of wood veneer—that are visible when sliced or cut. Low-grade plywood often displays fewer, thicker layers, or even a veneer with a figuring pattern that looks uneven. When I installed a new set of shelves, I used a utility knife to gently score a small edge; seeing multiple thin layers convinced me I had chosen quality material, avoiding the warped shelves I experienced in the past. Remember, a simple edge inspection can save you from long-term headaches.
Perform a Flex Test to Assess Durability
Take a small piece of the plywood, like a thin sample from an inconspicuous area, and gently press or bend it. High-quality plywood offers resistance and returns to shape without half-baking or cracking. Low-grade panels tend to flex or show signs of delamination quickly. I once received a batch with soft spots in the core layer that became evident during this test, indicating inferior glue adhesion. Performing this check before purchase helps ensure your cabinets won’t sag or warp over time.
Check the Surface and Face Veneer Quality
Look closely at the veneer surface for inconsistencies. High-grade plywood will have a smooth, uniform veneer with tight grain and minimal knots or patches. Low-grade options often hide defects or use veneer patches to cover imperfections. When selecting plywood, I always sought out sheets with even coloration and grain patterns. This step prevents future visual mismatches in your cabinets or built-ins, especially if you’re aiming for a seamless look—just like those featured in seamless kitchen remasters.
Assess the Adhesive Quality with Water Resistance Test
Apply a few drops of water to a hidden corner of the plywood. High-quality panels will resist moisture absorption, revealing a tight glue bond and durable veneer. Low-grade plywood may absorb water quickly or peel at the edges. This simple test mimics real-life kitchen conditions where humidity or spills are common. Once, I noticed a piece that started to swell after a brief water contact, signaling poor waterproof adhesives, and prompting me to reject that batch.
Know the Behind-the-Scenes Layer Structure
If possible, ask your supplier for a cross-section or detailed specs of the plywood. True high-grade panels will specify multiple layers, type of veneer, and adhesive used. Low-end options might not provide this detail or will mention less durable adhesives. During a project, I requested a datasheet, which confirmed aggressive glue formulas—allowing me to confidently proceed, knowing my cabinets would withstand moisture and weight.
By integrating these steps into your material selection process—inspect edges, perform flex and water tests, evaluate surface quality, and request detailed specs—you arm yourself with factual evidence rather than trust alone. This proactive approach turned my kitchen upgrade into a lasting success, preventing future issues like warped shelves or mold. To refine your storage solutions and ensure your custom cabinets last, consider exploring innovative ideas here or discover how built-in designs can elevate your space here.Most homeowners assume that choosing stylish cabinets and clever storage options is straightforward, but in reality, there are subtle details that often trip people up. For instance, a common misconception is that all custom cabinets are created equal, leading many to overlook critical factors like material durability and joint craftsmanship. In my experience, falling for trendy finishes without examining the underlying construction can result in cabinets warping or delaminating within a few years.
Another area where misconceptions abound is in built-in solutions. Many believe that adding multiple storage compartments is inherently beneficial, but without proper planning, these can create clutter and hinder usability. Instead, integrating truly innovative storage solutions that maximize accessibility and streamline daily routines makes a significant difference. Using too many small, shallow drawers, for example, can be less practical than one well-designed deep pull-out.
Advanced homeowners also frequently misunderstand the importance of material placement and environmental considerations. Low-grade plywood may seem like a saving, but in moist kitchens, they are prone to swelling and warping, especially if adhesives are subpar. An often-overlooked nuance is the effect of humidity on different materials—a misstep that can cause costly repairs down the line. To ensure longevity, always verify the core structure and adhesive quality of your cabinetry, which are critical but unglamorous details often missed in the rush to finish a remodel.
Let’s address a question that often stumps even seasoned DIYers: How do you effectively combine aesthetics with durability in custom kitchen designs? The answer lies in harmonizing style with the fundamental engineering principles of cabinetry, such as proper layering, sturdy joints, and moisture-resistant finishes. This is where consulting with experts who understand the nuances of custom cabinetry can be transformative. Prioritizing quality over trendy looks guarantees that your investment withstands the test of time.
Finally, avoid the trap of underestimating how space planning impacts every other aspect of your kitchen. Poorly designed storage, even if it looks sleek, can hamper workflow. Real optimization requires meticulous planning, considering not just how cabinets look but how they function during daily use. Taking advantage of built-in storage techniques that integrate seamlessly with your kitchen’s layout elevates both form and function.
In conclusion, understanding these nuanced details can prevent common pitfalls and elevate your kitchen renovation from good to extraordinary. As you plan your next move, remember that deep knowledge about materials, environmental impacts, and functional design makes all the difference. Have you ever fallen into this trap? Let me know in the comments.
Keep It Operational: Tools I Trust for Longevity
Maintaining your built-ins and custom cabinets requires precision and the right equipment. I personally rely on a digital moisture meter, such as the Delmhorst BD-2100, to regularly check humidity levels in my kitchen environment. This helps prevent warping and delamination, especially for plywood panels that are sensitive to moisture fluctuations. Additionally, I use a high-grade laminate squeegee and a microfiber cloth for cleaning surfaces without scratching or leaving streaks, preserving the finish over time.
Power tools play a vital role in ongoing maintenance; a corded orbital sander, like the Bosch ROS20V, is invaluable for gentle sanding of small areas when refinishing or repairing surfaces. For tight corners and intricate joints, I turn to a Dremel rotary tool with various attachments, allowing precise cleaning and touch-up to keep everything seamless and functional.
Implementing Effective Storage Management
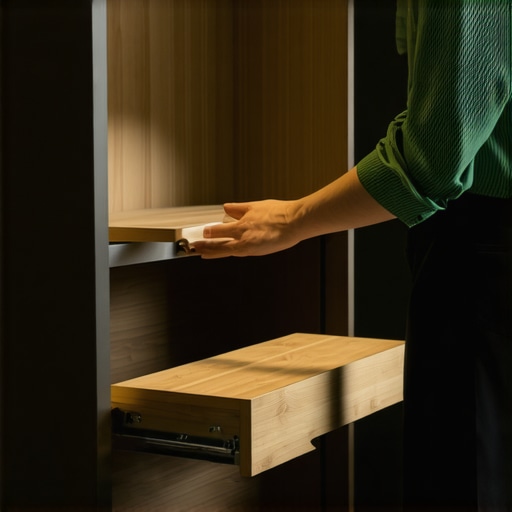
To keep storage flowing smoothly, I recommend investing in a smart organization system, such as adjustable sliding shelf rails and quiet-close soft-close hinges, which reduce wear and tear. These components help distribute weight evenly and prevent misalignment, extending the lifespan of your cabinetry. For those with small kitchens, vertical organizing racks for spices or baking sheets can drastically improve accessibility and reduce clutter, especially when paired with innovative solutions like smart storage ideas.
How do I keep my cabinetry looking pristine over time?
Regular cleaning is essential, but the key is using non-abrasive, pH-balanced cleaners designed for wood or laminate surfaces. Applying a protective wax or polish, like Howard Feed-N-Wax, creates a barrier against spills and fingerprints, especially on matte finishes. Routine inspections for loose hinges, squeaks, or gaps allow you to address issues early. Tightening hardware and adjusting hinges with a specialized screwdriver, such as the Wiha Precision Screwdriver Set, maintains perfect alignment and functionality without damaging the delicate surfaces.
Future trends in cabinet maintenance and storage
Looking ahead, I see integrated moisture sensors becoming standard in high-end cabinetry, alerting homeowners via smartphone apps when humidity levels fluctuate dangerously. The use of AI-driven maintenance apps may also recommend proactive measures, like surface treatments or hardware adjustments, to maximize longevity. Embracing these innovations will make upkeep more efficient and less guesswork, extending the life of your investments significantly.
If you’re eager to optimize your storage and maintenance routine, try installing a smart sensor that monitors moisture or temperature, preventing issues before they arise. For more ideas, explore expert storage solutions and consider integrating built-in features that simplify long-term care.
What I Wish I Had Known from the Start
My biggest mistake was assuming that all plywood is created equal. I learned that not inspecting core layers or veneer quality upfront can lead to warped shelves and frustrated repairs down the line. Trusting a supplier based on price alone was a costly lesson—quality materials matter more than we often realize.
Another insight is the importance of performing simple tests, like bending a small piece or checking the edges for multiple thin plies. These tiny checks save you from future headaches, ensuring your cabinets stay durable and looking brand new for years.
Lastly, understanding the true layer structure and asking for detailed specs can prevent hidden issues like weak adhesives or moisture susceptibility. Empower yourself to ask the right questions; it’s your best tool for crafting a kitchen that truly lasts.
My Must-Have Tools and Resources for Durable Kitchens
I rely on a digital moisture meter, such as the Delmhorst BD-2100, to monitor humidity and prevent warping—crucial in moisture-prone kitchens. For cleaning and maintenance, a microfiber cloth paired with non-abrasive cleaners keeps surfaces pristine without damage.
When inspecting materials, I use a high-quality utility knife for edge checks and a small flex tester to assess plywood resilience. These simple but effective tools guide my decisions for long-lasting cabinetry.
For deeper learning, I turn to trusted resources like The Ultimate Guide to Custom Cabinets and Expert Tips on Storage Solutions. They’ve transformed my approach, emphasizing the importance of quality materials and thoughtful design. As you plan your kitchen renovation, these tools and insights will be your allies.
Your Next Step Toward a Smarter Kitchen
Remember, an investment in understanding materials and choosing quality over cheap alternatives pays off in the long run. Your dream kitchen is within reach when it’s built on durable, well-sourced foundation materials. Stay curious, ask questions, and don’t settle for less than excellent craftsmanship.
What’s the one feature you’re most excited to customize in your kitchen—storage, durability, or style? Share your thoughts below and let’s turn your vision into reality!