The Best Way to Organize a Deep Drawer for Pots and Pans
I’ll never forget the sound of my favorite Dutch oven slamming into a pile of lids at six o’clock on a Tuesday evening. It was loud. It was frustrating. And honestly? It was the final straw. For years, I treated my deep drawers like a giant toy box for adults, just tossing everything in and hoping for the best. I thought I was being efficient by stacking my pans from largest to smallest, but all I really did was create a heavy, scratched-up obstacle course. If you’ve ever found yourself digging for a lid while your sauce is about to break, you know exactly what I’m talking about. Today, I’m going to show you how to stop the madness and turn that ‘black hole’ into the most efficient part of your kitchen. We’re moving beyond basic stacking and into the world of clever built-ins and storage hacks that actually work for real cooks. Have you ever faced the ‘landslide’ every time you try to boil water for pasta? Drop a comment and tell me I’m not the only one. According to research by the National Kitchen & Bath Association, poor storage accessibility is one of the leading causes of ‘renovator’s remorse’ after a kitchen remodel. We’re going to fix that today.
Stop Digging Through the Metal Graveyard
My biggest mistake early on was thinking that more space was the answer. I pushed for the deepest drawers possible during my first DIY project, only to realize that depth is a double-edged sword. Without structure, it’s just a deeper pit. You need a system that respects the weight of your cast iron and the fragility of your non-stick surfaces. I used to think smart storage ideas to maximize your kitchen space were just for tiny apartments, but even in a large kitchen, a deep drawer can become a disaster zone without the right dividers. [image_placeholder_1]
Are deep drawers just a trap for heavy cast iron?
There’s a common fear that putting heavy pots in a drawer will eventually lead to hardware failure or a drawer that’s impossible to open. I used to worry about that too, especially after I bent a cheap slide on a budget cabinet. But the truth is, when you use high-quality custom cabinets with proper weight ratings, those drawers become your best friend. The secret isn’t just in the strength of the box, but in how you distribute the weight so you aren’t lifting five pans just to get to the one at the bottom.
The Backbone of Your Deep Drawers
Think of your drawer slides like the suspension on a heavy-duty truck; if they aren’t rated for the load, you’re going to have a breakdown. When you are planning a perfect kitchen upgrade, the technical specs of the drawer box itself matter just as much as the finish. I learned the hard way that standard-grade slides start to ‘weep’ or sag under the weight of just three cast iron skillets. This is exactly why your custom cabinets should feature dovetail drawers combined with full-extension, under-mount slides. These slides ensure you can reach the very back of the drawer without the front dipping down like a sinking ship. High-quality hardware allows for a much smoother glide, which prevents the internal contents from shifting violently every time you close the cabinet.
Stop the Sliding Game with Adjustable Pegs
If you’ve ever opened a drawer only to hear the clatter of porcelain or metal sliding toward the back, you need a peg system. It’s essentially a wooden board with pre-drilled holes that fits into the bottom of your drawer. You place wooden pegs around your pots to lock them in place. It’s like Tetris for your kitchen, but you choose the layout. This allows you to maximize space with innovative storage solutions that adapt as your cookware collection grows. 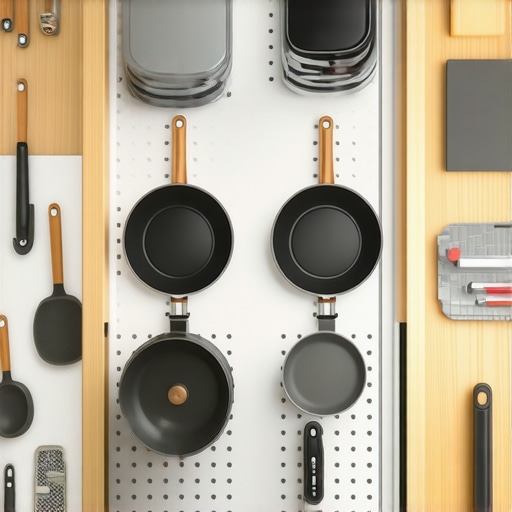 I remember the first time I set this up after a particularly messy Sunday brunch. Before the pegs, my heavy stand mixer would drift into the glass bowls every time I closed the drawer too quickly. Now, everything stays exactly where I put it, even if I’m in a rush. This is also the best way to store heavy small appliances without risking damage to the internal mechanisms of the drawer.
Stand Your Lids Up for Instant Access
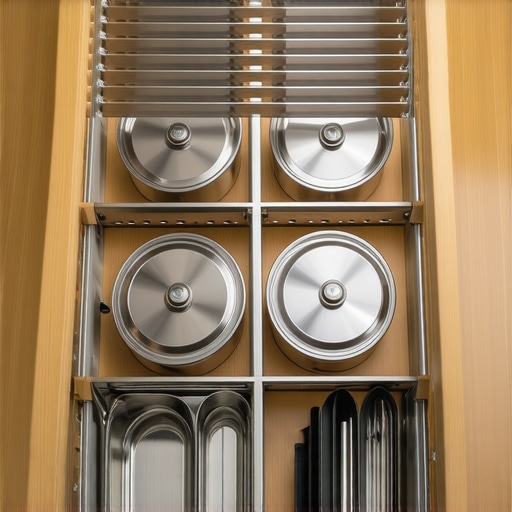
Stacking lids is a fool’s errand. They are awkward, they slip, and the knobs make them impossible to stack flat. The solution is vertical storage. By installing thin dividers—either built-in or adjustable—you can store lids on their side like books on a shelf. You can apply this same logic when looking for the best way to store baking sheets. It turns a chaotic pile into a library of kitchen tools where you can pull exactly what you need without disturbing anything else. If you notice your drawers feeling stiff during the colder months, it might not be the weight; check the real reason your soft-close drawers are sluggish in winter to ensure your hardware is performing at its peak.
The Thanksgiving Roaster Disaster
A few years back, I was hosting fourteen people for Thanksgiving. I had the turkey prepped and ready to go into the oven, but my giant roasting pan was at the very bottom of a deep drawer, buried under a 12-quart stockpot and three frying pans. As I tried to lift the top layers out with one hand (the other was covered in turkey brine), the whole stack shifted. The stockpot crashed onto my toe, and the drawer wouldn’t slide back in because a lid had fallen behind the box. I spent twenty minutes on the floor with a flashlight instead of basting the bird. That was the moment I realized that depth without organization is just a trap. Since moving to a vertical divider system, I can grab that roaster in three seconds flat without a single clatter.
My Thanksgiving disaster wasn’t just a fluke of bad timing; it was a symptom of a larger problem in kitchen design. We’ve been told for years that the more deep drawers you have, the better your kitchen functions. But here is the contrarian truth: **too much depth is actually a liability.** If you have a twelve-inch deep drawer but only use the bottom four inches for a single layer of pans, you are wasting valuable real estate and inviting clutter to migrate into that empty void. This is where expert tips on selecting storage solutions become vital. You don’t just need space; you need proportional space. Have you ever fallen into the trap of thinking a bigger drawer would solve your messy kitchen problems? Let me know in the comments.
The “More is Better” Trap Most Homeowners Fall For
The biggest mistake I see in high-end projects is what I call the “cavern effect.” People install massive, deep drawers in their custom cabinets as a game changer, only to find they are now bending over further and lifting heavier stacks than they did with old-fashioned doors. According to the National Association of the Remodeling Industry (NARI), homeowners often prioritize volume over accessibility, which can increase physical strain during meal prep by up to 30% because they are constantly bypass-loading—moving three things to get to one. To avoid this, I now advocate for “drawer-in-drawer” systems. These allow you to have a deep drawer face for aesthetic symmetry on the outside, but a hidden, shallow pull-out inside for lids or smaller tools. This way, you maximize space with innovative storage solutions without creating a bottomless pit.
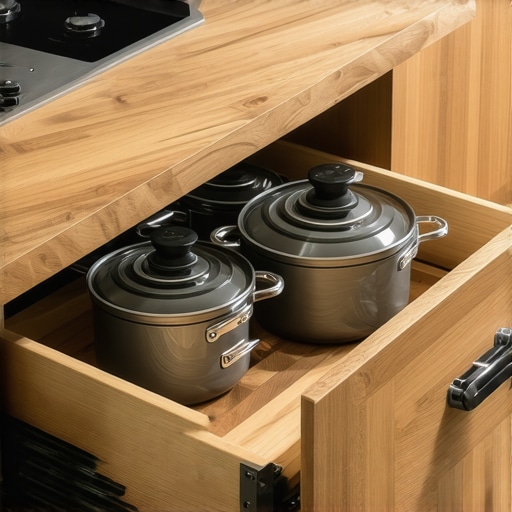
Why Deep Drawers Need a False Bottom or Inner Tray
Another nuance most people miss is the “clearance gap.” If your drawer hardware isn’t calibrated for the specific height of your tallest pot, you end up with a drawer that either catches on the frame or leaves a four-inch gap at the top that does nothing but collect dust. This is why why your kitchen island should have a mix of drawers and doors. Not every item belongs in a drawer. Heavy, awkwardly shaped appliances like stand mixers or bread machines often perform better on a pull-out shelf behind a door, rather than being lifted vertically out of a deep drawer box. If you ignore this, you’ll find your hardware wearing out prematurely, or worse, you’ll find your soft-close drawers are sluggish in winter because the grease in the slides is struggling against an imbalanced, over-packed load.
Can you actually over-organize a custom cabinet system?
The short answer is yes. I’ve seen clients spend thousands on fixed partitions that only fit one specific set of copper pots. What happens when you buy a new set? You’re stuck. The “advanced” move is to use adjustable, non-permanent dividers. While why your pantry should have solid shelves is a golden rule for stability, your drawer interiors should remain fluid. Using a combination of heavy-duty pegs and movable slats ensures that your built-ins and storage hacks can evolve as your cooking style changes. Don’t let your 2025 kitchen remodel be a prison for your 2030 culinary needs.
Once you’ve invested in custom cabinets as a game changer, the real work begins—keeping them functional. It’s easy to forget that a drawer loaded with thirty pounds of Le Creuset is a mechanical system under immense stress. I’ve seen beautiful built-ins and storage hacks fail within two years because the homeowner treated them like static furniture. According to the Architectural Woodwork Institute (AWI), drawer systems are rated for specific cycle counts under load, but those numbers assume a level of maintenance that most people ignore. If you want that “buttery” feel to last a decade, you have to be proactive about the friction points.
Keep Your Drawers from Dragging Over Time
I personally keep a can of dry PTFE (Teflon) spray in my kitchen “junk” drawer. Every six months, I pull my deepest drawers out to their full extension and give the metal tracks a quick wipe-down with a microfiber cloth to remove any kitchen grease or stray flour. Then, a tiny puff of dry lubricant ensures the ball bearings don’t have to fight for their lives. Avoid standard oils or WD-40; they are magnets for dust and will eventually turn into a sticky sludge that makes your soft-close drawers sluggish in winter and summer alike. This small habit is what separates a kitchen that feels “new” forever from one that feels “tired” after three Thanksgivings.
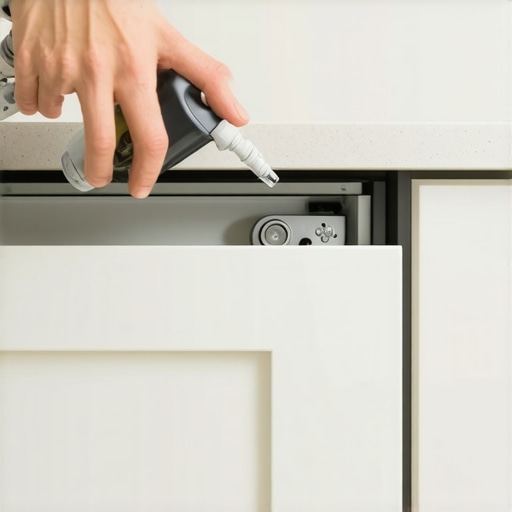
How can I keep my heavy-duty drawers moving like silk?
Maintenance isn’t just about lubrication; it’s about checking the geometry. Over time, the screws holding your heavy-duty slides to the cabinet carcass can vibrate loose due to the weight of your pots. I recommend doing a “screw check” once a year. If you find a screw spinning freely, don’t just ignore it. This is a sign that the wood fiber has given way. A quick trick I use is the toothpick-and-glue method to rebuild the hole, or better yet, upgrading to a slightly wider-diameter wood screw. If the alignment feels off, you might need to learn how to fix a drawer that won’t close all the way by adjusting the tilt tabs found on the underside of modern high-end slides. These tabs are designed to compensate for the natural settling of a house, so use them!
The Simple Tool That Stops Cabinet Sag Before It Starts
For those of you planning a future project, I predict we are going to see a massive shift toward “smart” hardware. We’re already seeing Häfele and Blum introduce sensor-driven lighting and electronic push-to-open mechanisms. In the next few years, I expect to see load-sensors that alert your smartphone if a drawer is becoming dangerously unbalanced or overweight. Until then, your best tool is a simple bubble level. Check your innovative storage solutions every now and then to ensure the drawer box isn’t leaning. Even a 1/16th-inch tilt can cause uneven wear on the bearings that will eventually lead to a costly hardware replacement. If you’re ready to stop the “clatter and crash” cycle, my challenge to you is this: go to your messiest deep drawer today, pull everything out, and install just one vertical divider for your lids. You’ll be shocked at how much lighter the drawer feels when things aren’t piled on top of each other.
Lessons I Had to Learn Through Trial and Error
Before you dive headfirst into your next project, keep these hard-won insights in mind to avoid the common pitfalls of drawer design:
- The ‘Dry Run’ is Essential: Never screw in your dividers on day one. Use temporary spacers or even cardboard to test the layout for a full week. If you find yourself reaching over a tall lid to get a shallow pan, your workflow is broken.
- Leave Room for the ‘Grip Gap’: It’s easy to pack pans so tight they look beautiful in a photo, but if you can’t get your hand around the handle without scraping your knuckles, the system has failed. Always prioritize ergonomic access.
- Think About Your Future Self: Your collection of cookware will inevitably change. This is why I always suggest you select storage solutions that are adjustable rather than permanent.
Tools That Keep My Cabinets Running Like New
If you want to maintain that high-end feel long after your kitchen remodel, these are the items I swear by for daily maintenance:
- Dry PTFE Lubricant: Unlike standard oils, this keeps slides smooth without attracting the dust and flour that ruins ball bearings.
- Adjustable Wood Peg Systems: I trust these because they offer the flexibility needed to maximize space with innovative storage solutions as your culinary gear evolves.
- A High-Quality Bubble Level: Houses settle, and drawers shift. A quick check once a year ensures your heavy-duty hardware isn’t wearing unevenly due to a slight tilt.
Your Path to a Clutter-Free Kitchen
Transforming your space isn’t just about the aesthetics; it’s about removing the daily friction that makes cooking feel like a chore. Whether you are looking for smart storage solutions for small kitchens in 2025 or planning a full-scale renovation, remember that the best built-ins and storage hacks are the ones that disappear into your routine. You deserve a kitchen that responds to your touch and keeps your most-used tools exactly where you need them. Go ahead, reclaim your space and stop the landslide for good.
Have you ever found a storage ‘hack’ that actually made things worse instead of better in your kitchen? Let me know in the comments below!