Why Your Kitchen Layout Should Follow the Work Triangle Rule
I’ll never forget the smell of burning garlic from my first big dinner party in our ‘dream’ home. I was at the sink, nearly twenty feet away from the stove, frantically trying to find a colander while the pan turned to charcoal. I was exhausted, sweaty, and honestly, a little embarrassed. My ‘perfect’ kitchen was a functional nightmare because I’d prioritized aesthetics over the actual flow of movement. I had ignored the Work Triangle, and my shins—which hit the island corner three times that night—paid the price. If you are starting to look at custom cabinets as a game-changer for your home, you have to plan for more than just pretty doors. You need a layout that doesn’t feel like a high-intensity workout every time you make a sandwich. Today, I’m going to show you how to stop the kitchen marathon for good and finally get the flow right.
Stop Fighting Your Floorplan Every Single Night
Early in my design journey, I made a massive mistake: I thought more square footage always meant a better kitchen. I designed a sprawling layout where the refrigerator and the stove were so far apart I practically needed a scooter to get between them. It looked grand in the 3D renders, but it felt impossible to use in real life. This is why maximizing your kitchen space is actually about shortening distances, not lengthening them. The Work Triangle—the path between your sink, refrigerator, and cooking surface—is the unsung hero of a happy home. According to the National Kitchen & Bath Association (NKBA), the total distance of the three legs of the triangle should be no more than 26 feet, with no single leg shorter than 4 feet or longer than 9 feet. If you’ve ever felt like your island seating feels cramped or you’re constantly dodging a swinging fridge door while someone else is at the stove, you are likely a victim of a broken triangle. Getting this right is the difference between loving your morning coffee routine and resenting your kitchen every time you try to boil water.
Does This Old-School Rule Still Apply to Modern Open Kitchens?
You might be looking at your open-concept floor plan and wondering if a rule from the mid-century era still carries weight today. The short answer is: absolutely. Even with the modern trend toward ‘work zones,’ the core movement between cold storage, prep, and heat remains the heartbeat of the room. Whether you’re investing in stylish custom cabinets or just moving a few appliances around, the triangle keeps you from crossing your own path. It prevents that awkward ‘bottleneck’ where two people can’t work at the same time without a collision. Have you ever felt like you’re doing a clumsy dance with your spouse just to get the dishes done? That’s rarely a ‘small kitchen’ problem; it’s almost always a layout problem. Let me know—have you ever lived with a kitchen that felt like it was actively working against you?To build a kitchen that survives a Tuesday night dinner rush, you have to think like a chef, not just a decorator. Most people start by picking out tile, but the pros start by tracing ‘the walk.’ I once worked with a homeowner who spent $80k on a kitchen but forgot to account for how the dishwasher door would block the silverware drawer when open. Every time she cleaned up, she had to pile forks on the counter, close the dishwasher, and then put them away. It was a $80k headache. To avoid that, you must revolutionize your kitchen remodel using built-ins and creative storage that aligns with your actual movements.
Map Your Movement Before You Move a Single Cabinet
The first step is identifying your primary zones: Prep, Cook, and Clean. These zones should overlap slightly but never collide. Think of your kitchen like a factory assembly line. If the raw parts—the groceries—have to travel across the room to get to the assembly station—the stove—your efficiency drops. 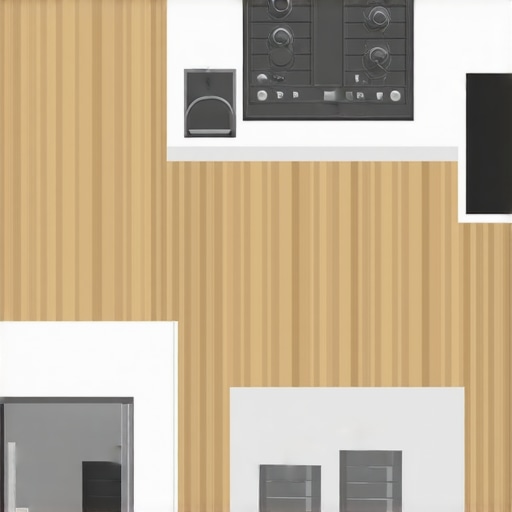
Keep Your Prep Space Between the Sink and the Fridge
The most frequent path you’ll take is from the refrigerator to the sink to wash produce. If your main prep counter is on the other side of the stove, you’ll be dripping water and dropping onion peels across the floor. This is where modern kitchen remodels featuring custom cabinets and built-ins shine—they allow you to anchor that prep space exactly where it needs to be. While you’re at it, check the clearance. If you notice a draft or a weird visual break, you might need to learn how to fix the gap between your cabinet and the refrigerator to keep the lines clean and the insulation tight.
Why You Should Never Place a Dishwasher Directly Against a Wall
This is a classic rookie mistake. When you place a dishwasher in a corner against a wall, you trap yourself. You can only stand on one side of the machine, making it twice as hard to unload. Beyond that, why you should never place a dishwasher directly against a wall often comes down to the simple fact that it restricts your elbow room and makes the corner cabinets inaccessible while the door is down. Instead, give it at least 12 to 18 inches of breathing room.
Install Storage Where You Actually Use It
Efficiency lives in the details of your cabinetry. If you are a heavy baker, you shouldn’t be hunting through a dark corner for your mixer. This is why your corner cabinet needs a super Susan, not a pole mount—it brings the heavy gear to you without the wobbling. I remember a client, Sarah, who had her spices in a beautiful upper cabinet three feet away from her stove. One night, while she was searing scallops, she had to walk away to find the white pepper. By the time she got back, the pan was smoking. We solved this during her next upgrade by explaining why you need a vertical spice drawer next to your range. Now, she just reaches out, grabs what she needs, and never takes her eye off the heat.
Why One Custom Quote Is Thousands More Than Another
I see it all the time: a homeowner gets three bids for a kitchen project, and the price range is wide enough to buy a mid-sized car. Most people assume the more expensive shop is just ‘brand-name’ markups, but having spent years in the woodshop, I can tell you the difference is usually hidden in the skeleton of the box. If you’re looking at custom cabinets as a game-changer for your home, you have to look at the joinery. A cheap cabinet is often just stapled together with a thin backer. A truly professional box is built to last decades, which is why your cabinet boxes should be stapled, glued, and screwed. This structural integrity prevents the box from racking or sagging when you eventually load it with two hundred pounds of granite and a cast-iron cookware collection. When you see a low-ball bid, ask about the box thickness and the assembly method; otherwise, you might be paying for a ‘custom’ look built on a ‘disposable’ frame.
Will Your Painted Joints Crack in Two Years?
One of the most common questions I get from savvy clients is about the longevity of the finish, especially with the trend toward crisp, white kitchens. The hard truth? Even the best paint can’t hide poor wood selection. The movement of natural wood—expansion and contraction due to humidity—is the enemy of a smooth finish. This is why the best wood species for painted cabinets are those with high dimensional stability, like HDF or specific maples. Research from the Woodwork Institute suggests that choosing materials that resist seasonal movement is the only way to avoid those hairline fractures at the door stiles. If your contractor is just spraying whatever wood was on sale, you’ll see those cracks by the second winter. Have you ever noticed your cabinet doors looking ‘wonky’ or cracked after a few years? Let me know in the comments.
The Floating Floor Trap That Destroys Modern Remodels
Everyone tells you to maximize every inch, but they often forget that your kitchen needs to breathe—literally. One of the biggest ‘oops’ factors I encounter in modern renovations involves the relationship between the flooring and the built-ins. If you are installing a floating floor, why luxury vinyl plank should not be trapped under your base cabinets becomes a critical technical detail. Floating floors need to expand and contract; when you pin them down with 2,000 pounds of cabinetry and island stone, you risk the floor buckling or the joints failing elsewhere in the room. Always install your base cabinets first and ‘float’ the floor to them, or use a permanent glue-down material if you insist on going wall-to-wall. 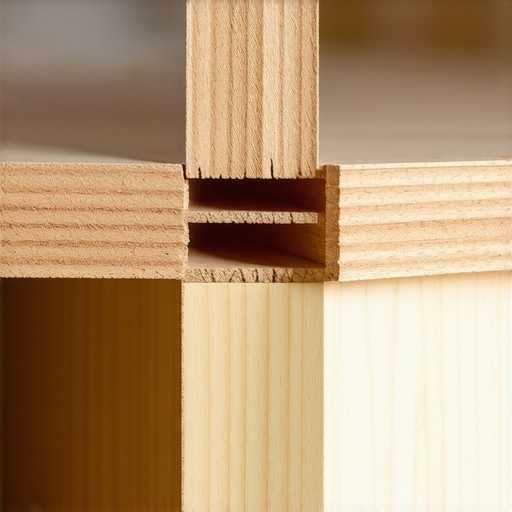 This kind of foresight separates a Pinterest-pretty kitchen from a technically sound investment. Beyond the floor, you must also look at how your stylish custom cabinets interact with your appliances. I’ve seen homeowners spend a fortune on a sub-zero fridge only to realize the door won’t open more than 90 degrees because it’s placed too close to a deep pantry cabinet. Don’t just plan for the size of the appliance—plan for the swing of the door.After you have successfully avoided the floating floorboard trap, you have to transition from the build phase to the keep it beautiful phase. I keep a dedicated kit under my sink—not for cleaning, but for mechanical maintenance. The single most important tool I own isn’t a fancy saw; it is a self-leveling cross-line laser. If you see your cabinets starting to look uneven, it is usually because the house is settling, and a laser level helps you identify if it is a simple hinge issue or if you need to understand why your wall cabinets are pulling away from the drywall. According to the Architectural Woodwork Institute (AWI) Quality Standards, custom cabinetry should maintain a tolerance of less than 1/16th of an inch over a 3-foot span. If yours is drifting, it is time to pull out the screwdriver and recalibrate.
How do I maintain custom wood finishes over time?
The biggest enemy of your stylish custom cabinets isn’t just humidity; it is the buildup of airborne cooking oils. I recommend a simple microfiber cloth and a less is more approach. Avoid any cleaners containing silicone or wax. If you went with the modern trend, you will need to know how to clean matte black cabinet hardware without scratches to keep that velvety finish from turning shiny. Similarly, do not forget the surfaces; learning the best way to clean your new granite countertops will prevent the sealant from breaking down prematurely. Beyond cleaning, you have to stay ahead of the mechanical parts. Every six months, I do a walkthrough of my drawers. If something feels sticky, I do not force it. I check the tracks for debris. This is the same logic I use in my shop; just as why urgent garage door repair is the first step to a safe storage workshop, keeping your kitchen hardware aligned prevents long-term structural damage. 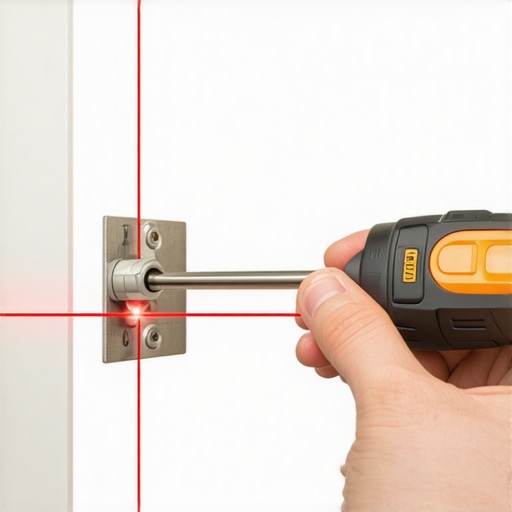 Looking forward, I predict we are going to see a massive shift toward active storage. We aren’t just talking about maximizing your kitchen space anymore; we are moving toward cabinets with integrated sensors that monitor humidity levels inside your pantry to protect dry goods. Until then, the best thing you can do to keep custom cabinets as a game-changer in your home is to master the basics. If you notice a door hanging slightly lower than its neighbor, don’t call a contractor—spend five minutes on the 5-minute hinge adjustment for fixing wonky cabinet reveals. It is the most empowering DIY skill you can have. If you ever feel stuck or want to plan your next upgrade, you can always contact us for a professional perspective.
Hard Truths I Learned After Installing a Thousand Kitchens
One thing nobody tells you is that a kitchen can be beautiful and still be a failure. I’ve seen homeowners get so caught up in the look of their stylish custom cabinets that they forget to check if the drawer will hit the oven handle. My biggest lightbulb moment? Realizing that the best kitchens are designed for the “messy middle” of cooking, not just the “after” photo. It’s better to have one perfectly placed smart storage solution than a dozen cabinets you can’t reach. Another lesson: don’t skimp on the small stuff. I’ve seen expensive kitchens ruined by low-quality hinges that sag within months. Invest in the skeleton of the cabinet first.
The Three Things I Keep in My Kitchen Toolkit
If you want your kitchen to last as long as your mortgage, you need more than just a screwdriver. I swear by my self-leveling cross-line laser; it’s the only way to ensure your island isn’t slowly drifting downhill during installation. I also recommend every homeowner keep a small repair kit for the inevitable—knowing how to fix a stripped screw hole can save you a frantic service call. Lastly, consult the AWI Quality Standards once in a while. It’s the “bible” of woodworking that ensures your contractor is actually giving you the quality you paid for. I also suggest being picky about the little things; finding hardware that does not snag your pockets is a small win that makes daily life much less frustrating.
Stop Waiting for the Perfect Moment to Fix Your Flow
You don’t need a sledgehammer to start improving your home. Sometimes, the most impactful change begins with the 5-minute hinge adjustment to make those doors line up perfectly. When you finally view custom cabinets as a game-changer, you stop settling for a layout that makes you tired and start building a space that gives you energy. Your kitchen is the heart of your home; make sure it beats at a rhythm that works for you. If you’re feeling overwhelmed by the technical details, we are always here to help you plan your next upgrade with confidence. Have you ever lived with a kitchen layout that felt like it was actively working against you? Let me know your biggest pet peeve in the comments below!