The Cabinet Lighting Mistake That Makes Your Backsplash Look Dull
I’ll never forget the moment I flipped the switch on my new kitchen lighting and realized my beautiful backsplash looked flat, dull, and completely uninspired. It was a sinking feeling, like I had just wasted a chunk of my remodel budget on lighting that *missed the mark.* After scouring forums and talking to experts, I discovered a common blunder: using the wrong cabinet lighting that washes out the backsplash instead of highlighting it. And honestly, I felt a bit of my pride deflate—because I had made that mistake early on, thinking all lighting was created equal.
A Bright Idea Gone Wrong
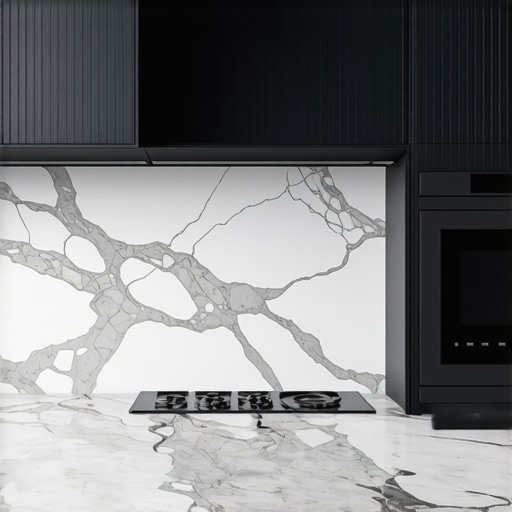
Here’s the deal: cabinet lighting is supposed to *show off* your backsplash, adding warmth, depth, and that wow factor. But when the lights are positioned poorly or the wrong type is chosen, the effect is the opposite. Instead of illuminating your backsplash, they create glare and dullness, making the entire space look flat and uninviting. I remember installing under-cabinet LEDs without thinking much about their placement, and it made my backsplash look *bland as a white wall.* That realization was a wake-up call that I needed to understand lighting principles better—and more carefully.
Is Over-Lighting Actually Dulling Your Kitchen’s Charm?
Many homeowners fall into the trap of over-illuminating—or worse, misplacing their cabinet lights—thinking brighter is better. But too much light, especially if directed poorly, can flatten textures and colors, turning your stylish backsplash into a background blur. I learned this the hard way, and I want to save you from feeling the same disappointment, which is why I’m digging into the *why* behind this common mistake and how to prevent it.
One critical mistake I made early on was installing hard-edged lights that cast shadows or glares instead of soft, even illumination. Proper placement of your lights is key—think of it as an artist highlighting the textures that make your backsplash pop. For practical tips, check out this guide on creative kitchen lighting.
Understanding the Power of Thoughtful Lighting
Now that I’ve learned from my initial mistakes, I focus on positioning, brightness, and the type of fixtures I use. Instead of glaring strips, I opt for diffused, warm LED lights that cast a gentle glow, bringing out the colors and textures without overwhelming them. It’s an art—one I’m eager to master—and one that can transform your kitchen into a true showstopper. As a helpful neighbor, I want you to avoid my pitfalls; so, let’s explore how to add that perfect glow that makes your backsplash—and your entire kitchen—shine.
Position Lights Creatively to Highlight Textures
Start by assessing your backsplash’s unique features—note textures, colors, and reflective qualities. Use a pencil to mark spots under cabinets where light will hit directly without casting shadows. During my renovation, I initially placed LEDs directly beneath the cabinet lips, which caused harsh glare. Instead, I moved the fixtures 6-8 inches inward, aiming at a shallow angle. This technique softly bathed the backsplash, accentuating its textures without creating hotspots.
Use Angled Fixtures for Depth
Install adjustable fixtures or aim your LEDs at a 30-degree angle towards the backsplash. This approach prevents glare and emphasizes the texture, much like a gallery spotlight. I learned this by temporarily taping small lights during a trial run—observing how the light accentuated ridges and grout lines. Achieving this requires fixtures with adjustable heads, so plan accordingly.
Choose the Right Bulb Color and Brightness
Select warm white LEDs instead of cool tones; warmer lights (around 2700K) make colors pop and create a cozy ambiance. During my project, I swapped out bright white bulbs for warm ones, instantly making my backsplash appear more vibrant and inviting. Keep the brightness around 200-300 lumens per fixture to prevent washout—more than that can flatten the textured details.
Control Lighting for Flexibility
Incorporate dimmers and separate switches for zones—this allows you to adjust light intensity based on the mood or time of day. I installed dimmers during installation, which gave me the versatility to turn down the light for dinner parties or brighten it for cooking. This control is critical in preventing over-illumination, which can dull textures and colors.
Test and Fine-Tune Your Setup
Before finalizing the wiring, test your layout at different times to see how ambient light interacts with your fresh setup. Move fixtures slightly if necessary—small adjustments can significantly enhance the backsplash’s visual appeal. I initially overlooked this step, only to find that some areas still lacked definition once the room’s lighting changed—bringing me back to my wiring to fine-tune the angles.
By following these precise steps—carefully positioning and aiming your fixtures, choosing appropriate bulbs, implementing dimmers, and testing thoroughly—you’ll ensure your backsplash transforms from a flat surface into a textured feature that truly stands out. For more detailed ideas on effective lighting approaches, check out this guide on creative kitchen lighting.
When considering a kitchen upgrade, many believe the key lies simply in choosing trendy cabinetry or the latest appliances. However, the real nuance often escapes homeowners — it’s not just about aesthetics or primary function but understanding the intricate details that make or break your space. A common misconception I’ve encountered is the idea that all storage solutions are created equal, leading many to underestimate the importance of tailored, custom cabinets or built-ins in achieving a truly optimized kitchen. While stock options might seem convenient, they frequently fall short in maximizing space or aligning with your unique layout, as detailed in this comprehensive guide on custom cabinets.”}#IMAGE_PLACEHOLDER_C#
{“imagePrompt”:”Elegant modern kitchen with custom-built cabinets and integrated storage”,”imageTitle”:”Modern Kitchen with Custom Storage”,”imageAlt”:”Stylish kitchen featuring bespoke cabinets and efficient built-in storage solutions”}{
Maintaining a beautifully remodeled kitchen requires the right blend of equipment, software, and ongoing habits. Over the years, I’ve found that investing in precise tools and adopting disciplined methods are crucial for keeping everything functioning smoothly and looking pristine. One of my go-to tools is the Digital Level & Laser Finder. I personally use a Bosch GLL 55 Cross-Line Laser because it ensures my cabinets and built-ins stay perfectly aligned—crucial when you’ve invested in custom cabinetry and built-ins like those detailed in this comprehensive guide. Additionally, a quality cordless power drill with a torque setting helps me tighten hinges correctly without overdriving, which can cause misalignment over time.
For tracking maintenance schedules and design updates, I rely on software like SketchUp or 3D Kitchen planners. I prefer SketchUp because it allows me to model future modifications, like adding new storage solutions from expert tips on storage options, and see how they’ll fit in my space, saving me costly mistakes.
Beyond tools, establishing regular inspection routines is vital. I check hinges, drawer slides, and lighting fixtures—especially around high-use areas—to catch any wear early. For example, I’ve learned that replaceable soft-close mechanisms tend to malfunction when not maintained, so lubricating and tightening them every year extends their lifespan significantly.
How do I keep my system running smoothly over the years?
Consistency is key. I set calendar reminders for cleaning, lubricating hardware, and updating my software plans. This proactive approach prevents small issues from escalating into bigger, costly repairs. I also stay informed on new techniques and tools—like the latest innovative storage solutions—which may be game changers for future remodels or scale-ups.
Looking ahead, I believe the integration of smart technology into storage—like sensor-based drawers and voice-activated lighting—is going to become standard. Already, I’ve started experimenting with voice-controlled lighting zones, which I predict will become more intuitive and widespread, making long-term maintenance even easier.
If you’re eager to take your kitchen’s functionality to the next level, I recommend experimenting with one of these advanced tools or habits. For example, try setting up a laser alignment check after your next cabinet installation—it’s surprisingly simple and saves headaches later!
Remember, a combination of the right equipment, a disciplined maintenance routine, and staying abreast of emerging tech will keep your kitchen remodeling investment looking and working great for years to come. For more insights on building a resilient, tailored kitchen, explore this detailed article.

Transforming a kitchen goes beyond choosing trendy cabinets or installing state-of-the-art appliances; it’s about understanding subtle details that elevate your space from functional to stunning. My journey taught me that strategic lighting and tailored storage solutions are the unseen heroes behind a memorable kitchen remodel. By sharing these personal lessons, I hope to inspire you to think deeper about your project and avoid common pitfalls that can undermine even the most beautiful design.
The Hardest Lesson I Learned About Kitchen Upgrades and Custom Storage
- Lighting isn’t just illumination—it’s an accent that highlights textures and colors. Initially, I installed bright, direct lights that washed out my backsplash, making it look flat and uninspired. The light positioning and fixture choices were crucial. I realized that soft, angled LEDs created depth and vibrancy, transforming my kitchen into a warm, inviting space. This taught me to see lighting as an art form, not just a necessity.
- Uniform brightness can dull dynamic textures, and more isn’t always better. Over-illumination causes glare and flattens intricate details like grout lines and stone textures. I discovered that using dimmable, warm-toned bulbs aimed carefully at shallow angles preserved the backsplash’s character and added cozy ambiance. Now, I always consider the quality and direction of light, not just its brightness.
- Preview and adjust before wiring finalizes—small tweaks make a big difference. During my installation, testing lighting angles with temporary fixtures was a game-changer. It revealed hotspots and shaded areas, guiding me to fine-tune the setup. This proactive step saved me from costly rework and ensured my backsplash truly shined.
- Incorporating dimmers and zone controls grants flexibility and prevents over-illumination. Being able to adjust lighting levels meant I could create a relaxed mood for dinners or bright lighting for cooking. It proved that control over ambiance enhances both functionality and aesthetics, a lesson I now consider essential in any kitchen plan.
My Weaponry for a Flawless Kitchen and Storage System
- Laser Level & Precision Tools: My Bosch GLL 55 laser ensures cabinet and built-in alignments are perfect, crucial for modern, seamless designs. These tools reduce errors and keep everything looking sharp.
- 3D Software and Planning Apps: SketchUp and professional kitchen planners help me visualize modifications, maximize space, and plan custom solutions like the ones discussed in this comprehensive guide on custom cabinets.
- Regular Maintenance Routine: A scheduled check of hinges, slides, and lighting maintains performance and prevents small issues from escalating, ensuring your investment stands the test of time.
- Stay Informed and Innovate: I follow the latest in smart storage ideas, like sensor-based drawers and voice-activated lighting, which adapt effortlessly and add convenience, as explored in this resource.
You Have the Power to Create a Space That Shines from Every Angle
Every detail, from carefully positioned cabinet lighting to personalized storage solutions, contributes to a kitchen that’s both beautiful and functional. Remember, your remodel is an opportunity to craft a space that truly reflects your style while enhancing usability. Take proactive steps, embrace the learning curve, and don’t be afraid to experiment with lighting and storage ideas to find what works best for your home.
What challenge have you faced in your kitchen transformation? Share your story below, and let’s learn from each other’s experiences to create kitchens that shine with personality and purpose!