The Best Way to Store Your Wine Bottles in the Kitchen
I’ll never forget the sound of my heart breaking—or rather, the sound of a $70 bottle of Willamette Valley Pinot Noir pouring down the kitchen sink. I had just finished my first major modern kitchen remodel, and frankly, I was exhausted. I didn’t have a plan for my small wine collection, so I did what everyone does: I lined them up neatly on top of the refrigerator. It looked sophisticated, or so I thought. Six months later, I popped a cork to celebrate an anniversary, only to find the wine tasted like cooked raisins and wet cardboard. The heat from the fridge compressor had literally baked my investment. It was a rookie mistake, a total failure of planning, and it’s why I’m so obsessed with finding the perfect built-ins and storage hacks today.
Stop Treating Your Wine Like Extra Canned Corn
[IMAGE_PLACEHOLDER]
Most of us treat wine as an afterthought in the kitchen. We shove bottles into the pantry next to the flour or leave them standing upright on a sunny countertop. But here’s the thing: wine is a living, breathing thing that hates your kitchen’s environment. Between the heat from the oven, the vibration of the dishwasher, and the UV rays from that beautiful new window, your kitchen is basically a wine graveyard. If you are starting a custom cabinets remodel journey, you have the chance to fix this before it costs you a single cork. According to experts at the Wine Spectator, consistent temperatures between 45°F and 65°F are crucial, yet most kitchens fluctuate by 20 degrees in a single day. My goal today is to show you how to integrate storage that actually works without sacrificing style.
Will a wine rack actually ruin my kitchen aesthetic?
I hear the skepticism already. “I only keep three bottles on hand; why do I need a dedicated setup?” Even if you aren’t a collector, those three bottles deserve better than the cabinet above the stove. Have you ever pulled a bottle out of storage only to find it tasted ‘off’ or flat? Tell me—have you ever lost a good bottle because the kitchen was just too hectic for it? We aren’t just talking about luxury here; we are talking about functionality and protecting what you buy. We are going to look at smart storage solutions for small kitchens that keep your wine horizontal, cool, and ready for a Tuesday night dinner.
Find the Coldest Corner of Your Kitchen Floor
When planning your layout, treat your wine storage like a quiet library, not a dance club. Most homeowners make the mistake of putting wine racks near the oven because it looks ‘convenient’ for cooking. Big mistake. You want your wine as far away from heat sources as possible. In one of my early projects, I thought putting a wine lattice right next to the dishwasher was a stroke of genius—easy access for clean glasses! I quickly realized that the steam and vibration from the drying cycle were basically shaking my Pinot into an early grave. Now, I always recommend placing wine storage on the end of an island or in a dedicated ‘dry zone’ away from the main work triangle. If you aren’t sure where the heat gathers, leave a thermometer on your counter for 24 hours. If it spikes above 70 degrees when the oven is on, that spot is a no-go zone for your Cabernet.
Why Your Wine Rack Needs Its Own ‘Breathe’ Room
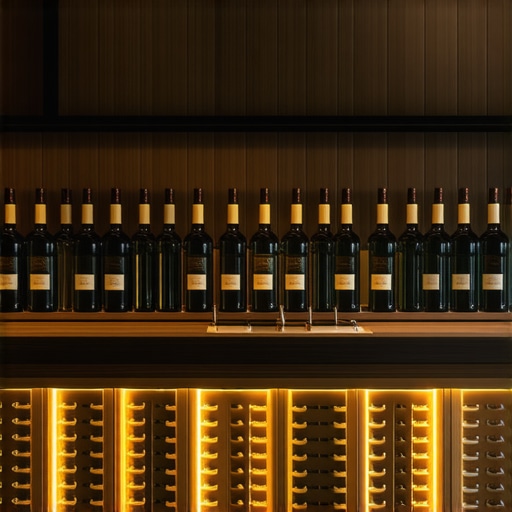
Airflow is the unsung hero of innovative storage solutions for modern kitchen remodels. If you seal your bottles into a tight, airless box, the humidity can rot the corks from the outside in. Think of your bottles as hibernating animals; they need a stable environment with just a hint of circulation. This is where expert tips on selecting storage solutions for a perfect kitchen upgrade come into play. Instead of standard closed cabinetry, look at ‘X-cube’ inserts or open lattice work. These allow air to move around the glass, preventing stagnant heat pockets from forming. This design choice also makes it much easier to spot a leaking cork before it ruins the rest of your collection.
The Truth About X-Cubes vs. Individual Bottle Holes
If you’ve ever looked at the ultimate guide to custom cabinets for a stylish kitchen overhaul, you know there are a dozen ways to stack a bottle. Individual ‘cubby’ holes look incredibly high-end, but they are a nightmare if you buy magnums or oddly shaped Champagne bottles. I once spent three hours trying to ‘shave down’ a custom divider because a client’s favorite Prosecco was half a millimeter too wide. It was messy, embarrassing, and totally avoidable. Now, I advocate for X-cubes or diamond bins. They are the ‘cargo pants’ of wine storage—they fit everything, and they make it easy to grab what you need without playing a game of Tetris. Plus, they offer a cleaner look for those aiming for a minimalist aesthetic.
Kill the Vibration Before It Kills the Flavor
This is the technical side that most why your custom cabinet quote varies so much between shops discussions miss. High-quality cabinets aren’t just about the wood; they’re about the dampening. Vibration is a silent killer for aged wine, as it prevents the sediment from settling and causes chemical imbalances in the bottle. I remember a remodel where we put a gorgeous wine rack directly underneath the main prep station. Every time the homeowner used their high-powered blender for morning smoothies, the whole rack hummed like a tuning fork. Within three months, even the cheap table wine tasted ‘shook’ and metallic. We ended up having to retroactively reinforce the cabinet with rubber gaskets—a fix that was twice as expensive as doing it right the first time. The secret to a quiet kitchen dampening your cabinet doors isn’t just for your ears; it’s to ensure that slamming a drawer three feet away doesn’t send shockwaves through your collection. If your island vibrates when you use the best way to organize your small appliances, your wine storage shouldn’t be physically tied to that same frame. Use smart storage ideas to maximize your kitchen space this year by decoupling storage units or using isolated mounting brackets to keep things still.
I see it every day: homeowners demanding 100% solid wood because they believe it is the gold standard for luxury and longevity. But if we dig into the technical nuances of a modern kitchen remodel, you’ll find that solid wood can actually be your worst enemy. Because wood is a hygroscopic material, it constantly pulls moisture from the air and releases it, causing it to swell and shrink. The experts at the Woodwork Institute point out that even a 2% change in moisture content can cause visible gaps in joinery. This is why the most stable, high-end cabinets often use engineered cores for door panels to prevent the dreaded finish cracking.
Stop Obsessing Over All-Wood Construction
If you are looking at the best wood species for painted cabinets that will not crack at the joints, you will realize that using solid wood for a painted center panel is a recipe for disaster. After a single winter, that panel will shrink, revealing a raw, unpainted line around the perimeter. I always advocate for high-density fiberboard (HDF) centers in painted doors; they are more stable, smoother, and won’t play a game of tug-of-war with your paint. This is a primary reason why your custom cabinet quote varies so much between shops—quality shops prioritize stability over marketing buzzwords like ‘all-natural.’
Does Your Cabinet Quote Hide a Structural Weakness?
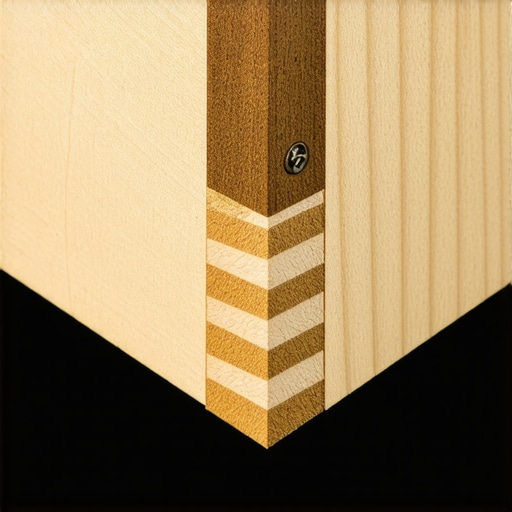
Many homeowners ask me if the box material really matters as much as the doors. The answer is a resounding yes. A common ‘oops’ factor in the industry is the ‘staple-and-prayer’ method. Some shops build their boxes using only air-driven staples and thin backing, which will eventually lead to the structure racking or pulling away from the wall. You must ensure your cabinet boxes are stapled, glued, and screwed together. Without the glue-and-screw combination, the mechanical fasteners will eventually vibrate loose under the weight of heavy granite countertops. Have you ever fallen into this trap of choosing the lowest bid only to see your drawers sag a year later? Let me know in the comments.
Avoid the Staple-and-Prayer Joinery Trap
Another nuance involves the finishing process. Many people assume on-site staining is the way to go for a ‘custom’ feel, but the truth about pre-finished plywood vs. on-site staining is that factory-controlled environments produce a much more durable chemical bond. When you finish a cabinet in a dusty kitchen, you’re trapping contaminants that lead to premature peeling. Furthermore, if you aren’t careful about the topcoat, you’ll find why your white cabinets are turning yellow as the resins react to UV light. Expertise isn’t just about the wood; it’s about understanding the chemistry of the entire build. If you’re ready to start a project that lasts, feel free to contact us for a deep dive into your specific layout.
Even the most expensive modern kitchen remodel will eventually face the laws of physics. Doors will shift, slides will gather dust, and those beautiful finishes will face the daily assault of grease and steam. I’ve learned over the years that the difference between a kitchen that looks ‘tired’ after three years and one that looks pristine after ten is about 20 minutes of maintenance every quarter and having the right tools in your utility drawer.
Stop Your Drawers from Grinding with One Simple Tool
When you notice your heavy pot drawers aren’t gliding as smoothly as they used to, don’t ignore it. The technical team at Blum, a leader in hardware innovation, specifies that their Tandem slides are tested for 100,000 open/close cycles under full load, but that rating assumes the tracks are free of debris. I personally swear by a can of dry PTFE spray (Teflon) and a simple air compressor or a can of keyboard duster. Never use WD-40 or heavy oils; they act like a magnet for flour and dust, turning your high-end hardware into a gritty mess. If you are already hearing a noise, it’s time to learn why your drawer slides are grinding and how to clear the ball bearings before you cause permanent damage to the race.
How do I keep my custom storage looking brand new after five years?
Maintenance is less about deep cleaning and more about ‘alignment audits.’ Every six months, I walk through my projects and look at the ‘reveals’—those little gaps between doors. If one door is hanging lower than its neighbor, it’s not just an eyesore; it’s putting uneven stress on the hinge screws. Most modern European hinges have a dedicated ‘adjustment screw’ for this exact reason. Taking the time for the 5-minute hinge adjustment for fixing wonky cabinet reveals can prevent your doors from rubbing against the frames and chipping your expensive paint or stain. While you are at it, make sure you know how to clean matte black cabinet hardware without scratches, as acidic cleaners can eat through the finish in months. Similarly, always follow the best way to clean your new granite countertops to ensure the sealer remains intact, protecting the stone from the oils used in expert tips on selecting storage solutions for a perfect kitchen upgrade.
Design for the Future of Hidden Kitchen Tech
As we look toward 2025 and beyond, I predict we are moving toward ‘living cabinetry’ where power and connectivity are completely invisible. We are already seeing a massive shift toward integrated tech. This isn’t just about smart fridges; it’s about why why you need a flush mount outlet inside your toaster garage or why every kitchen should have a dedicated charging station for laptops. The future is all about removing ‘visual clutter’ from the backsplash and putting the utility where the work actually happens—inside the built-ins and storage hacks. Try this: Grab a screwdriver this weekend and perform a quick check on your most-used cabinet door. If the gap looks uneven, use that adjustment screw—you’ll be amazed at how much ‘newer’ your kitchen feels after just 60 seconds of work.
[IMAGE_PLACEHOLDER]
Hard Truths from a Decade of Sawdust and Spilled Wine
I’ve spent thousands of hours in workshops and high-end kitchens, and if there’s one thing I’ve learned, it’s that your kitchen is only as good as its weakest joint. Many homeowners get distracted by the jewelry—the handles and the granite—while ignoring the skeleton. I’ve seen expensive remodels fail because the owner insisted on solid wood panels in a high-humidity environment, leading to massive cracking. Another hard truth? Most people spend way too much on smart gadgets that will be obsolete in three years, but they’ll haggle over the price of high-quality, long-term expert tips on selecting storage solutions for a perfect kitchen upgrade. Always prioritize the things that move, like the hinges and the slides, because those are the components you touch every single day.
Tools That Keep My Own Kitchen Alive
If you want to maintain a professional-grade feel, you don’t need a massive toolbox. I personally recommend keeping a high-quality dry PTFE lubricant on hand for drawer slides; it’s a game-changer that prevents the gritty buildup associated with traditional oils. For those deeper dives into design, I always point my clients toward the standards set by the Woodwork Institute. Understanding these technical specifications helps you realize why your custom cabinet quote varies so much between shops. Finally, if you are looking to maximize space with innovative storage solutions for every room, start by investing in a quality laser measure. It is the only way to ensure your DIY hacks actually fit your layout without the dreaded gap-filling shim.
Crafting a Space That Actually Ages Well
Building a kitchen isn’t just about utility; it’s about creating a backdrop for your life. Whether you are preserving a rare vintage or just looking for a way to hide the toaster, the goal is a seamless blend of form and function. By choosing stable materials and performing those tiny, five-minute adjustments, you ensure your transform your kitchen with custom cabinets expert guide for 2025 remains relevant and beautiful for a generation. Your home deserves that level of intentionality. Have you ever noticed your cabinet doors starting to sag or rub after a few years of heavy use? Let me know in the comments how you handled it!