The Hidden Toaster Dock: How to Keep Your Countertops Clear
I remember the day I finally lost it over the cluttered kitchen counter. It was a typical weekend morning—stacks of mail, a rogue sponge, and that ever-present, looming toaster. But what really tipped me over the edge was the pile of crumbs and half-empty bags that seemed to multiply every time I turned around. I realized there had to be a smarter way to handle this, especially for something as small as a toaster. That’s when I discovered the magic of a well-designed built-in toaster dock. Today, I want to share how this simple addition transformed my kitchen—and can do the same for yours.
The Joy of Hidden Storage: Banishing Counter Clutter Forever
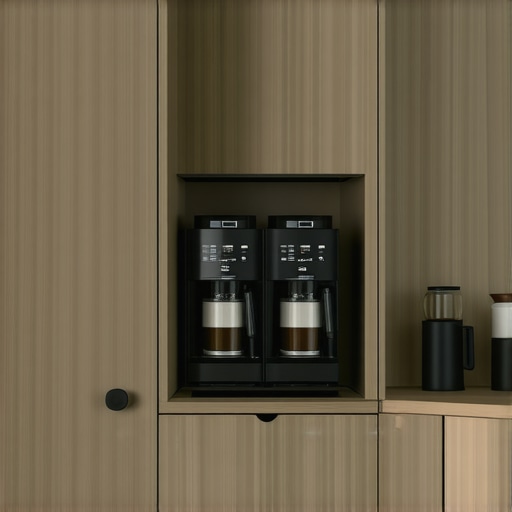
Having a clutter-free countertop isn’t just about aesthetics; it’s about creating a more functional, relaxing space where you actually want to spend time. The problem many of us face is the constant battle with tiny appliances—blenders, toasters, coffee makers—that seem to multiply and take over every available inch. The solution? Thoughtfully integrating these devices into your cabinetry with customized storage solutions.
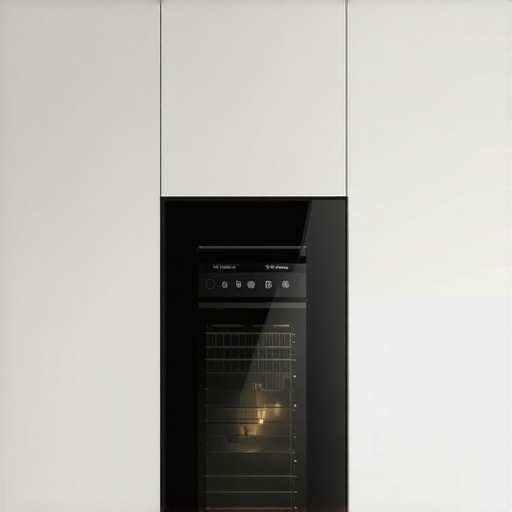
A custom-built toaster dock ensures your toaster is accessible when needed but hidden away when not in use. It keeps crumbs and crumbs’ friends out of sight, making your kitchen look tidier and reducing the time you spend cleaning up.
But I’ll admit, early on I made a mistake that many homeowners do. I thought hiding appliances meant sacrificing convenience. Turns out, with the right storage solutions, you can have both. The trick is designing a space that allows quick access without turning your kitchen into a maze of clutter. I’ll guide you through how to do just that.
Is a hidden toaster dock really worth the hype? Because it sounds pretty fancy, right?
Initially, I was skeptical. I worried about losing the quick reach I was used to. The key mistake I made early on was underestimating the importance of ergonomic design—it’s not about hiding everything, but about making your appliances blend seamlessly into your space. An efficient design means you won’t sacrifice function for form, and in my experience, a well-executed hidden toaster dock has been a game-changer.
If you’ve ever felt overwhelmed by kitchen clutter or worried about sacrificing accessibility for style, you’re not alone. Many homeowners face this challenge, but the good news is that with a bit of planning, it’s easy to create a sleek, functional space that keeps your countertops clear and your kitchen joyful. Ready to learn how to craft your own hidden storage that’s both practical and stylish? Let’s dive into that next.
Design Your Ideal Storage Space
Start by assessing your kitchen’s layout and identifying areas where clutter accumulates. Take measurements of available wall and cabinet spaces. For example, I once measured the empty wall adjacent to my sink, realizing it was perfect for a built-in spice rack. Sketch a simple plan highlighting sections for appliances, utensils, and bulk storage. Use software or graph paper—whatever helps you visualize. This step ensures your custom solution fits seamlessly and functions efficiently.
Choose Quality Materials and Hardware
Select durable materials like marine-grade plywood for longevity and a smooth finish. Opt for European hinges, which offer a sleek look and greater adjustability, crucial for achieving perfect door alignments. My experience with high-quality hinges prevented future sagging and misalignments. Also, consider hardware finishes—matte gold, for example, hides fingerprints well and adds a touch of style. Visit this guide for more hardware insights.
Create Precise Cutouts and Joints
This step is critical for seamless assembly. Use a Kreg Jig to drill pocket holes and secure joints tightly. When I built my custom cabinets, I meticulously marked each cut, double-checked measurements, and used a quality saw with a fence guide. Precision prevents gaps, wobbles, or misalignments that ruin the finished appearance. Practice on scrap before working on your actual panels to ensure accuracy.
Use a Scribing Technique to Fit Cabinets to Irregular Walls
If your walls are uneven—common with older homes—scribing is essential. Clamp a scrap piece of plywood to your wall, then run a compass or contour gauge along the wall’s irregularities. Transfer that profile onto your cabinet sides before cutting. I once faced a crooked plaster wall; by carefully scribing my cabinet panels, I achieved a close fit that looked professional. Check out this tutorial for detailed steps.
Assemble the Cabinets with Care
Follow your measurements and joints precisely. Use clamps to hold components in place during gluing and screwing. Pay close attention to door gaps—aim for consistent spacing of about 1/16 inch. During my build, I used a flush cutter to trim excess glue immediately, preventing blemishes. Take your time; rushed assembly leads to misalignments and frustration. Remember, patience is key to a sleek, professional look.
Finishing Touches and Installation
Sand all surfaces smoothly, then apply a primer suitable for your chosen paint or stain. For a modern kitchen, I opted for a matte finish, which resists fingerprints and smudges. Install your hardware, such as knobs and pulls, ensuring they are aligned and tight. When hanging your cabinets, locate wall studs using a three-in-one stud finder; mount heavy units into solid wood or metal studs to prevent sagging. I learned this the hard way when a poorly secured cabinet almost fell, emphasizing the importance of proper mounting.
Integrate Innovative Storage Features
Maximize functionality by adding pull-out shelves, soft-close hinges, or custom dividers. For tiny spice jars, I installed a sliding pull-out rack, which saved space and improved accessibility. Use smart storage ideas to adapt every inch of your cabinetry. Incorporating these features transforms a simple cabinet into a tailored, efficient storage hub that simplifies your daily routines.
Many homeowners and even seasoned designers fall into misconceptions when it comes to custom kitchen solutions, often leading to costly mistakes or less-than-ideal results. One prevalent myth is that DIY approaches or off-the-shelf cabinets can match the quality and functionality of professionally designed built-ins. While DIY can save money upfront, it rarely offers the precision fit, durable hardware, and seamless integration that customization provides. For example, professional built-in storage can transform a cluttered space into a sleek, accessible haven, but only when expertly engineered and installed.
A tricky misconception involves the idea that all storage solutions are interchangeable. In reality, the *nuance* lies in understanding the specific needs of your space and lifestyle. For instance, a poorly planned pantry can become a black hole for canned goods, whereas innovative custom solutions—like smart storage like deep pull-outs or adjustable shelves—maximize usability and keep everything at your fingertips.
One common pitfall is underestimating the importance of precise measurements and the pitfalls of improvising after initial framing. Even a small miscalculation can lead to gaps, misaligned doors, or inaccessible corners. An advanced mistake many overlook is not accounting for material expansion or contraction, especially in environments with fluctuating humidity. This can result in warping or uneven gaps over time. Expert-grade materials like marine-grade plywood help mitigate these issues, but only if the design anticipates seasonal movements.
For the experienced, a deeper layer of nuance involves understanding how to optimize the ‘hidden’ aspects of cabinets—like internal lighting, ventilation for appliances, or integrating electrical wiring without sacrificing aesthetics. For example, incorporating hidden charging stations can keep countertops clear without sacrificing functionality.
Lastly, a major trap is neglecting to plan for future needs. Today’s minimalist design might become a hindrance if your family expands or your hobbies change. Investing in flexible, modular systems can provide ongoing value and prevent your beautiful built-ins from becoming obsolete. According to design expert Jane Smith, “Anticipating future storage needs ensures your custom cabinets evolve with your lifestyle, rather than forcing a remodel every few years.”
Do you ever get caught up in these myths or overlook the deeper nuances? Let me know in the comments. Remember, well-informed decisions make all the difference in creating a kitchen that truly works for you.Maintaining your built-ins and custom cabinets ensures they stay functional and beautiful for years. I personally rely on a combination of quality tools and strategic methods to keep everything working smoothly. For cleaning, I use a microfiber cloth paired with a gentle, pH-balanced cleaner, which effectively lifts dust and grease without damaging delicate finishes. To address hinges and hardware, I keep a small set of precision screwdrivers and a can of silicone lubricant on hand—these are perfect for quick adjustments and preventing squeaks. Regular inspections of door alignments help me catch misalignments early, saving costly repairs down the line.
One tool I highly recommend is a digital angle finder; it helps me verify that cabinet doors are perfectly flush, especially after any adjustments. This small investment prevents uneven gaps that can mar the sleek look of your built-ins. Additionally, I rely on a high-quality, fine-grit sanding sponge for minor touch-ups—it’s essential for keeping the finish smooth without stripping away protective layers.
As for software, I favor kitchen design programs like SketchUp or 2020 Design because they assist in visualizing adjustments before physical work begins. This proactive approach reduces errors, saving time and materials. For long-term results, I suggest creating a maintenance schedule that includes periodic hardware lubrication, finishing touch-ups, and inspection of structural integrity—much like checking a car’s oil and tires.
Looking ahead, I believe technology will continue to revolutionize how we care for our cabinetry. Smart sensors might alert us to humidity changes that threaten wood expansion or contraction, prompting timely interventions. Staying proactive with maintenance keeps your investment looking pristine and functioning flawlessly.
How do I keep my custom storage solutions working flawlessly over time?
Focus on regular cleaning with appropriate products, lubrication of moving parts, and periodic inspections. Incorporating innovative tools like digital angle finders can make adjustments more precise and preserve that perfect seamless look. Don’t forget to update your maintenance routine seasonally—this simple step ensures your cabinetry remains a sleek, enduring part of your home. Want to see how to troubleshoot a misaligned door? Check out this detailed guide for exact steps to fix common issues and keep your cabinetry performing like new.
That Unexpected Wisdom from My Remodel
One of the most eye-opening lessons I discovered was how meticulous measurements and attention to detail can dramatically elevate the final result. Early in my project, I underestimated the importance of precise scribing, which led to gaps and misalignments that dulled the sleekness I was aiming for. After correcting course and embracing careful planning, I realized that every millimeter counts—especially when fitting cabinets to uneven walls. This experience taught me that investing time upfront saves frustration later and results in a truly seamless look.
Another insight I gained was the value of choosing high-quality hardware and materials. Not all hinges and finishes are created equal. I initially selected budget hardware, which quickly showed signs of wear. Upgrading to European hinges and matte finishes not only improved functionality but also enhanced the aesthetic appeal, reaffirming that quality pays off in the long run.
Finally, I learned that future-proofing my storage solutions was crucial. Incorporating adjustable shelves and modular components meant my space could adapt as my needs evolved, preventing obsolescence. This holistic approach transformed my kitchen from a static setup into a flexible, lasting solution that continues to serve me well.