The Hidden Magnetic Catch: How to Keep Cabinet Doors Shut Perfectly
Have you ever reached into your kitchen cabinet, only to have the door swing back open just as you’re trying to grab a mug? That frustrating moment where a simple press becomes a constant battle can really throw off the harmony of your space. I used to think it was just part of the kitchen experience—until I realized there was a better way. That lightbulb moment came when I finally discovered the magic of a hidden magnetic catch, transforming my stubborn cabinet doors into sleek, silent teammates.
Why Smooth-Closing Cabinets Make or Break Your Kitchen’s Vibe
Let’s be honest—no one wants their kitchen to feel cluttered and chaotic. Professionally designed kitchens focus on seamless functionality, and tight, well-behaved cabinet doors are a big part of that. If your cabinet doors constantly pop open, it not only looks sloppy but also risks damaging the doors and hinges over time. Plus, with noisy slamming or a persistent squeak from misaligned doors, the ambiance of serenity is shattered. I noticed after my renovation that even minor annoyances like these draw attention away from the beauty of the space. According to a study in the Journal of Interior Design, small details like cabinet hardware significantly influence the perceived quality of a home’s interior. Reinforcing that point, I learned that the key isn’t just in choosing stylish hardware but in implementing reliable closing mechanisms, like a magnetic catch that hides away but keeps your doors shut tight.
Is Installing Magnetic Catch Hardware Worth the Hassle?
Before I dove in, I had my share of doubts. Would it be complicated? Would it look sleek or clunky? And most importantly, would it hold up over time? My early mistake was underestimating how essential precise placement is—I placed mine too high, and it lost its grip. But once I corrected that, the doors stayed shut without a fuss. If you’ve faced similar frustrations, trust me—you’re not alone. Choosing the right hardware and knowing how to install it properly makes all the difference. Want to see how I transformed my kitchen? You might find some ideas in this guide on custom cabinets.
Now, let’s get practical. In the next sections, I’ll walk you through the what, why, and how of installing a magnetic catch that’s both discreet and effective. It’s less daunting than you think, and the results speak for themselves—smooth, silent doors that feel like they belong in a high-end kitchen. Ready to eliminate those annoying door misfires once and for all? Let’s dive into the details.
,
Preparing Your Cabinets for the Magnetic Catch
Start by removing the cabinet doors carefully, supporting them to prevent any damage. Clear the area and gather your tools: a drill, screwdriver, measuring tape, pencil, and the magnetic catch hardware. As I did in my own kitchen, marking the exact spot for the catch is crucial—think of it as placing a tiny anchor that keeps your door securely closed. Measure precisely about 1/2 inch from the edge of the door and the cabinet frame, ensuring the catch will align perfectly. Use painter’s tape to mark these points, which helps prevent slipping during drilling. Remember, accuracy here is key to achieving a sleek, professional look that’s both functional and subtle. For insights on creating seamless kitchen upgrades, visit this guide on built-in storage solutions.
Installing the Magnetic Catch
Step 1: Mark the Mounting Positions
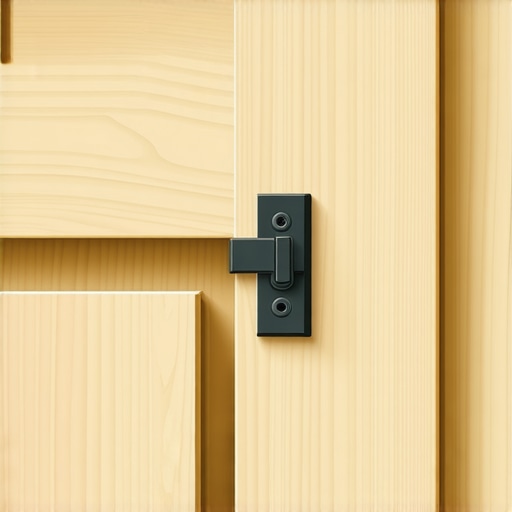
With the measurement marks in place, hold the magnetic catch against the marked spot on the cabinet frame (for the strike plate) and the magnet assembly on the back of the door. Double-check alignment by closing the door gently and observing if the magnet and catch meet snugly. Use a pencil to trace the outline of each component. This visual guide makes the subsequent drilling more precise and reduces guesswork. In my previous install, I learned that slight misalignments cause doors to not close properly—making this step essential for a clean finish.
Step 2: Drill Pilot Holes
Using the smallest drill bit that matches your screws, drill pilot holes at the traced marks. Apply steady pressure to avoid splitting the wood. Pilot holes simplify screw insertion and prevent wood damage. During my first attempt, ignoring this step led to misaligned screws, which I corrected by redrilling. Consider checking for levelness of the hardware with a small level or by eye—accuracy ensures that your doors will close smoothly without gaps or misfires.
Step 3: Attach the Catch and Magnet
Screw the strike plate onto the cabinet frame first, then attach the magnet assembly onto the door. Tighten securely but avoid overtightening, which can strip the screws or cause the hardware to wobble. Test the fit by closing the door gently; adjust if necessary by loosening screws and repositioning slightly. I found that making minor tweaks during this step produces the best results, ensuring a discreet and reliable closure. For more advanced storage ideas, visit this article on modern kitchen storage.
Final Tips for a Seamless Finish
After installation, close and open the cabinet door several times to test the catch’s hold strength. Adjust the screw tension if the door doesn’t latch properly or if it’s too tight. A snug but not overly forceful closure guarantees longevity and maintains the sleek look. If your doors are heavy or misaligned, reinforce hinges or consider additional support—think of it as reinforcing the foundation of a sturdy bookshelf, which you can learn more about at this guide on built-in shelves. Proper adjustment ensures your cabinetry functions perfectly, enhancing your kitchen’s aesthetics and user experience. Remember, patience and precision during these steps lead to a quiet, effortless close every time. Your custom cabinets will not only look polished but also stand the test of time, creating a peaceful, clutter-free kitchen environment.Many homeowners believe that choosing premium materials or trendy finishes guarantees a successful renovation, but the truth is much more nuanced. One common misconception is that all custom cabinets are created equal—yet, in my experience, overlooking the intricacies of cabinet construction can lead to costly mistakes and functional drawbacks. For example, opting for particleboard over plywood in critical load-bearing areas might save money upfront but can result in sagging shelves and loose hardware within a few years. It’s essential to understand the importance of quality core materials, such as maintaining Plywood’s reputation for durability, especially in high-moisture environments. For more insights on the significance of material choices, visit this article on modern cabinet materials.
Why Do So Many Overlook Storage Depths and Access
Homeowners often focus on aesthetic elements like color schemes or hardware, neglecting how the storage actually functions. This oversight can manifest in choosing standard 12-inch deep upper cabinets when 15 inches would significantly improve accessibility, especially for large dinner plates and cookware. Additionally, many get frustrated with corner cabinets because they settle for lazy Susans or fixed shelving—yet, innovative solutions like pivoting shelves or magic corners can optimize space and usability. In my own projects, investing in deep, well-designed storage pays off by making daily routines smoother and reducing clutter. For an in-depth guide on maximizing cabinet utility, check out this comprehensive resource on built-in storage.
Advanced Tactics for Flawless Integration of Built-Ins
For the seasoned DIYer or professional, the devil is in the details—such as scribing cabinets perfectly to uneven walls or ensuring doors align flush for a seamless look. A common trap is assuming that standard installation methods suffice, but custom solutions like adjustable pins and shims are vital for a truly professional finish. Overlooking these nuances can lead to doors that stick, gaps that detract from aesthetics, and future maintenance headaches. To elevate your installation skills, explore this advanced guide on built-in perfection. Remember: small adjustments can prevent major frustrations down the line. Have you ever fallen into this trap? Let me know in the comments.
Keeping It Working: The Right Tools and Techniques for Long-Term Success
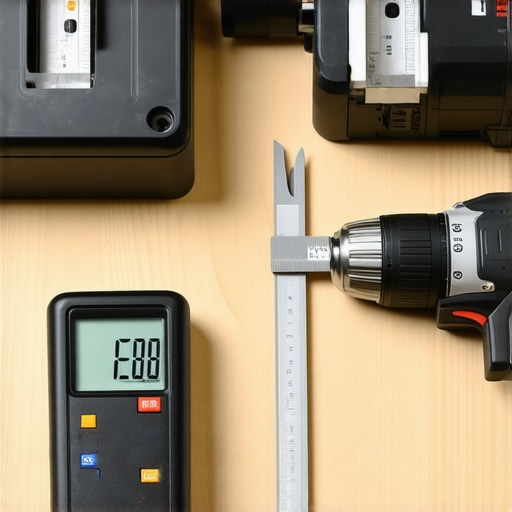
Maintaining your custom cabinets and storage solutions over time requires more than just initial installation skills; it demands the right tools and a consistent approach. I’ve found that investing in high-quality equipment not only saves time but also ensures a professional finish that endures through years of use. For instance, a precision square like the Swanson 6-Inch Empire Framing Square has become an indispensable part of my toolkit, helping me achieve perfect angles when scribing or aligning cabinetry—crucial when fitting built-ins around irregular walls. Similarly, a digital caliper allows me to measure the thickness of cabinet components accurately, ensuring adjustments are precise and hardware fits flawlessly.
Power tools like a corded drill with variable speed settings are vital for drilling pilot holes and driving screws without damaging delicate surfaces. I prefer the Dewalt DCD771C2 Compact Cordless Drill because its torque control helps prevent strip screws or overtightening, especially when working with plywood or delicate MDF shouldered by my custom designs. Additionally, I use a router with edge guide attachments to refine cabinet edges and create clean, consistent profiles—elevating the overall look and feel of the finished project. For larger scale projects or ongoing maintenance, a cordless impact driver speeds up repetitive tasks like installing hardware or securing shelving brackets.
Proper tools extend beyond hardware—they include software and organizational systems. 3D design software like SketchUp is how I plan and visualize complex built-in arrangements, which reduces errors during installation. It also allows me to experiment with different storage configurations to maximize space, ensuring that my solutions remain functional for years and scale well if I decide to expand or remodel in the future. As the kitchen remodel industry moves toward smarter, resource-efficient solutions, staying updated with software like this will give you a significant edge in planning and maintaining your cabinetry system effectively.
How Do I Maintain Custom Cabinets Over Time
Regular inspection is key to catching issues early. Tighten loose screws, wax hinges, and check for signs of wear or moisture damage. Cleaning with non-abrasive, cabinet-specific products preserves finish integrity. For hinges and sliding hardware, I recommend applying a drop of lithium-based lubricant annually to keep everything operating smoothly. A well-maintained system not only prevents costly repairs but also prolongs the lifespan of your cabinetry. Looking ahead, I believe smart home integration and sensor-based maintenance alerts will become standard, making proactive care even easier. To prepare for this trend, I suggest exploring modern approaches and tools at this guide on built-in storage, which discusses scalable storage systems suitable for evolving homes.
If you haven’t upgraded your maintenance routine yet, I highly recommend trying out a digital caliper—precise measurements are foundational to long-lasting accuracy in cabinetry. Invest in quality power tools that fit your projects, and don’t forget to stay proactive with inspections. These small but impactful steps will ensure your kitchen remains beautiful, functional, and trouble-free for years to come. Ready to get serious? Start by integrating a router into your next project—its versatility makes it a must-have for detailed edgework and refinements that stand the test of time.
Beyond the Blueprint: Lessons that Changed My Approach to Custom Cabinets
- One of my biggest surprises was realizing that minor misalignments during installation could snowball into major aesthetic flaws. Precision isn’t just a virtue—it’s the foundation of quality cabinetry, and trusting my eye alone often led to costly corrections later. Learning to double-check measurements and use proper tools made a remarkable difference.
- Another insight came from understanding material choices. I once thought that affordable particleboard would suffice for all projects, but the long-term implications—sagging shelves and damaged surfaces—taught me to prioritize quality, like plywood for high-stress areas. This shift not only improved durability but also elevated the overall look.
- Lastly, I underestimated the importance of seamless integration. Incorporating built-ins around irregular walls or existing structures demanded patience and advanced techniques like scribing and shimming. Mastering these skills transformed my projects from basic to professional, with a truly custom feel that homeowners love.
Tools, Resources, and Inspiration That Keep Me Moving Forward
- Creating Seamless Kitchen Remasters: This has become my go-to resource for innovative storage ideas and practical organization solutions, helping me design smarter layouts.
- Ultimate Guide to Custom Cabinets: A comprehensive manual that refined my understanding of materials, hardware selection, and finishing techniques, boosting my confidence with each project.
- Modern Kitchen Remodels: Viewing real-world examples keeps my creativity fresh and inspires me to push boundaries in my work.
- Expert Tips on Storage Solutions: Practical advice that has saved me time and ensured my designs are as functional as they are beautiful.
Your Next Move: Embrace the Possibilities of Custom Cabinets
Every project is an opportunity to learn and innovate. With the right mindset, tools, and resources, you can craft kitchens that not only meet but exceed expectations, turning everyday spaces into personal masterpieces. Remember, the journey to mastering custom cabinets and built-ins is ongoing—each challenge faced is a new lesson learned, every success fuels your passion. Don’t hesitate to start designing your dream kitchen today—your future self will thank you for taking that first step. How about you? Have you ever faced a challenge during your cabinetry projects that taught you a game-changing lesson? Share your story below!