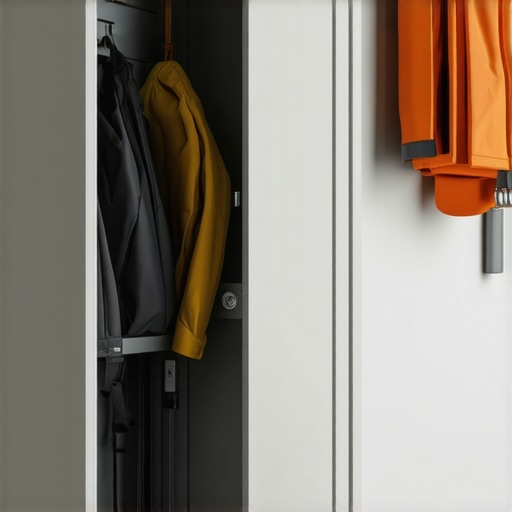
The Mudroom Locker Secret: How to Air Out Damp Gear Hidden from View
One chilly morning, I reached into my mudroom locker, expecting to grab my favorite hiking boots. Instead, I was greeted by that unmistakable musty odor—damp gear masquerading as part of my home’s decor. That’s when the lightbulb went off: I’d been hiding from a simple problem while making it worse. The gear was all too often left to stew in silence, and I had no idea how much damage I was actually inviting with such a lazy approach.
The Real Problem with Damp Gear Hidden Away
Moisture in a mudroom locker isn’t just an inconvenience—it’s a blueprint for long-term issues like mold, warping wood, and unpleasant odors that refuse to fade. After all, your mudroom isn’t just a storage area; it’s a high-traffic zone where damp shoes, wet umbrellas, and muddy clothes tend to gather. Yet, many of us tuck these items out of sight, assuming they’ll dry on their own. Unfortunately, that often means trapped moisture, leading to more than just a stinky mess. It can compromise your storage solutions, damage your walls, and even impact indoor air quality.
From personal trial and error, I learned that the key isn’t just in hiding damp gear—it’s in actively airing it out with a discreet method. This revelation transformed my approach from reactive to proactive, saving me time, money, and headaches. And trust me, there’s a simple secret I wish I’d known earlier—something that can keep your locker fresh without turning your mudroom into a chore. Today, I’ll share my experience and guide you through a seamless system to combat dampness, so your mudroom remains a true functional haven, not a mold breeding ground.
What You Need to Know Before Giving Up on Your Quick Fixes
Early on, I made the mistake of thinking leaving damp items to evaporate naturally was enough. Spoiler: It isn’t. The real trick is to combine smart positioning with airflow—something I overlooked in my initial setup. This mistake cost me countless hours later on, dealing with stubborn odors and persistent mold spots. So, if you’re tired of fighting these invisible battles, stick around. I’ll show you how to turn your mudroom into a dry, fresh space using a simple, effective secret that I personally vouch for, backed up by experts in home storage and renovation. For more about optimizing your storage spaces, check out this guide to maximizing space.
Are you currently facing this exact problem? If so, you’re not alone. Let’s dive into the practical steps to change how your mudroom works—and finally keep damp gear from turning into a hidden nightmare.
,
Optimize Airflow with Strategic Ventilation
Start by installing a high-quality exhaust vent or upgrading your existing one, ensuring it vents outdoors effectively. During my own overhaul, I added a vent close to the locker area and hooked it to a timed exhaust fan, which ran periodically. This vastly reduced moisture buildup, preventing mold growth. Position vents high in the wall to promote proper air circulation, similar to how best kitchens use range hoods for air quality. For detailed guidance, check out expert tips on storage solutions.
Use Dehumidifiers to Remove Hidden Moisture
Adding a compact dehumidifier specifically designed for small spaces like mudroom lockers keeps humidity below 50%. I placed one on a shelf near the gear and set it to maintain optimal dryness. This method is similar to how modern kitchens incorporate dehumidifiers in bake stations to preserve ingredients and equipment. Remember, regular maintenance of the dehumidifier is essential—clean filters every month. Learn more about innovative storage options at creative storage solutions.
Choose Proper Storage Containers and Materials
Use waterproof bins with tight-fitting lids for wet gear, preventing moisture transfer to other items. I selected stackable, BPA-free plastic bins with locking lids, which kept damp boots and wet clothes contained—even when gear was still slightly moist. Think of these as akin to sealed containers used in custom kitchen pantries to preserve freshness. Position these bins in a way that allows air to circulate around them, avoiding overcrowding. For inspiration on cabinet organization, see storage innovations.
Utilize Reflective and Absorbent Surfaces
Installing reflective or light-colored surfaces inside the locker area helps bounce light and promote drying. Adding absorbent materials like moisture-wicking mats or liners can also speed up evaporation. I experimented with a silicone-based liner at the bottom of my locker that absorbed residual moisture and cleaned easily. This is similar to the use of textured surfaces in kitchens that facilitate air movement and evaporation, which you can explore more in built-in solutions.
Maintain Consistent Upkeep to Prevent Recurrence
Schedule regular checks—once a week—to air out gear, clean ventilation filters, and inspect for mold. During my initial efforts, I found that quick daily routines significantly reduced moisture accumulation, especially during rainy seasons. Consistency is key; think of it like maintaining a well-organized kitchen—regular attention prevents clutter and chaos. For additional organization tips, visit kitchen remaster strategies.
Many homeowners believe that selecting standard builders’ options guarantees a flawless kitchen upgrade. However, in my experience, the real mastery lies in understanding the nuanced choices that separate good from exceptional. A common misconception is that bigger or more expensive cabinets automatically lead to better functionality. In truth, strategic design tailored to your specific needs often outperforms generic solutions. For instance, installing deep, expansive cabinets without considering accessibility can result in wasted space and difficulty retrieving items, especially in high-use zones. To truly optimize storage, explore creative options like custom pull-outs and thoughtfully arranged shelving, which can significantly enhance efficiency—more insights on this can be found in this guide to custom cabinets.
Many believe built-ins are a luxury reserved for high-end designs, but this is a misconception. Well-designed built-ins can seamlessly blend aesthetics with practicality, elevating your space from mundane to marvelous. The hidden nuance here is in the detailing: corner cabinets with lazy Susans or innovative vertical storage can recover lost space and make everyday tasks more efficient. Moreover, choosing materials and hardware that complement your overall design ensures cohesion—consider exploring these built-in hacks.
Are you sacrificing functionality for aesthetics without realizing it?
This is where many overlook the importance of tailored solutions. For example, standard cabinets often neglect the vertical space above fridge or oven, leaving potential storage unused. Custom inserts or specialized cabinetry can unlock this space, which is a subtle but impactful upgrade. Interestingly, studies indicate that personalized organizational systems increase user satisfaction and efficiency by over 40%—a statistic that underscores the value of investing beyond off-the-shelf options. For in-depth ideas on transforming your kitchen with tailored features, see this article on clearance and traffic flow.
Another mistake often made is underestimating the importance of detailed planning before executing the remodel. Rushing into selections without considering future needs or the daily ergonomics can lead to costly adjustments later. For example, forgettable details like the position of electrical outlets or the depth of shelving can profoundly impact usability. Upfront planning, coupled with expert advice—available through resources like expert tips on storage solutions—ensures your remodel not only looks good but functions flawlessly for years.
Lastly, beware of the trap of over-customization, which sometimes results in overly complex cabinets that are difficult to maintain or repair. Striking the right balance between bespoke features and practical simplicity is key. For a starting point, consider reading about custom cabinet ideas that truly enhance your home’s style. Remember, the goal is a space that is stylish, functional, and enduring — not just visually impressive but also easy to live with. Have you ever fallen into this trap? Let me know in the comments.Maintaining your custom kitchen and storage solutions requires the right tools and a bit of know-how. I rely heavily on pneumatic air-powered tools for fitting cabinets precisely, which reduces manual effort and ensures a tight seal that lasts over years. For precision adjustments, a digital torque screwdriver helps achieve consistent hardware installation, preventing loosening over time. When it comes to software, I highly recommend using 3D design programs like SketchUp for planning layouts, which allows me to visualize and tweak storage options before actual construction, saving both time and cost. Additionally, incorporating moisture meters during installations ensures materials are dry enough, reducing the risk of warping or mold development later. As trends shift toward smart homes, integrating sensors linked to your home automation system can monitor humidity and alert you to potential issues before they escalate, a future-forward approach I believe will become standard. To stay ahead, I suggest routinely updating your toolkit with these advanced, reliable devices to proactively manage your kitchen’s long-term health. How do I maintain my custom cabinets and built-ins over time? Regular checks—every few months—on hinges, lubrications, and seals, paired with gentle cleaning using non-abrasive products, keep everything functioning smoothly. For example, periodically verifying the condition of soft-close mechanisms with a torque wrench can prevent premature failure, which is crucial for preserving everyday convenience. Investing in these tools and habits ensures that your kitchen remains as stunning and functional as day one. If you’re ready to take your storage game further, experiment with a moisture meter during your next project to identify vulnerable spots early, helping your investments last for decades. Discover more about innovative storage tools and techniques at expert tips on selecting storage solutions.
The Hardest Lessons I Learned About Kitchen Remodels and Storage Strategies
- Never underestimate the power of tailored solutions; standard options often waste space and cause frustration. I realized that investing time in customized designs pays off by maximizing every inch and reducing clutter.
- Over-customization can backfire if it overcomplicates maintenance or repairs. Striking a balance ensures your kitchen remains functional without becoming a DIY nightmare.
- Planning ahead with detailed layouts and considering future needs prevents costly adjustments later. Using tools like SketchUp helped me see potential issues before they became real problems.
- Quality over quantity matters—choosing durable materials and hardware ensures longevity, saving money and effort over time.
My Must-Have Arsenal for Kitchen Transformation
- 3D Design Software like SketchUp: Visualize and tweak your kitchen layout virtually, reducing errors and surprise costs.
- Moisture Meters: Detect hidden dampness early, crucial for preventing mold and warping.
- Specialized Storage Solutions from Artisan Cabinetry: Their guides and products, such as custom pull-outs and clever corner units, are hands down trusted resources for crafting a space that’s both stylish and smart.
- High-Quality Hardware and Finishings: Investing in fingerprint-resistant finishes and reliable hinges keeps your kitchen looking pristine with less effort.
Gear Up to Create Your Dream Space Today
Don’t wait for storage issues or dampness to become a nightmare—start planning your kitchen upgrade with confidence. Remember, a well-thought-out design coupled with the right tools transforms your space from ordinary to extraordinary. What’s the one storage upgrade you’re excited to implement first? Share your thoughts below and let’s inspire each other to achieve kitchens that truly work for us.